The desktop version of SYNCROOM Ver.2.0.0 has been released!
Please try out the new SYNCROOM. You can download it here.
*Ver.2.0.0 and later are not compatible with Ver.1.6.4 or earlier of the application.
Please use Ver.1.6.4 of the application to connect to people who are using Ver.1.6.4 or earlier. See here for details
Services for Ver.1.6.4 and earlier are scheduled to be discontinued around 2024.
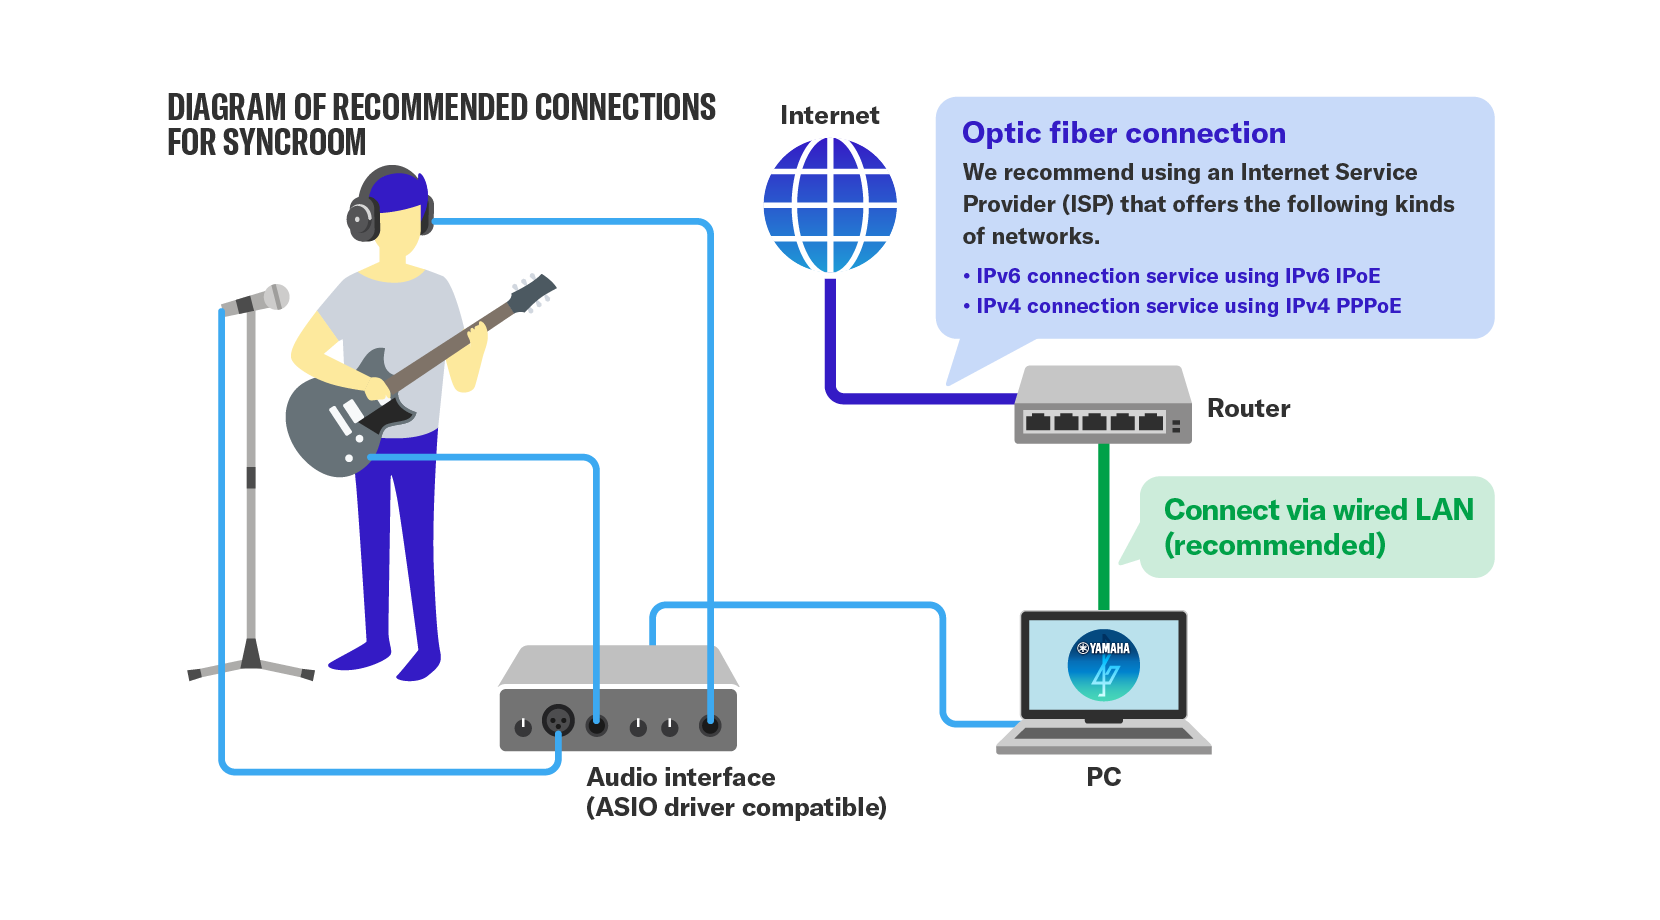
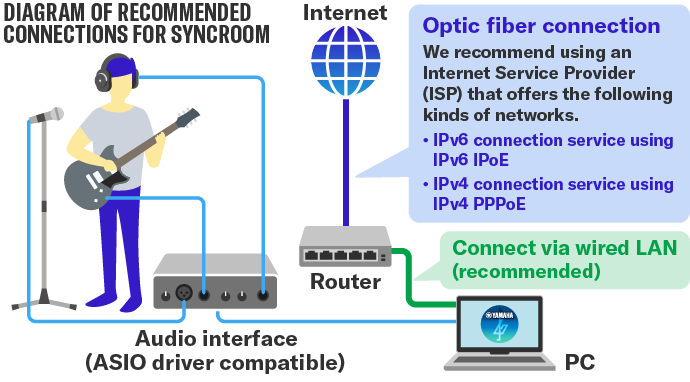
Certain environmental requirements must be met to have an enjoyable session on SYNCROOM. Before using SYNCROOM, please prepare the following equipment and environment.
A device that can use SYNCROOM (a device with a compatible OS)
Audio interface (for Windows, one that supports ASIO drivers)
Broadband environment such as optic fiber (wired internet connection)
2. Communication Environment
① With SYNCROOM, it is important to not simply have a fast communication speed (capable of large-space communication per second), but to be able to communicate stably in smaller time units.
② Even if you contract with the same provider and the same service, connection status varies depending on the area and time of use, so it is difficult to define "the correct line setup". If the line is congested, it may happen that you cannot connect to the room, or there will be greater latency.
③ In SYNCROOM audio communication, user terminals communicate directly with each other without going through a server (P2P connection). Audio communication may be affected depending on the line status of the other users.
④ Communication is often unstable with a wireless connection, and the latency increases, so use a wired connection in order to establish a session. *Note that even with a wired internet connection, if the cable is an old standard, it may not be very fast.
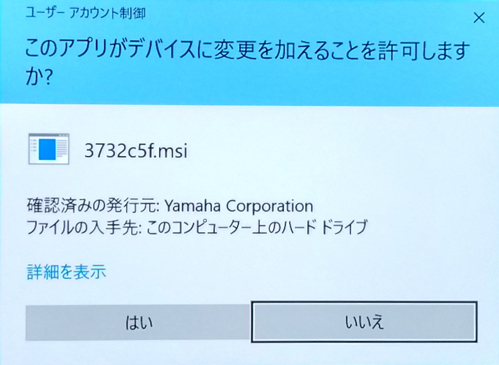
If the "User Account Control" window appears during installation, click "Yes".
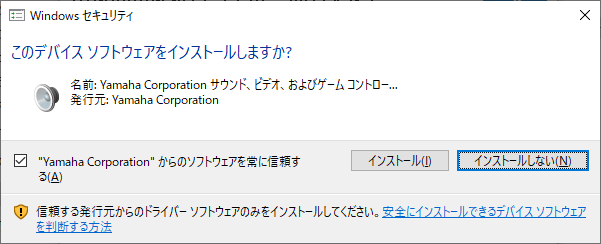
A Windows security window may open. In that case, click "Install".
*In rare cases, such as when performing other operations during installation, this screen may be displayed behind other windows. Move the other windows to display this screen, then click "Install" or "Continue".
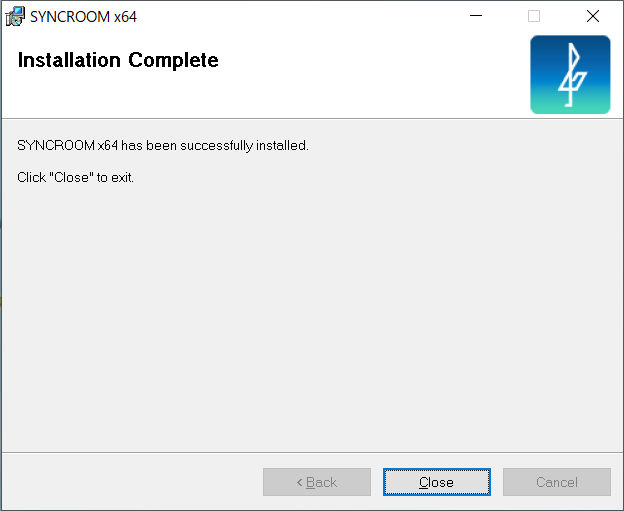
Installation is complete.
Click "Close".
2-2. For Mac
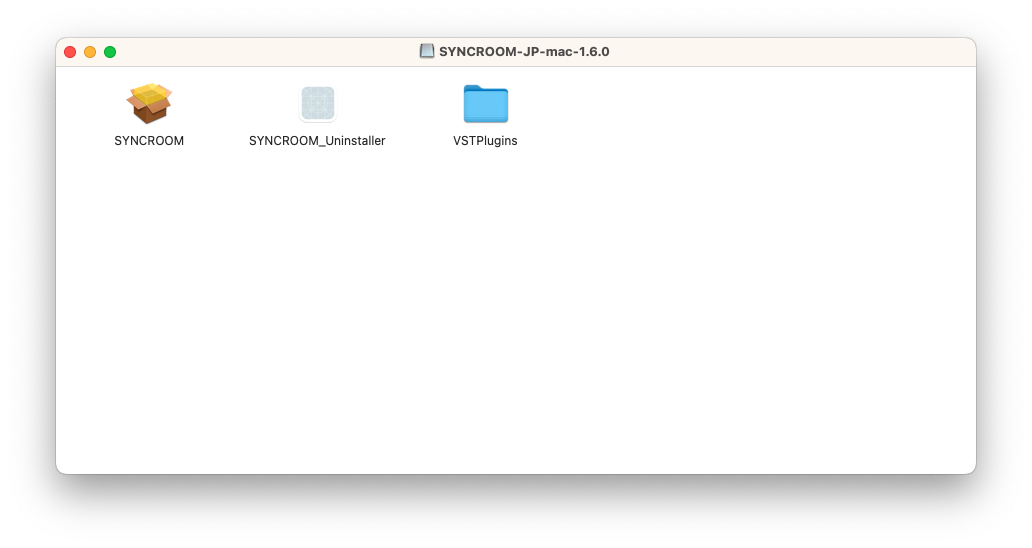
First, unzip the downloaded file.
Mount the .dmg file generated by unpacking and you will find that it contains the installer package.
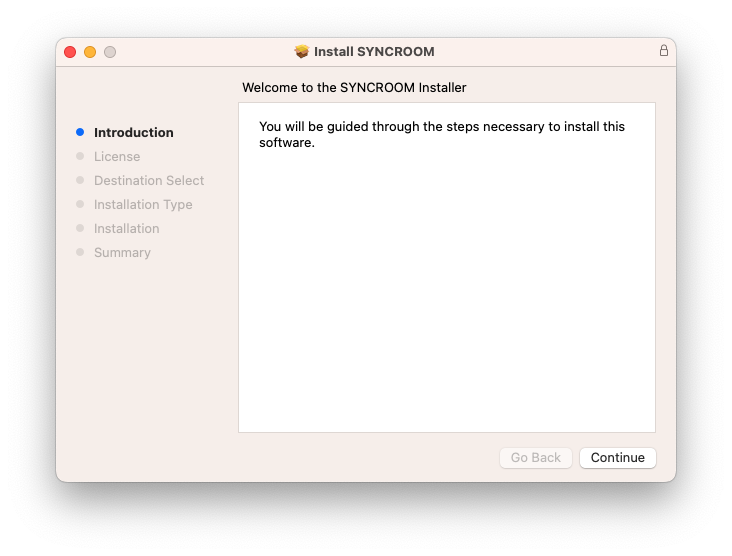
Double-click SYNCROOM to start the installation.
Click "Continue".
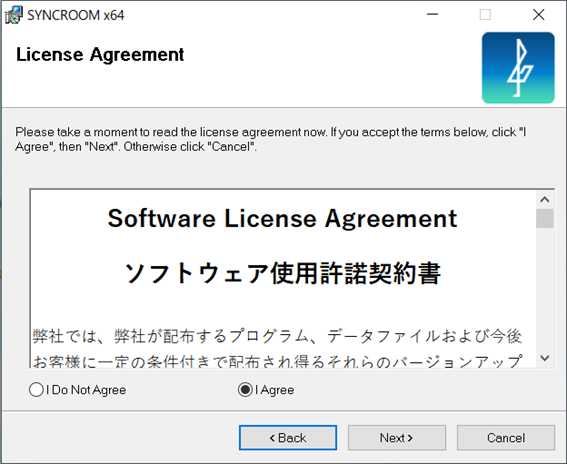
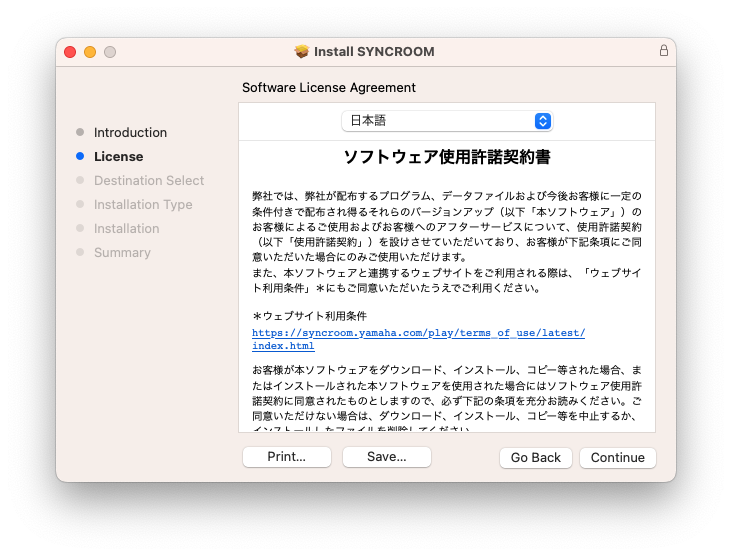
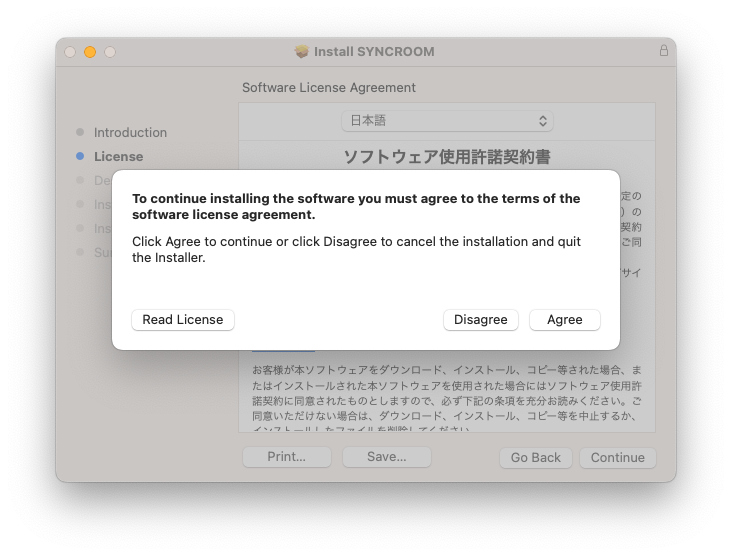
After reading the Software License Agreement for the country or region where you will use SYNCROOM, click “Continue”.
To agree, click “I agree”.
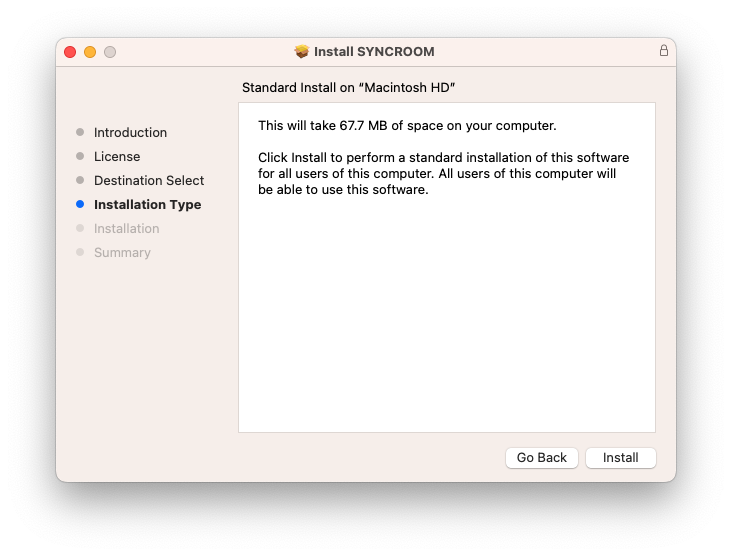
Follow the instructions and click "Install".
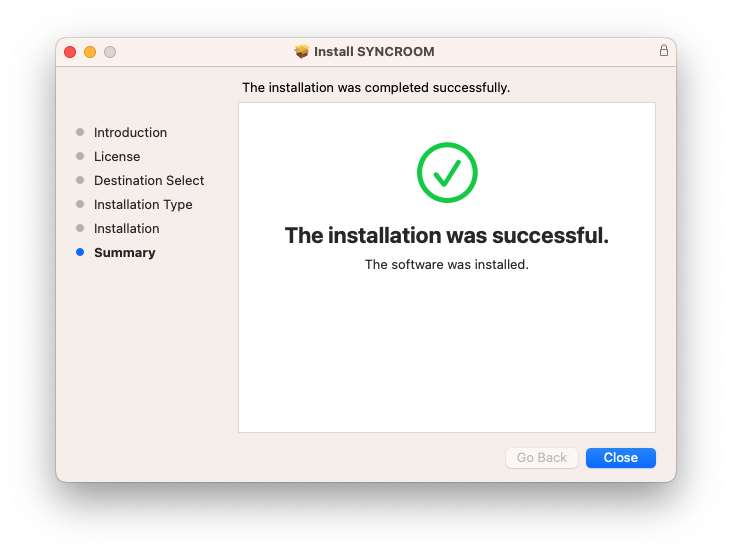
When the installation is complete, click "Close".
SYNCROOM will be installed in "Applications" > "Yamaha" > "SYNCROOM".
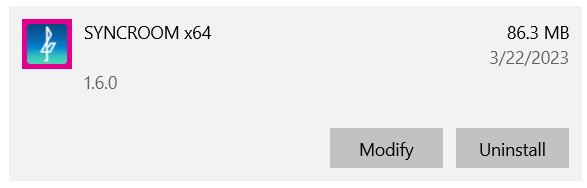
3. Uninstall
3-1. For Windows
SYNCROOM can be uninstalled by either method A or B below.
A. Delete from Control Panel
Click the "Settings Icon" from the Start button.
From the "Windows Settings" window that appears, click "Apps".
From the list of applications in "Apps & Features", find and click on "SYNCROOM".
Click the "Uninstall" button to start uninstallation.
B. Use SYNCROOM installer and select delete.
Run the downloaded installer again and select "Delete SYNCROOM" to start uninstallation.
3-2. For Mac
Mount the downloaded .dmg file and you will find that it contains the uninstaller.
Double-click the uninstaller to open it and follow the instructions to uninstall SYNCROOM.
Hold an online session
1. Startup
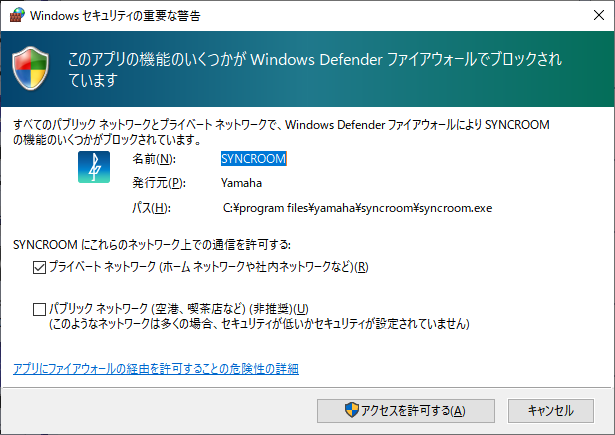
Since SYNCROOM communicates with external devices, in the case of Windows, this sort of warning may appear at the first startup.
Click "Allow access".
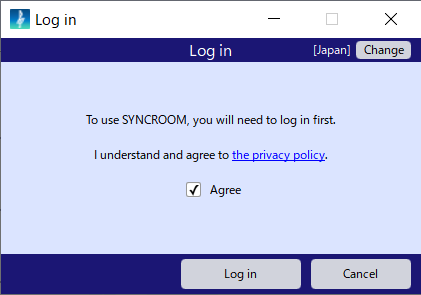
2. Register an account
To use SYNCROOM, you must register for a Yamaha Music ID account (free).
You will be asked to log in the first time you start up SYNCROOM.
First, select the country or region where you will use SYNCROOM, then click “Next”.
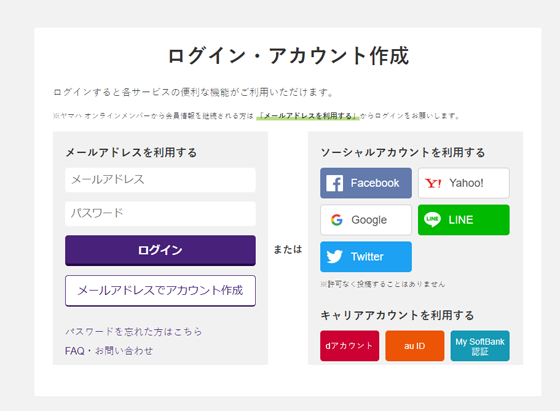
Agree to the Privacy Policy, then create an account or log in. *Yamaha Music ID accounts differ for each country or region.
Complete user registration or log in, and you will be able to use SYNCROOM.
Note that SYNCROOM does not make Yamaha Music ID account information public to other users.
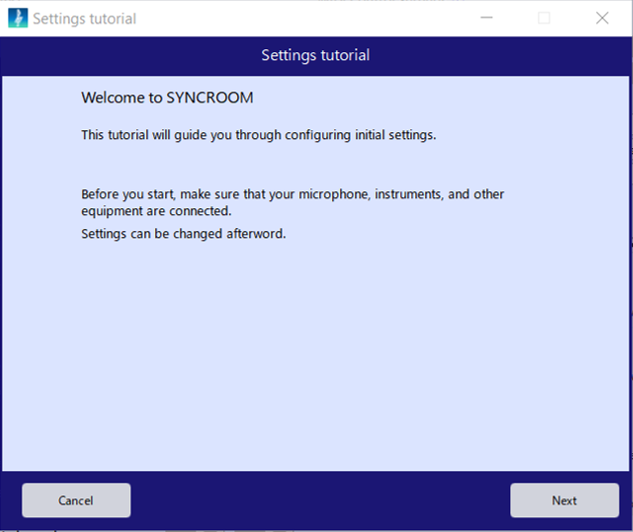
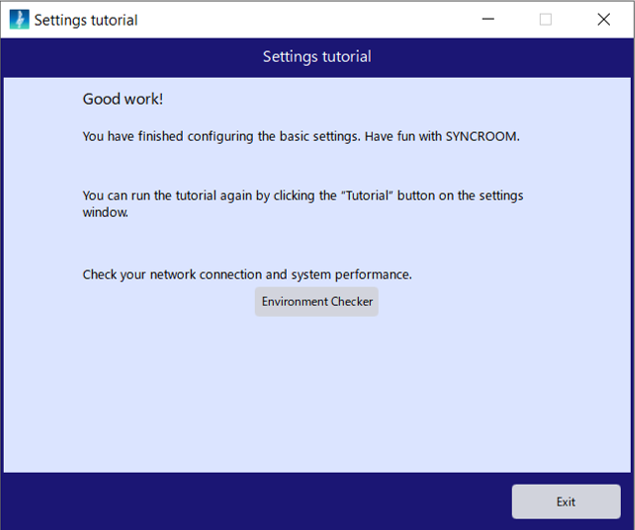
Once you have completed the first log in, the "Settings Tutorial" will start.
Follow the instructions in the tutorial to make settings.
3. How to hold a session
To hold a session with other users, you must enter a "room. A "room" is a "virtual space" on the Internet where people gather to hold a session together.
Up to 5 people can connect in one room. If you want to connect with more people (up to 10 locations), use the "Connect to room" function.
4. Hold a session with friends
First create a room. Consult with your friends and decide who will create the room.
4-1. What the room creator should do
① The room creator should first input a "Nickname" under their icon in the upper left, then input a "Room Name". "Password" is optional. If you only hold a session only with friends (acquaintances), we recommend you set the "Room Privacy Setting" to "Private".
② Click "Create Room". If the message at the bottom of the screen says "Connected to server", that means the room is successfully created.
③ Tell your friends the completed room information (room name and password) by email or social media, and wait for them to enter the room.
Room information can also be shared by the following methods:
Click the Twitter button in the upper right corner displayed on the screen while you are in the room, and a browser will start up and the Twitter tweeting screen will open, so you can tweet the room information.
Click the link Copy link buttonon the upper right that is displayed on the screen while you are in the room, and the text string of the link URL of that room will be copied to your clipboard, so you can paste it into an email, etc. Anyone who receives the email, etc. can click the link to start the application and enter the same room.
4-2. What people besides the room creator should do
① Enter the room created by the room creator. Input the "Nickname" as well as the "Room Name" and "Password" given to you by the room creator.
*"Room Privacy Setting" reflects the settings of the room creator. People who enter the room don’t affect the room privacy setting regardless of which one is selected. Even if you select "Private", your icon and nickname will be public to other users.
② Click "Enter room". If the message at the bottom of the screen says "Connected to server", that means you have successfully entered the room.
5. Hold a session with strangers
5-1. First, find a room
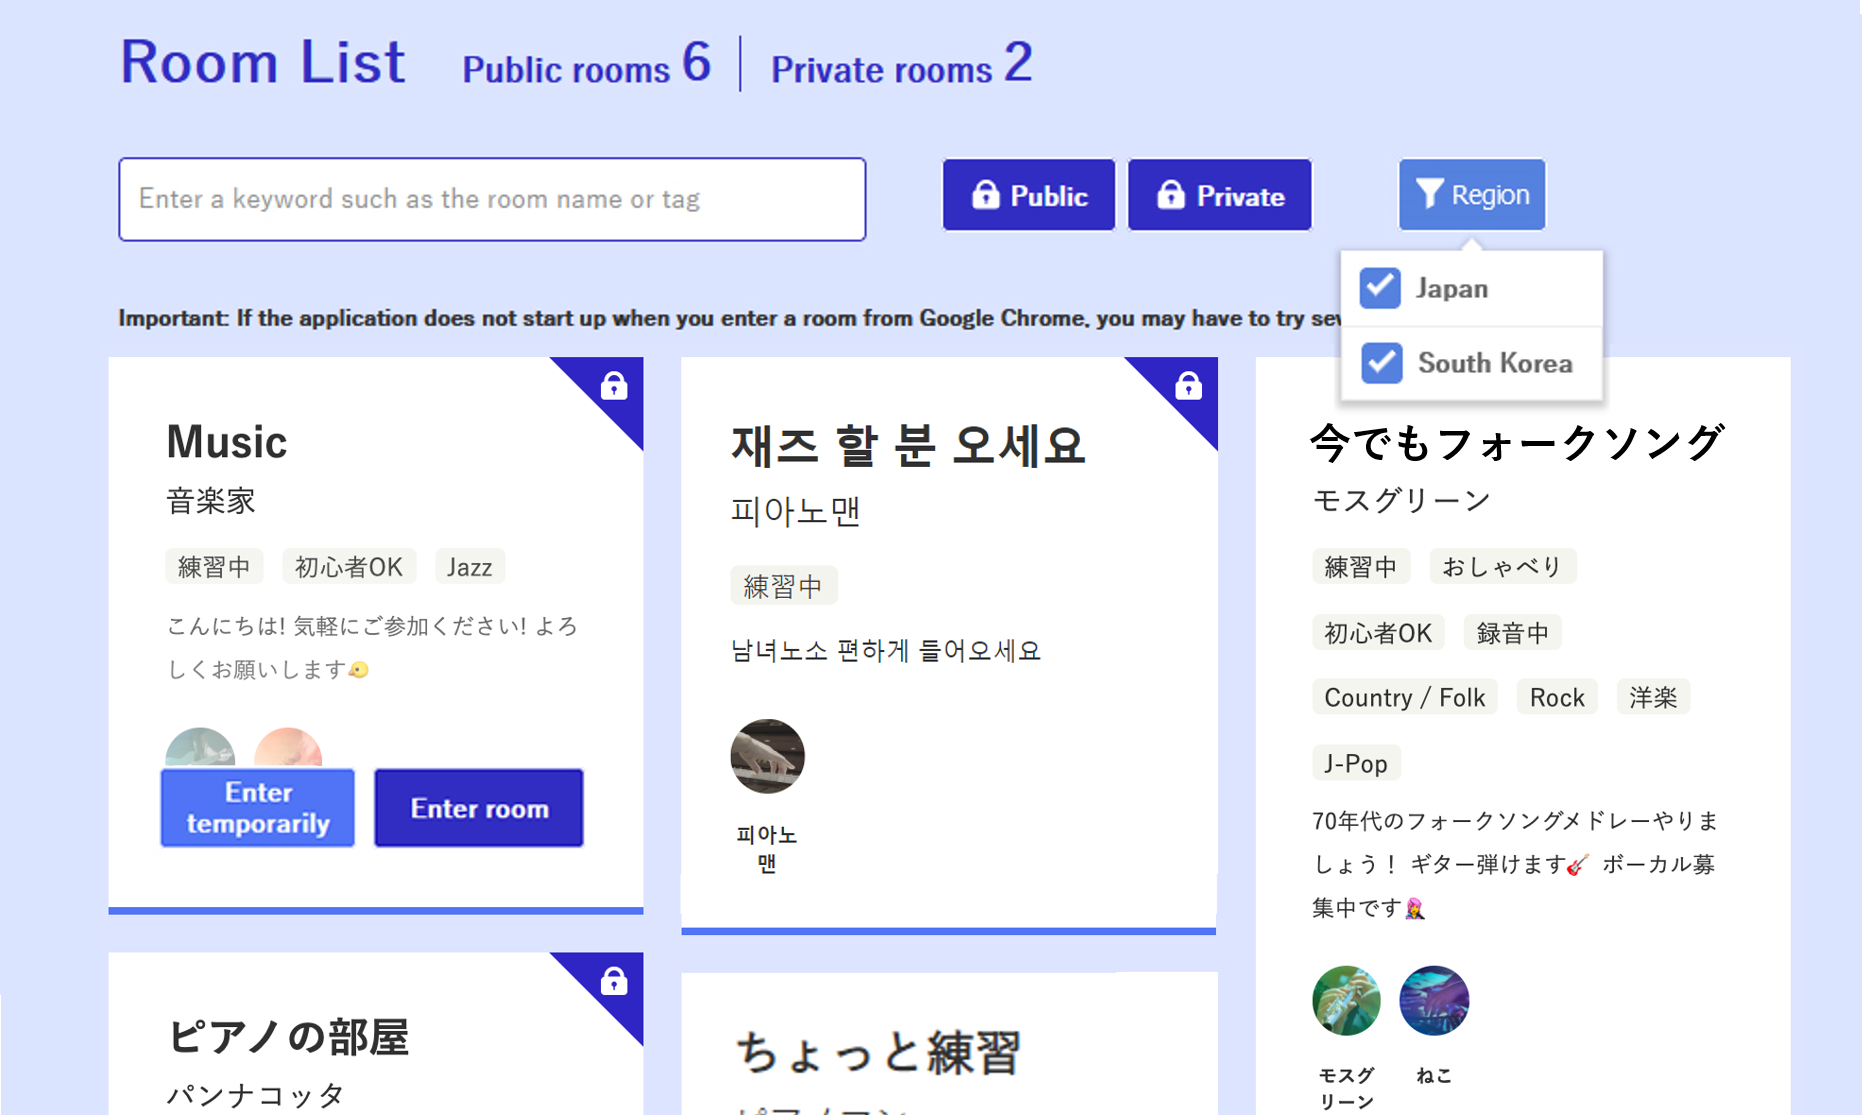
① Click "Room List". The "Official Players Site" will be launched and a Room List currently open to the public will be displayed.
② Move the cursor over the room card in the room list, "Enter temporarily" and "Enter room" will be displayed. For public rooms displayed in the room list you can enter for 30 seconds and try listening by clicking "Enter temporarily". After 30 seconds, you will be unable to listen again unless you wait a little longer.
③ If you click "Enter room", you can enter the room as it is without entering the room temporarily. Refer to the "Room Description" and "Tags" for each room, and enter a room that interests you. *Rooms with a lock mark cannot be entered unless you input the password set by the room creator.
④ Click OK when prompted to launch SYNCROOM. SYNCROOM will start up, and you can "Enter temporarily" or "Enter the room". (Nickname must be input)
5-2. If there is no room you are interested in...
① Start the app and create a room. First, input the "Nickname" and "Room Name". Password is optional.
② Edit the "Room Description" and "Tags" to add information to make your room appealing.
③ If you want to make the room public in the "Room List", select "Public" in "Room Privacy Setting". *If you select "Private", only people who know the "Room Name" you created can enter the room.
④ Click "Create Room". If the message at the bottom of the screen says "Connected to server", that means the room is successfully completed.
⑤ Make the “Room Name” public on social media. Wait for people who are interested to enter.
6. Link to Twitter
By linking with the Twitter app from "Profile Settings", you can use your Twitter icon and nickname in SYNCROOM, and set automatic tweets when creating a room. For details, see "1-1. Set up your profile".
7. Try using an audio player
SYNCROOM can play MP3 and WAV data. We recommend you hold a session while playing a sound source, such as when there are few members and you feel that the sound is not enough. Click "Select" in "Audio Player" and select the sound source you want to play.
8. Try using a metronome
SYNCROOM allows members in the same room to share the sound of the metronome. Synchronizing with the metronome creates a standard sound, so it is easier to match the tempo.
9. Try recording sound
Click the "REC" button to start recording. Recorded audio data is saved in "Music > SYNCROOM_REC" in the system folder.
SYNCROOM Operation Manual
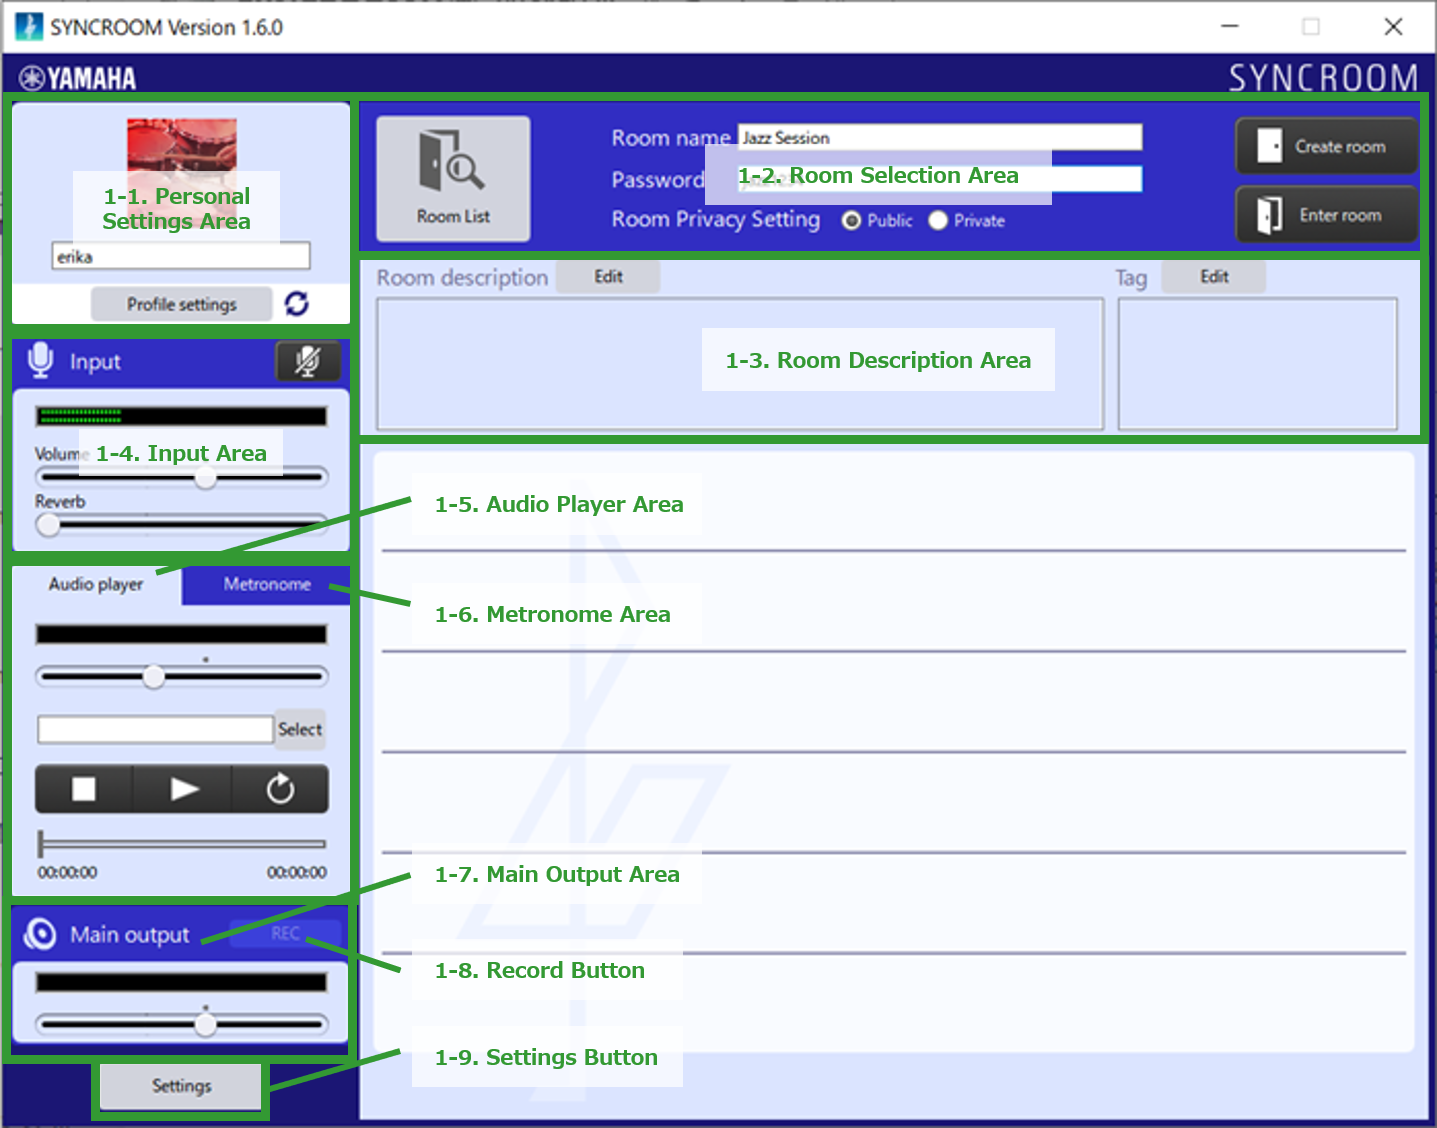
1. Main screen (before entering the room)
1-1. Personal Settings Area
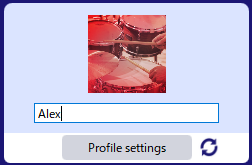
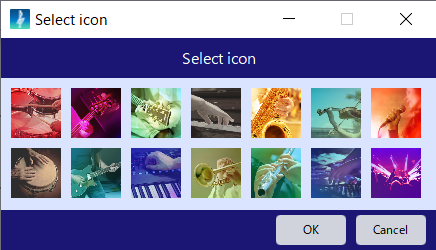
Your currently selected icon is displayed. Clicking the icon will move you to the icon selection window, so select the icon you like.
Your current nickname will be displayed. You can only edit your nickname when not in a room.
You can set your profile on the web page by clicking "Profile Settings". For details, see "1-1. Set up your profile".
1-2. Room Selection Area
This is the area where you can make settings for "Create Room" and "Enter Room" in SYNCROOM.
When you click "Room List", the browser will start and the room list page of the Players Site will be displayed. Refer to the room descriptions and tags, enter the room you are interested in, and hold a session.
When you click "Create Room", you can create a new room with the name specified by "Room Name". Also, by specifying a "password" before creating a room, you can make settings so that only people who know the password can enter the room. Specifying a "Password" is not required. Please refer to the following to determine whether or not you need to set a password by yourself.
When you want to have a session with only acquaintances and friends
→ Create a room by specifying a password
When you want to have a session with a stranger
→ Create a room without setting a password
Click "Enter Room" to enter the existing room specified by "Room Name". If a password is required, specify "Password".
"Room Privacy Setting" can be used to set information displayed on the Room List page of the SYNCROOM site as follows.
*Since version 1.5, the user’s nickname private setting function has been removed. See "1-1. Set up your profile" for information on how to make your profile information private.
"Public": The created room will be displayed on the Room List page.
"Private": The created room will not be displayed on the Room List page. (Affects only the count of "Private room" on the Room List page)
1-3. Room Description Area
This is an area for editing / displaying descriptions and tags related to rooms.
When you "Enter a room", the "room description" and "tags" edited by the room creator will be displayed.
When you "Create a room", explain in detail what artist’s songs you want to hold a session for and what genre songs you want to session by editing the "room description" and "tags". In particular, when recruiting session mates in a “Public Room", the "Room Description" and "Tag" information will be displayed on
the Room List page, so you may meet people who have the same taste in music as you and have a session.
Click "Edit" to edit the "Room description". Click "Edit" and "Edit" will change to "Exit". When you have finished editing, click "Exit" to confirm.
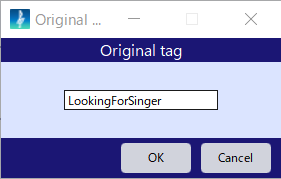
You can also edit "Tag" by clicking "Edit", and confirm by clicking "Exit". "Tag" include pre-prepared genre tags ("J-Pop", "Jazz", etc.) and "Original tag". Multiple selections are possible. If you select "Original tag", you can create only one tag of your choice. (This will be displayed at the bottom of the list.) Use it when you want a tag that is not in the default choices.
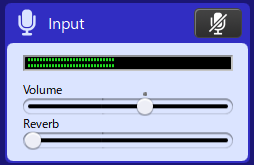
1-4. Input Area
There is a "Volume Meter", "Volume Adjustment Slider", "Mute Button", and "Reverb Adjustment Slider" for your own microphone or instrument.
You can adjust the volume with the Volume Adjustment Slider. If you feel the volume is too low, try increasing the volume. At maximum volume, the volume meter appears as. In this state, there will be sound distortion, so please try reducing the volume with the volume control slider or reducing the input volume of the audio interface.
You can mute (turn off) the input sound by clicking the Mute button.
You can adjust the reverb with the reverb adjustment slider.
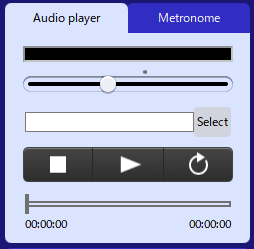
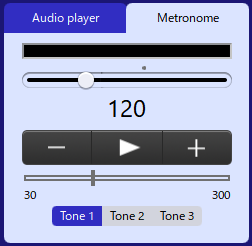
1-5. Audio Player Area
You can play voice files such as MP3 and WAV files. Use it when you want to hold a session for a certain sound source.
Select the voice file you want to play with "Select".
The "Seek Bar" shows the current "Play" or "Pause" position. You can adjust the desired playback position by dragging the slider and clicking on the Seek Bar.
You can play the file repeatedly with the "Repeat" button.
The volume meter display is the same as 1-4. "Input Area". *It cannot be played at the same time as the metronome.*You cannot play a sound source while you or members in the room are recording.
1-6. Metronome Area
Members who entered the same room can share the sound of the metronome.
You can select one of three metronome tones.
You can change the tempo by clicking the "+" or "-" button.
You can also adjust the tempo by dragging or clicking the slider. *Display the metronome by switching the tab of the audio player.*It cannot be played at the same time as the audio player.
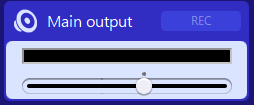
1-7. Main Output Area
The audio is output when everything is mixed (master sound), including the audio player, room creation / member monitor sound including yourself after entering the room, and monitor sound of other rooms when connecting rooms. You can adjust the master volume by moving the slider. Also, the volume meter display is the same as 1-4. "Input Area".
1-8. Record Button
Click the "REC" button to start recording. During recording, it will be in the "● REC" state. Clicking it again will stop recording. Recorded audio data is saved in "Music > SYNCROOM_REC" in the system folder.
*If you record while you or someone in the room is playing an audio file, the file will stop playing.*It is active only while you are in the room.
1-9. Settings Button
Click "Settings" to move to the settings screen. See 3. Settings Screen for the setting screen.
2. Main Screen (after entering the room)
By clicking "Simple Display" or "Detailed Display" at the bottom right of the screen, you can switch between the following two screens. Also, the display next to "Simple Display" or "Detailed Display" shows the remaining time in the room.
(Simple Display)
(Detailed Display)
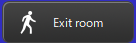
2-1. Exit Room Button
When you want to quit a session, click this button to exit the room.
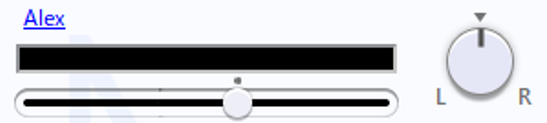
2-2. Member Settings Area
SYNCROOM can normally connect up to 5 people including yourself. However, you can connect up to 10 people using the "Connect to room Function". As shown in the figure below, you (Member 1), Member 2, Member 3, Member 4, Member 5, and the destination rooms are displayed from the top. In addition, the "×" and "Connect to room" in the figure are displayed and can be used only when you have created a room yourself.
(Simple Display)
(Detailed Display)
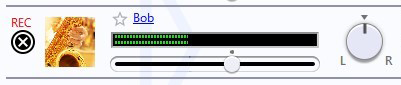
① Volume, Pan pot
You can adjust each member's volume with the slider in each member's row, and adjust their pan pot with the dial. Also, the volume and pan pot settings you adjust here are for your own monitoring, so they are not sent to the other users.
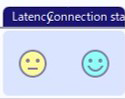
② Display of Latency / Connection Status
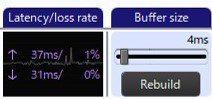
In the simple display, it indicates that the latency and the connection status are good in order. In detailed display, the latency and packet loss rate when sending voice to that member are displayed in the upper part, and the latency and packet loss rate when receiving from that member are shown in the lower part of the figure on the left.
The buffer size is prepared for the purpose of absorbing jitter on the network on the Internet. Immediately after starting the connection, the latency time due to the ASIO buffer size and the connection status are measured and automatically set to appropriate values. If audio dropouts occur, it may be resolved by clicking "Rebuild" and automatically setting the buffer size again. It will not be sent to the other users.
(Simple Display)
(Detailed Display)
③ Sound quality display/setting
You can view and set the sound quality settings with the target person. In the simple display, the higher the number of stars, the higher the sound quality. In the detailed display, you can display and set "Sampling rate", "Compression Method" and "Number of Channels". This is the same specification as Basic Sound Quality Settings on the setting screen.
④ Display during recording
"REC" is displayed in the column of the member who is recording.
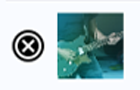
⑤ Forced exit
You can force the member to exit the room by clicking the "x". Only the person who created the room can use it.
If you check "Add this user to the block list" when forcing them to exit the room, the user will be blocked at the same time.
See "1-6. Block users." for information on blocking users.
⑥ Connect to room
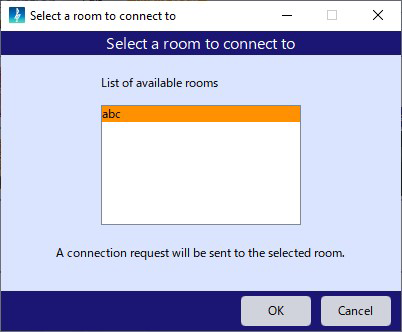
"Connect to room" allows you to connect your room with another room and have a session with up to 10 people. Only the person who created the room can use "Connect to room". When you click "Connect to room", the room connection screen, and a list of rooms that can be connected (public rooms) will be displayed. You may be asked for a password when connecting to rooms. In that case, ask for the password of the connected room in advance and input it.
If your own room is a public room, the room creator may receive a "Room connection request".
The audio sent and received in room connection is the room creator’s "Main output" sound. Therefore, you can control the volume and pan pot of the master sound in the destination room, but you cannot control the volume and pan pot of each part in the destination room.
⑦ Chat Button
Click "Chat" to open the chat screen, so you can chat with room members or people in the destination room.
⑧ Tweet Button
Click the "Tweet button" and the browser will be launched and the Twitter tweet screen will be displayed. You can tweet with the hashtag "#SYNCROOM", nickname, room name, or other such information.
⑨ Copy link Button
Copy the URL string to the room you are currently in to the clipboard.
Paste the URL into an email or social media and share it with the person you want to have a session with. SYNCROOM will start up just by accessing the link, so you can have them enter the room.
*For rooms with passwords, you must input the password.
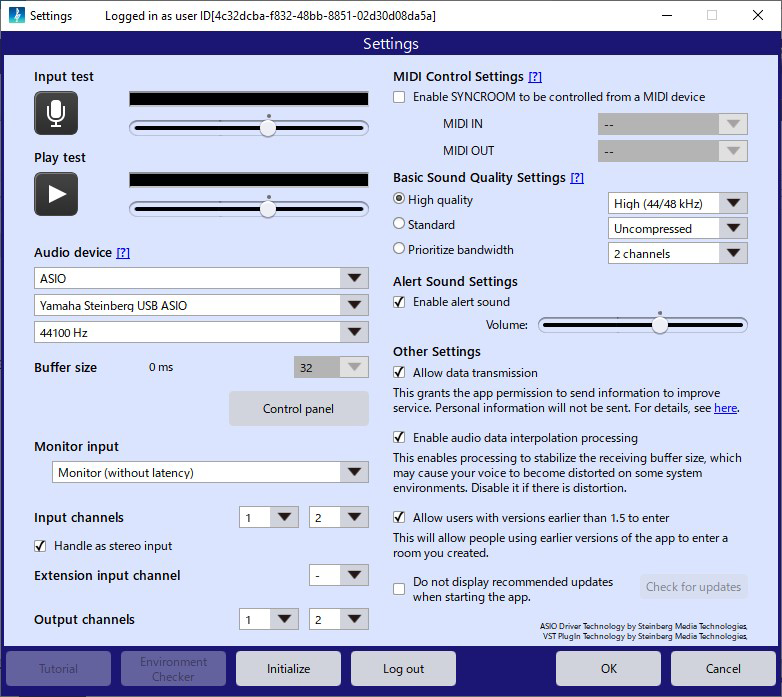
3. Settings Screen
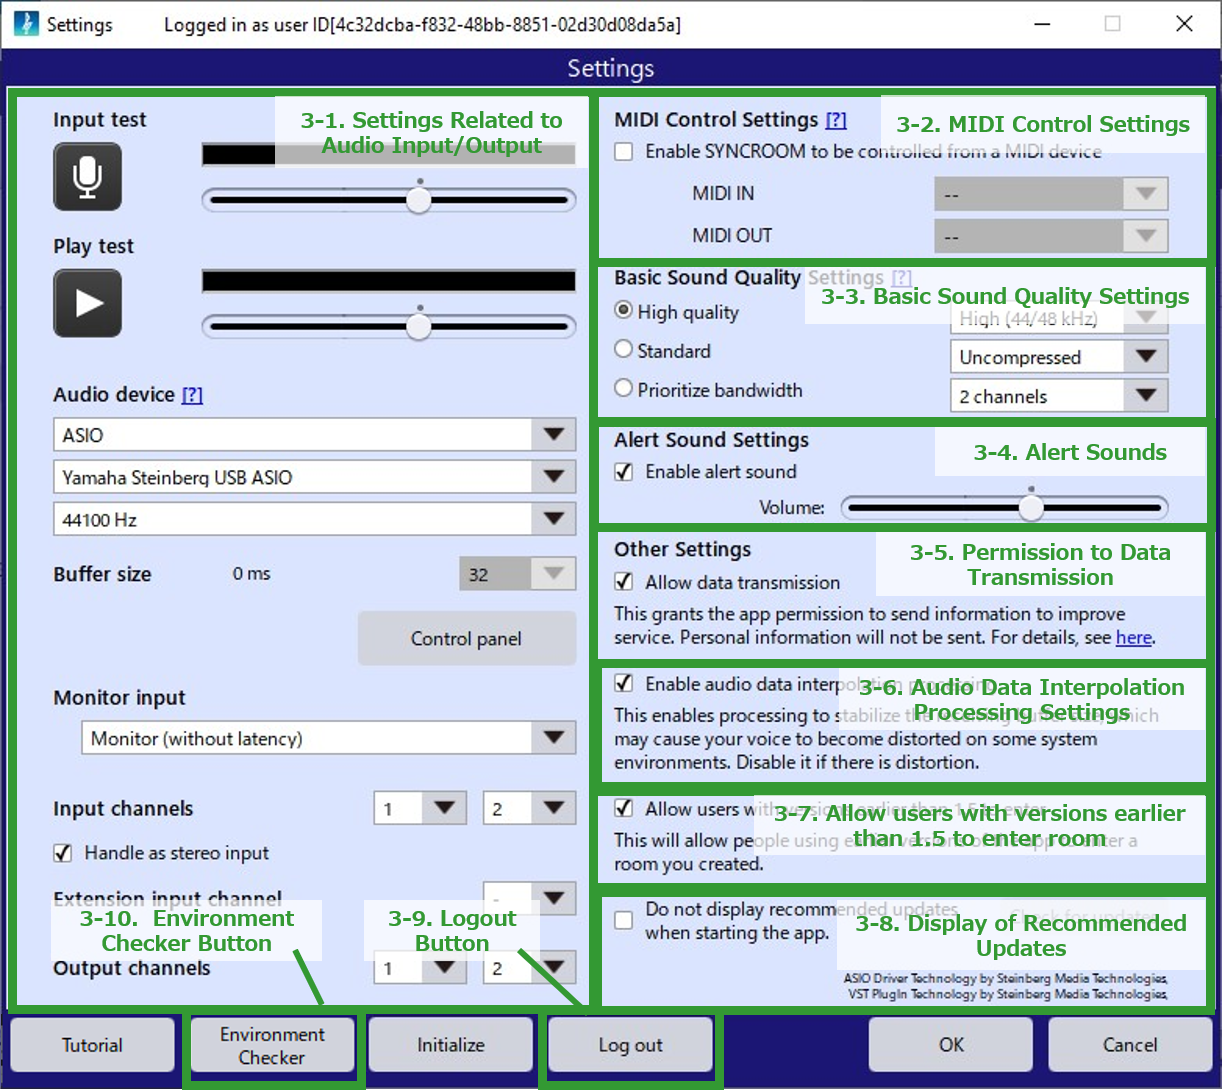
When you click "Settings" on the main screen, the following setting screen will be displayed. Set up SYNCROOM to work properly. If you changed the settings too much on this screen and lost track, or the sound stopped, click the "Initialize" button at the bottom left of the screen and start over from the beginning.
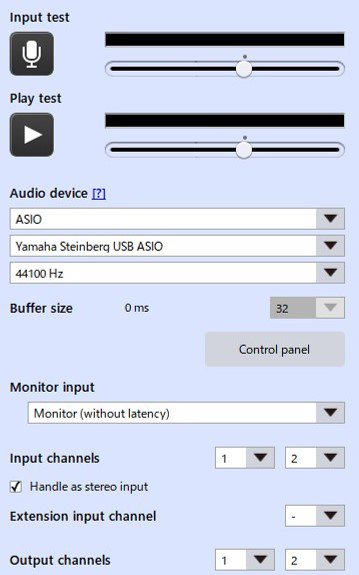
3-1. Settings Related to Audio Input/Output
Click "Input test", and the color of the button will change, so you can check the audio input. Click "Play Test" and the color of the button will change in the same way, and you can check the audio output. We recommend that you use the two buttons to make the following settings. Settings related to audio input/output can also be set on the "Settings tutorial" screen displayed by clicking the "Tutorial" button at the bottom left of the screen. We recommend that you follow the instructions in the Settings tutorial first.
3-1-1. For Windows
In “Audio Device”
ASIO
WASAPI shared mode
WASAPI exclusive mode
DirectSound
VST mode
You can select one of these. Performance considering "sound quality" and "latency" is generally fine, as
ASIO > WASAPI exclusive mode > WASAPI shared mode > DirectSound.
(VST mode is automatically selected when using SYNCROOM as a VST plug-in on a host application such as a DAW. Normally you do not need to select this.)
Therefore, we recommend using ASIO drivers with SYNCROOM, so that you can better enjoy sessions.
A. When selecting “ASIO”
① Select audio device
Select the ASIO device name to use.
② Select sampling rate
Set the sampling rate to match the sampling rate of your audio interface. The sampling rates supported by SYNCROOM are 44100 Hz (44.1 kHz) and 48000 Hz (48 kHz). SYNCROOM may not work if the sampling rate of your audio interface does not match the sampling rate selected in "Settings". Some audio interfaces allow you to change the sampling rate with a switch, etc., depending on the model. If it is set to 96 kHz or 192 kHz, set it again to 44.1 kHz or 48 kHz, which corresponds to SYNCROOM.
③ Set buffer size
The buffer size can be set in the "Control Panel" in "Settings". Setting the value as small as possible (recommended 64 - 128 samples or 2 - 4 ms) will make latency small and the session will be more comfortable. If the sound pops and cuts out with this setting, increase the buffer size value little by little, and try making adjustments until the value does not cause audio dropouts.
④ Monitor input
Configure your own sound monitoring settings. You can select from three types: "Do not monitor", "Monitor (with latency)", and "Monitor (without latency)". We recommend that you select "Monitor (with latency)" to match well with party with a small latency. For details, see the FAQ "Is there a trick to using SYNCROOM enjoyably?"
⑤ Set input channel
Select the input channel of your audio interface. By checking "Handle as stereo input", you can handle the selected input channel as stereo input. Use this when using a stereo output instrument such as a synthesizer.
⑥ Set extension input channel
This can be used when the audio interface used has three or more input channels. Use this when you are playing and speaking or conversing while using a stereo output instrument such as a synthesizer.
⑦ Set output channel
Set the output channel of your audio interface.
B. When selecting "WASAPI shared mode" or "WASAPI exclusive mode"
If you select WASAPI, the session will be more comfortable than DirectSound as it has less latency than DirectSound.
WASAPI has two modes: "WASAPI shared mode" and "WASAPI exclusive mode". The characteristics of each are as follows.
WASAPI shared mode
Latency will be longer than WASAPI exclusive mode.
Can be used concurrently with other applications. (Sounds of the application you use simultaneously will also be output.)
WASAPI exclusive mode
Allows lower latency than WASAPI shared mode.
No sound from other applications when using SYNCROOM.
① Select audio device
No special settings are required for either mode. However, if you have multiple audio devices, such as a built-in speaker and a USB headset, select the audio device you want to use from "Audio Device" in "Settings". Also, if "--" is displayed for either the input device or the output device, then the audio device cannot be opened. Try to open it by inserting a microphone or headphones.
② Select sampling rate
The sampling rate can be selected from 44100 Hz only in WASAPI shared mode and 44100 Hz or 48000 Hz in WASAPI exclusive mode.
③ Set buffer size
We recommend a buffer size of 512 for WASAPI shared mode and 192 for WASAPI exclusive mode. If audio dropouts are caused, it may be improved by setting buffer size to a larger value.
④ In the case of (4)WASAPI, settings beyond "input channels" are not possible.
C. When selecting "DirectSound"
The sampling rate is fixed at 44100 Hz and the buffer size is also fixed at 20 ms. Other settings cannot be selected or changed.
3-1-2. For Mac
In the Mac environment, you can select the mode to use either CoreAudio or VST modes. Select CoreAudio. Similar to the Windows environment, VST mode should only be selected when using it as a VST plug-in on a host application such as a DAW.
D. When selecting "CoreAudio"
① Select audio device
Select the audio input device and output device you want to use. If you are using an external audio interface, we recommend that you specify the same device for both the input device and the output device (Also see the FAQ "The sound is distorted").
② Select sampling rate
The sampling rates supported by SYNCROOM are 44100 Hz (44.1 kHz) and 48000 Hz (48 kHz). SYNCROOM may not work if the sampling rate of your audio device does not match the sampling rate selected in "Audio Device". Also, some audio interfaces allow you to change the sampling rate with a switch, etc., depending on the model. If it is set to 96 kHz or 192 kHz, set it again to 44.1 kHz or 48 kHz, which corresponds to SYNCROOM.
③ Set buffer size
Selecting the value as small as possible will make latency small and the session will be more comfortable. Also, if the sound is popping and noisy, increase the buffer size value little by little, and try making adjustments until the sound does not pop and cut out.
④ Monitor input
Configure your own sound monitoring settings. You can select from three types: "Do not monitor", "Monitor (with latency)", and "Monitor (without latency)". We recommend that you select "Monitor (with latency)" to match well with party with a small latency. For details, see the FAQ "Is there a trick to using SYNCROOM enjoyably?"
⑤ Set input channel
Select the input channel of your audio interface. By checking "Handle as stereo input", you can handle the selected input channel as stereo input. Use this when using a stereo output instrument such as a synthesizer.
⑥ Set extension input channel
This can be used when the audio interface used has three or more input channels. Use this when you are playing and speaking or conversing while using a stereo output instrument such as a synthesizer.
⑦ Set output channel
Set the output channel of your audio interface.
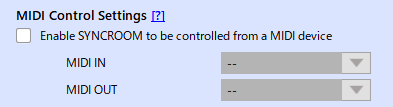
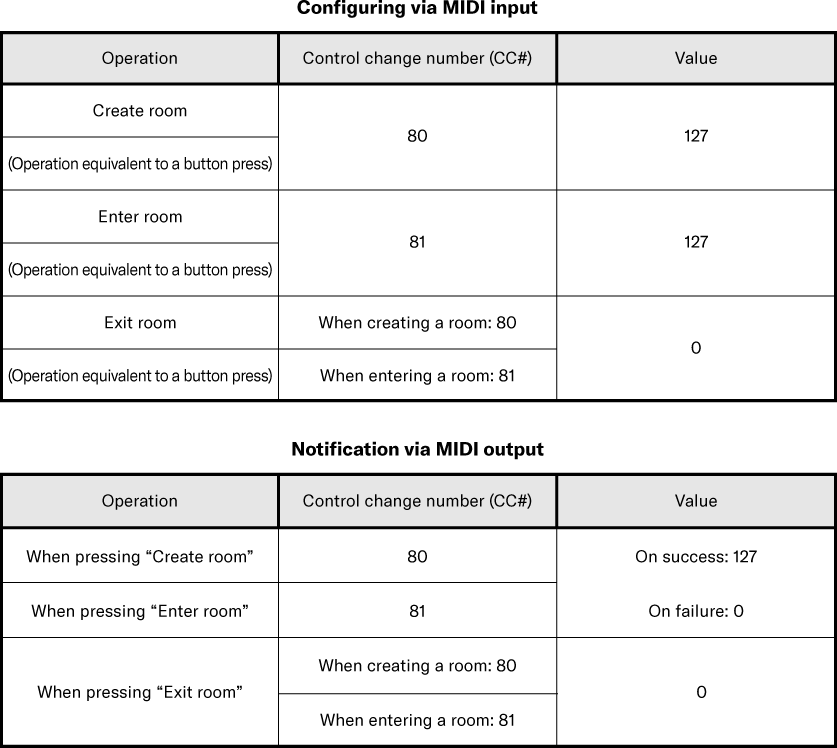
3-2. MIDI Control Settings
SYNCROOM allows you to control apps from outside. You can control the following with MIDI:
You can also control "Create room", "Enter room", and "Exit room" using MIDI as shown below. (Please specify 1 for MIDI CH)
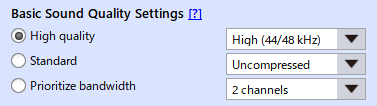
3-3. Basic Sound Quality Settings
In "Basic Sound Quality Settings", you can set the sound quality when communicating with other members. By selecting one from "High Quality", "Standard", and "Prioritize bandwidth" on the left side of the figure, you can set the rough sound quality.
When connecting, the Basic Sound Quality Settings of both members are compared, and the setting that matches the lower of "Sampling rate ", "Compression Method", and "Number of Channels" is used. For reference, see the FAQ "What happens if the participants have different audio settings?".
The higher the sound quality, the more communication bandwidth is required, so if the line is thin and the bandwidth is inadequate, the sound may be interrupted or the latency may increase. In that case, select "Standard" or "Prioritize bandwidth" and lower the sound quality. Also, you can make detailed sound quality settings from the drop down menu on the right, so try that too.
3-4. Alert Sound
Checking "Enable alert sound" will make an alert sound when an error occurs or when a new member enters the room. You can also adjust the volume of the alert sound by moving the slider.
3-5. Permission to Data Transmission
SYNCROOM collects customer usage information as information in order to improve and enhance its services.
If you check "Allow data transmission", then information will be transmitted. Uncheck to stop sending information. *By initial settings, "Permit data transmission" is checked.
3-6. Audio Data Interpolation Processing Settings
This function is for stabilizing the reception of audio data. This function is enabled by initial settings, but depending on the environment, disabling it may improve problems such as distorted voice.
3-7. Allow users with versions earlier than 1.5 to enter room
Set whether or not users using versions earlier than 1.5 can enter the room you created.
*The "Block" function cannot be used on users using versions earlier than 1.5. By unchecking this Room Entry Permission Setting, if a user using a version earlier than 1.5 tries to enter the room, it is possible to force them to exit the room.
3-8. Display of Recommended Updates
Set whether to display information on the latest version that is recommended for updating at startup.
Click "Check for updates" to check the latest update information.
3-9. Log out Button
The app will restart, but you must log in again to use it.
3-10. Environment Checker Button
An environment checker function has been added since SYNCROOM Ver.1.1.0. Using the environment checker, you can check the operating environment of SYNCROOM, such as network environment, audio device, CPU performance, etc.
See below for how to use the environment checker.
*The result of the environment checker does not guarantee the operation of SYNCROOM. Connectivity and stability will vary depending on the time of day and connection partner, so use this as a reference for your own environment.
① Open environment checker
You can open the environment checker screen by one of the following methods.
Click the "Environment Checker" button on the setting screen
Check the "Environment Checker" button displayed on the last screen of the "Setting Tutorial"
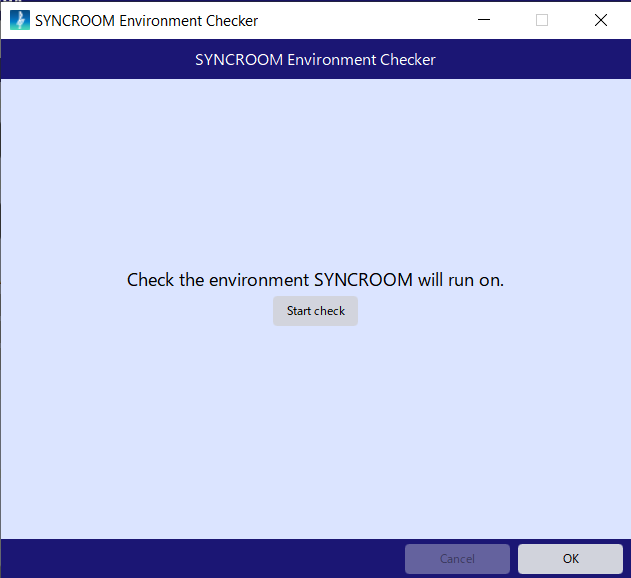
② Start environment check
When you open Environment Checker, it first checks your internet connection. After confirmation, the following screen will be displayed.
Measurement starts when you click the "Start Check" button.
If you click the "Cancel" button during measurement, it will return to the screen before starting check.
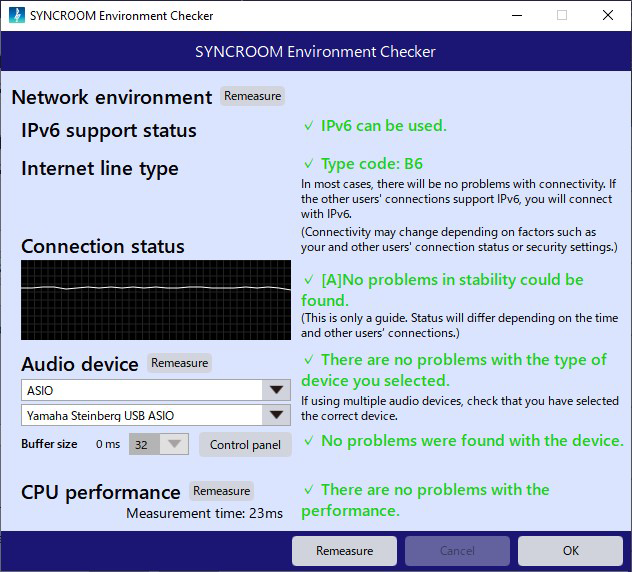
③ Check results
Once the measurement is completed, the following result screen will be displayed. Please check the contents.
If you click the "Remeasure" button at the bottom, you can return to the screen before the start of the check and measure all items again from the beginning.
Click the "OK" button to return to the setting screen.
The explanation of each item of the measurement result is as follows.
IPv6 support status
Check if your line supports IPv6 communication.
Although SYNCROOM can be used even if your line does not support IPv6, we recommend connecting with the IPv6 IPoE method with SYNCROOM.
Intenet Line Type
Determines your connection and router type. If there is a connectivity issue with SYNCROOM, an explanation will be displayed under "Type Code". *Depending on the usage environment, the determination result may change according to the situation even with the same connection.*Connectivity in SYNCROOM varies depending on the actual connection partner and time of day, so use the result as a guide only.
Also see the FAQ below.
"Which connection can I use?"
"What is IPv6/IPv6 IPoE?"
"Unable to connect."
*Type Code
Type code is a notation method unique to our company. Currently there are 12 types: A to C, A6 to C6, AU to CU, and AU6 to CU6.
A to C : Indicates the characteristics of the connection/router. If it is A or B, there is no problem connecting with SYNCROOM in most cases.
U : Indicates whether port mapping by UPnP can be used. If it supports UPnP, connectivity with IPv4 will be improved.
6 : Indicates whether or not IPv6 is supported. If the connection partner also supports IPv6, the connection will be made using IPv6.
Connection Status
Measures the latency status of communication with the test server and displays the result. Use this as a guide only, as it may vary depending on the time of day.
CPU Performance
Measures the processing speed of the CPU. If there is a problem with SYNCROOM’s operation, an explanation will be displayed on the screen.
4. Precautions
① In order to reduce the delay when inputting/outputting sound to/from the PC, for Windows, an audio interface that supports ASIO drivers is required. For Mac, use the standard audio driver (CoreAudio).
Keep the ASIO or CoreAudio buffer size as small as you can without sound cutting out. However, the audio interface and PC performance can also affect audio latency.
② When using speakers for monitoring, for example, it takes 3 milliseconds for sound to reach 1 meter away. Using headphones will make the latency in sound from other users less. *Wireless headphones are not recommended as they add significantly more latency.**1 msec (1 millisecond) = 1/1000th of a second
③ In SYNCROOM, "Sound Quality Setting" does not affect the communication speed much. Therefore, in order to have a more enjoyable session, try using it with the setting set to "high sound quality" as much as possible. If the communication bandwidth is inadequate and you cannot connect, try lowering the sound quality setting.
Using My Profile
1. My Profile Screen
My Profile is available starting from version 1.5. You can register your own profile and browse the profiles of other users.
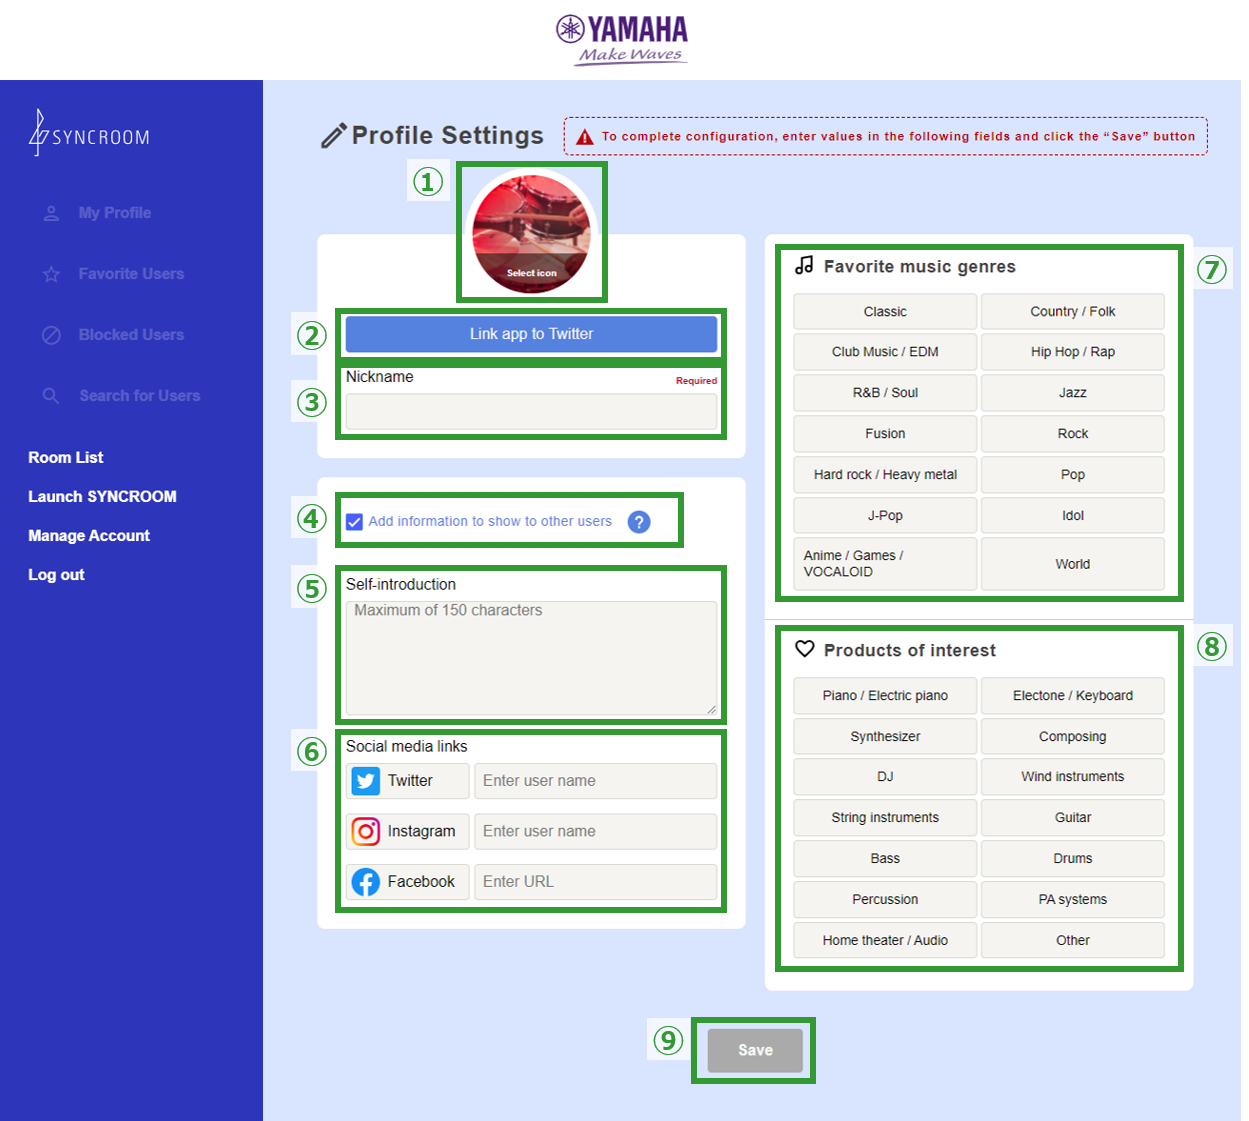
1-1. Set up your profile
If you register and log in with the app in version 1.5 or later, you will be directed to the profile settings screen, so set the following information.
① Icon Select
Select the icon.
②
Link to Twitter settings
Link to the Twitter app to use Twitter icons and nicknames in SYNCROOM, or to set automatic tweets when creating a room. Link with Twitter as described below.
Linking with Twitter (during initial setup)
(1) Click the "Link app to Twitter" button on the profile settings (edit) screen.
(2) The browser will start up and the Twitter authentication screen will be displayed. If you are not logged into Twitter, then log in with your account.
(3) Click "Authorize app".
(4) After successful authentication, you will be returned to the profile setting (edit) screen.
*By default, the Twitter icon and nickname will be used.
*If you set up Link to Twitter settings, the linked Twitter account will be automatically reflected in the "Social media links" on your profile.
Correct items for Link to Twitter
(1) Click "Link to Twitter" on the profile settings (edit) screen.
(2) The check boxes for the following items are enabled, so you can set them individually.
*By default, "Use Twitter icon" and "Use Twitter nickname" are enabled.
Tweet automatically when a room is created
When you create a new room by clicking the "Create room" button, it will be tweeted automatically. "Enter room" will not be tweeted. Also, if the room creation fails, it will not be tweeted.
Use Twitter icon
Use the icon set on Twitter in SYNCROOM.
Use Twitter nickname
Use the nickname set on Twitter in SYNCROOM.
Disconnect from Twitter
(1) Click "Link to Twitter" on the profile settings (edit) screen.
(2) If you click "Disconnect from Twitter", the link will be canceled and you will return to the profile settings (edit) screen.
③ Nickname
Register one nickname for each account. If you are linked to Twitter, you can use your Twitter nickname, but you cannot edit your nickname.
④ Add information to be made public to other users
If you check "Add information to be disclosed to other users", information (⑤ to ⑧) that is open to other users can now be edited, and when saved, the profile information will be set to "Public". If "Add information to be disclosed to other users" is not checked, your profile information will be set to "Private". In the case of "Private", information other than the icon and nickname will not be public.
*If you remove the check while editing, the information you entered before saving will be deleted.
⑤ Self Introduction
You can enter your own introduction in free text.
*The information you enter will be made public to other users.
⑥ Social Media Link
You can register your social account ID and URL.
⑦ Favorite Music Genres
You can choose your favorite music genres.
⑧ Products of Interest
You can choose the products of your interest.
⑨ Save
Your profile information will be saved.
*If ④"Add information to be disclosed to other users" is checked, the profile will be public.
1-2. Edit your profile
Once you have set up your profile, you can edit your information from "Edit Profile" in the My Profile menu.
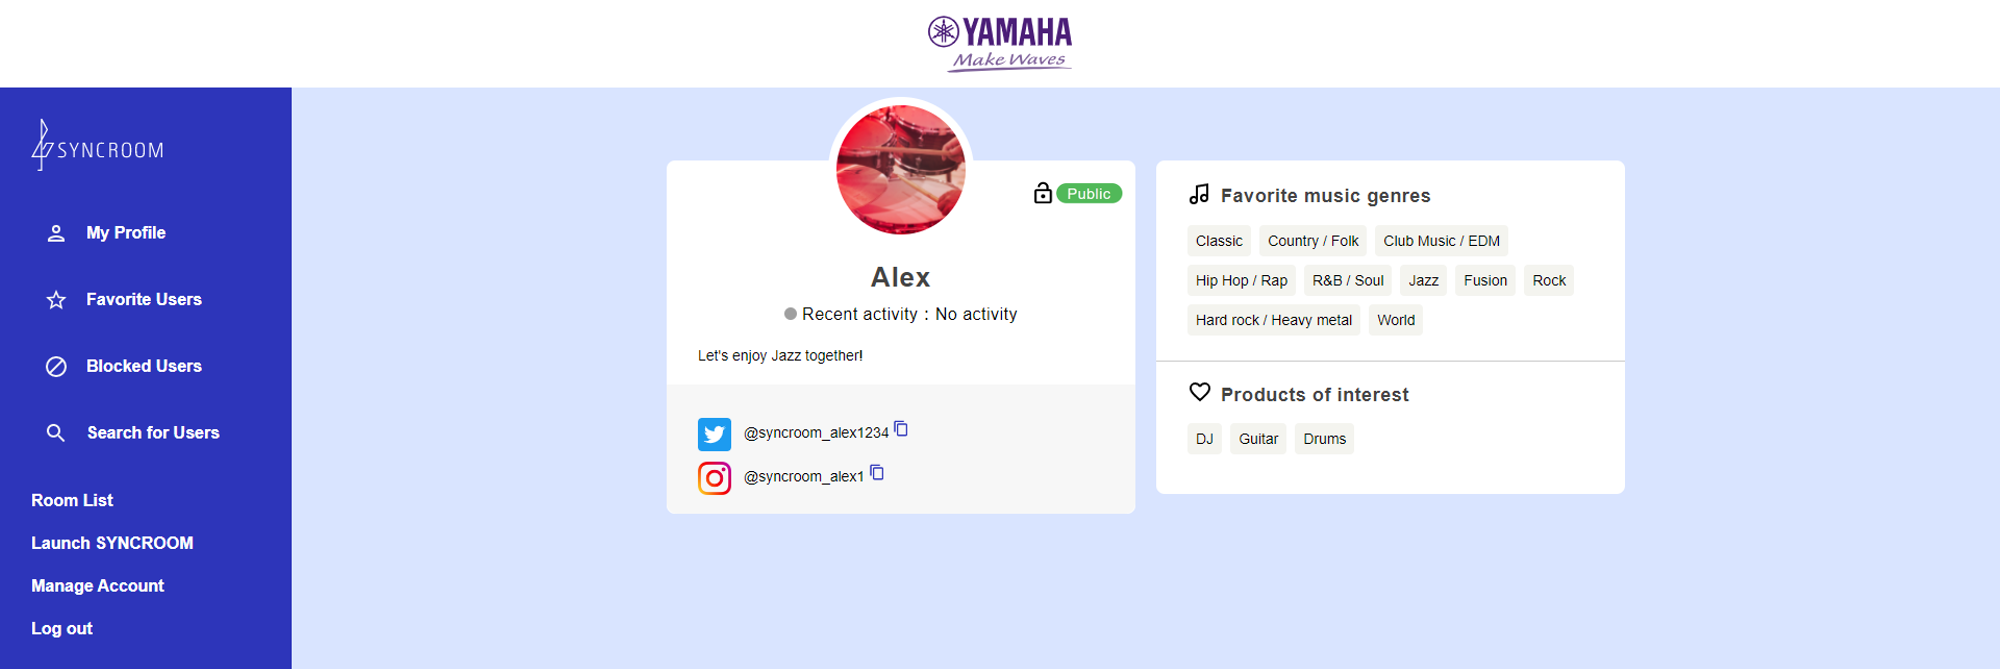
1-3. Check My Profile
You can check the profile you set up on your "My Profile".
Your My Profile
Other User’s My Profile
For public
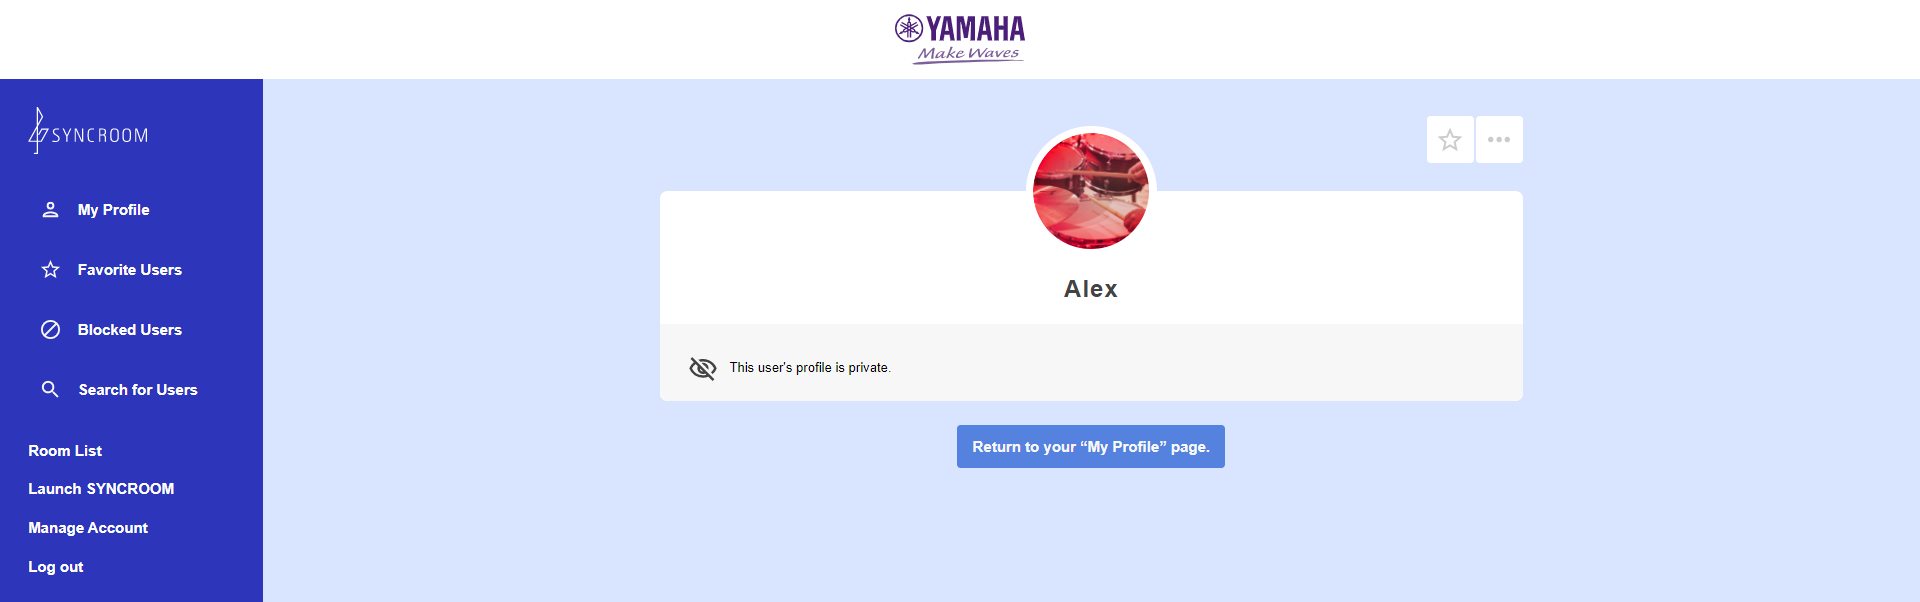
For private
For "Public", the following information is open to other users.
① Icon
② Nickname
③ Self Introduction
④ Social Media Link
⑤ Favorite Music Genres
⑥ Products of Interest
⑦ Room Creation Status / Latest Activities
If it is "Private", other users will only see your icon and nickname, and will see "This user's profile is private". It also prevents other users from searching.
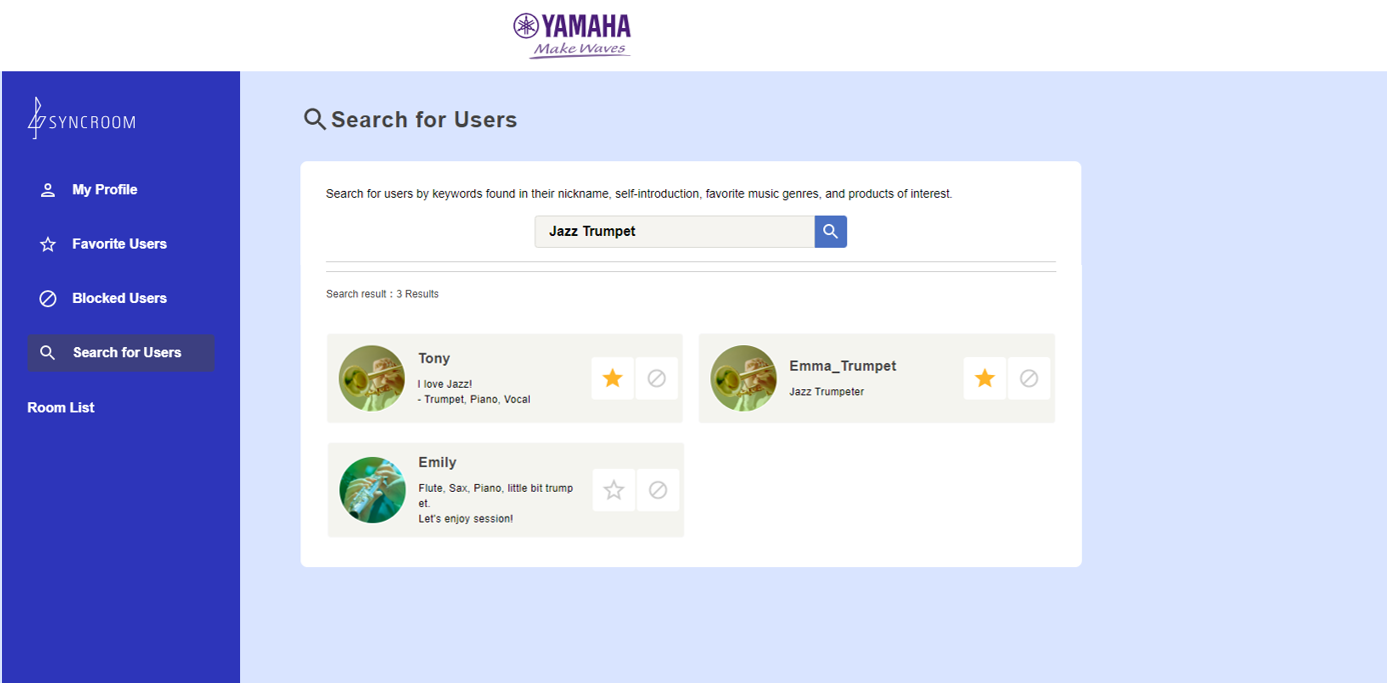
1-4. Search for users
With user search, you can search for other users by their registered nickname, self introduction, favorite music genres, keywords of products you are interested in, etc.
Users who have set to private, users you've blocked, and users who have blocked you won't appear in your search results.
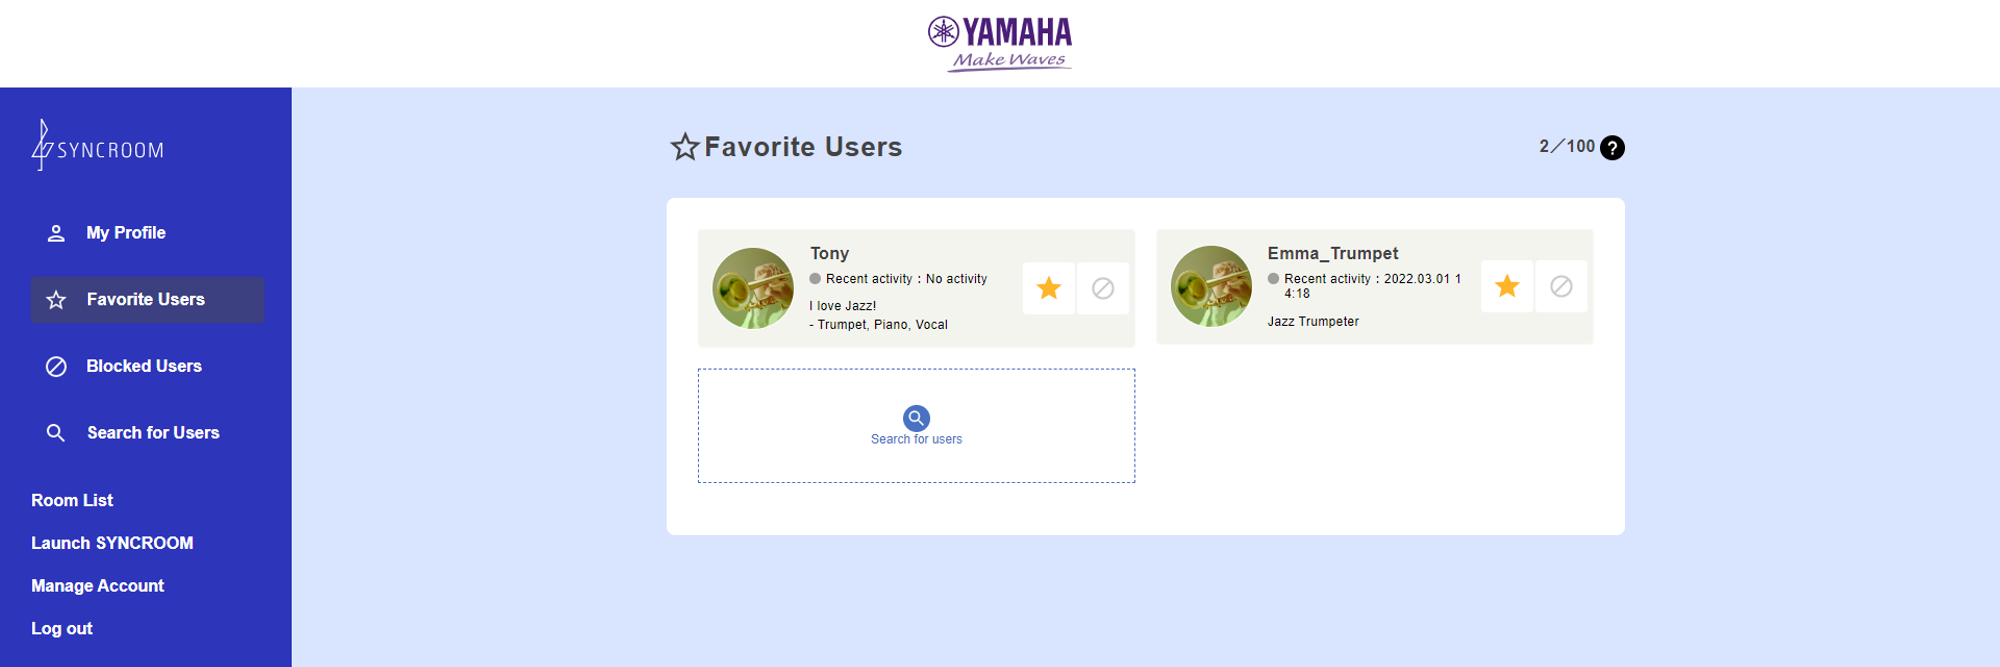
1-5. Add users to Favorites
You can register up to 100 users as favorites by tapping the "Favorites" icon on other users' My Profiles or on the user search screen.
You can check users you have registered as favorites in your "Favorite Users" on your My Profile.
Tap the "Favorite" icon of the registered favorite user again to remove the favorite.
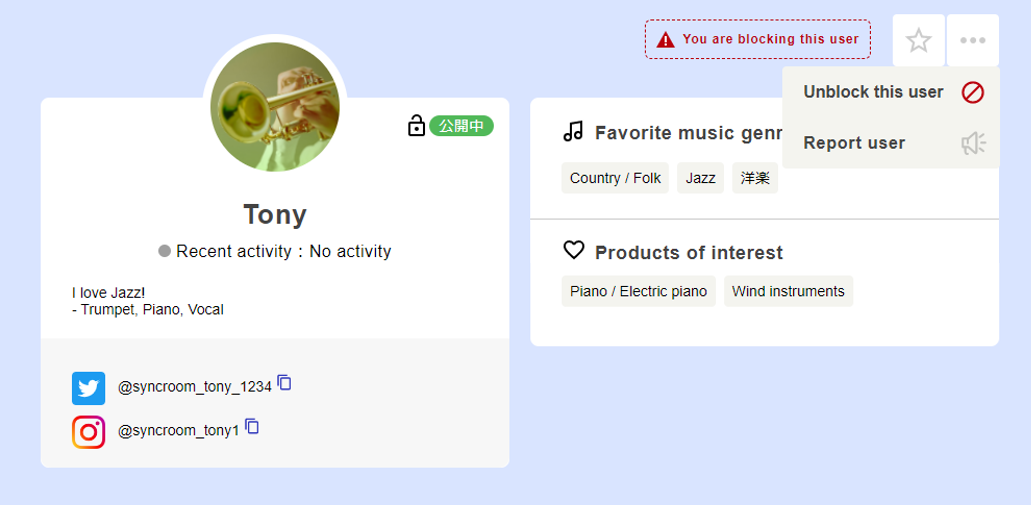
1-6. Block users
You can check blocked users in "Blocked Users" on My Profile.
Blocking a user will have the following effect.
When you browse a blocked user's My Profile, the message "You have blocked this user" is displayed.
When a blocked user tries to view your My Profile, the message "This user's profile is private" is displayed.
If one of you is blocking the other, the room created by the other will not be displayed on each other's room list.
*However, in the room list on the SYNCROOM Players Site, all rooms will be displayed when you are "logged out".
If either one blocks the other, you will be excluded from each other's "Search for Users" search targets.
If a blocked user tries to enter a room you have created, they will be automatically forced to exit the room.
You can unblock a registered blocked user by tapping the "Block" icon again.
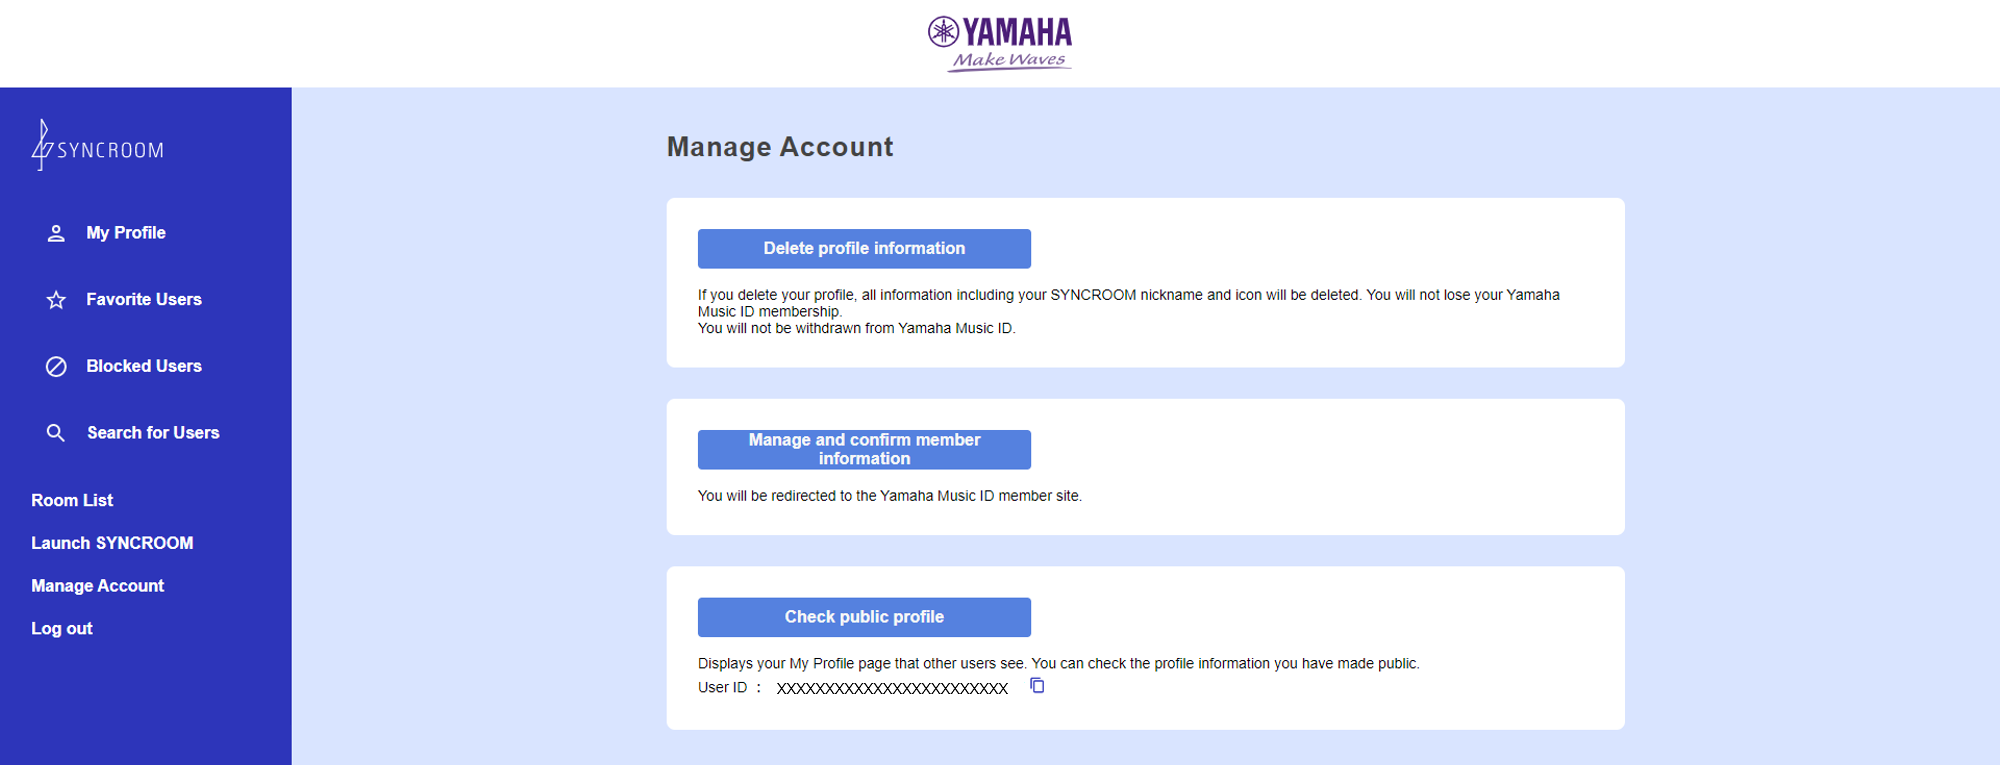
1-7. Manage / Delete Account
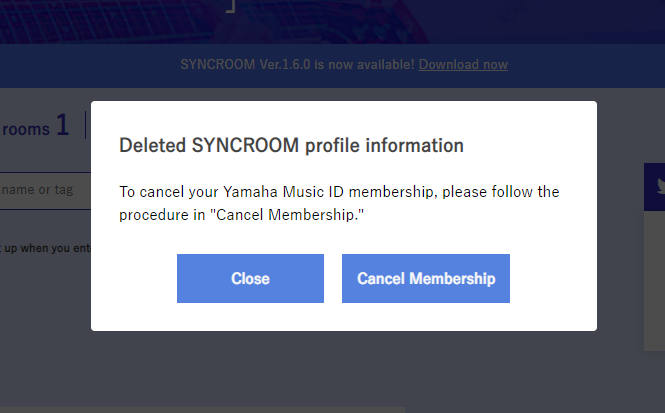
Profile information deletion completion screen
① Delete profile information Removes information including the SYNCROOM nickname and icon.
② Close If you select "Close" when deleting your profile information, you will be automatically logged out of SYNCROOM.
③ Proceed to withdrawal procedure If you wish to withdraw from Yamaha Music ID, select "Proceed to withdrawal procedure" when deleting your profile information and follow the procedure.
④ Manage and confirm member information Go to the Yamaha Music ID member site.
⑤ Check public profile You can display the My Profile that other users see and check the contents of your public profile. You can also copy the User ID by tapping the icon next to the User ID.
How to use the VST linkage function
1. About the VST linkage function
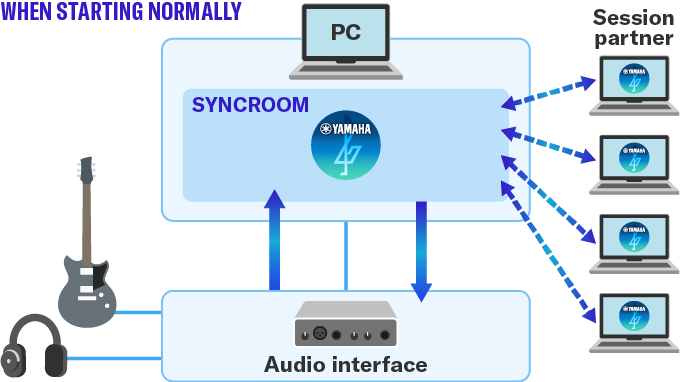
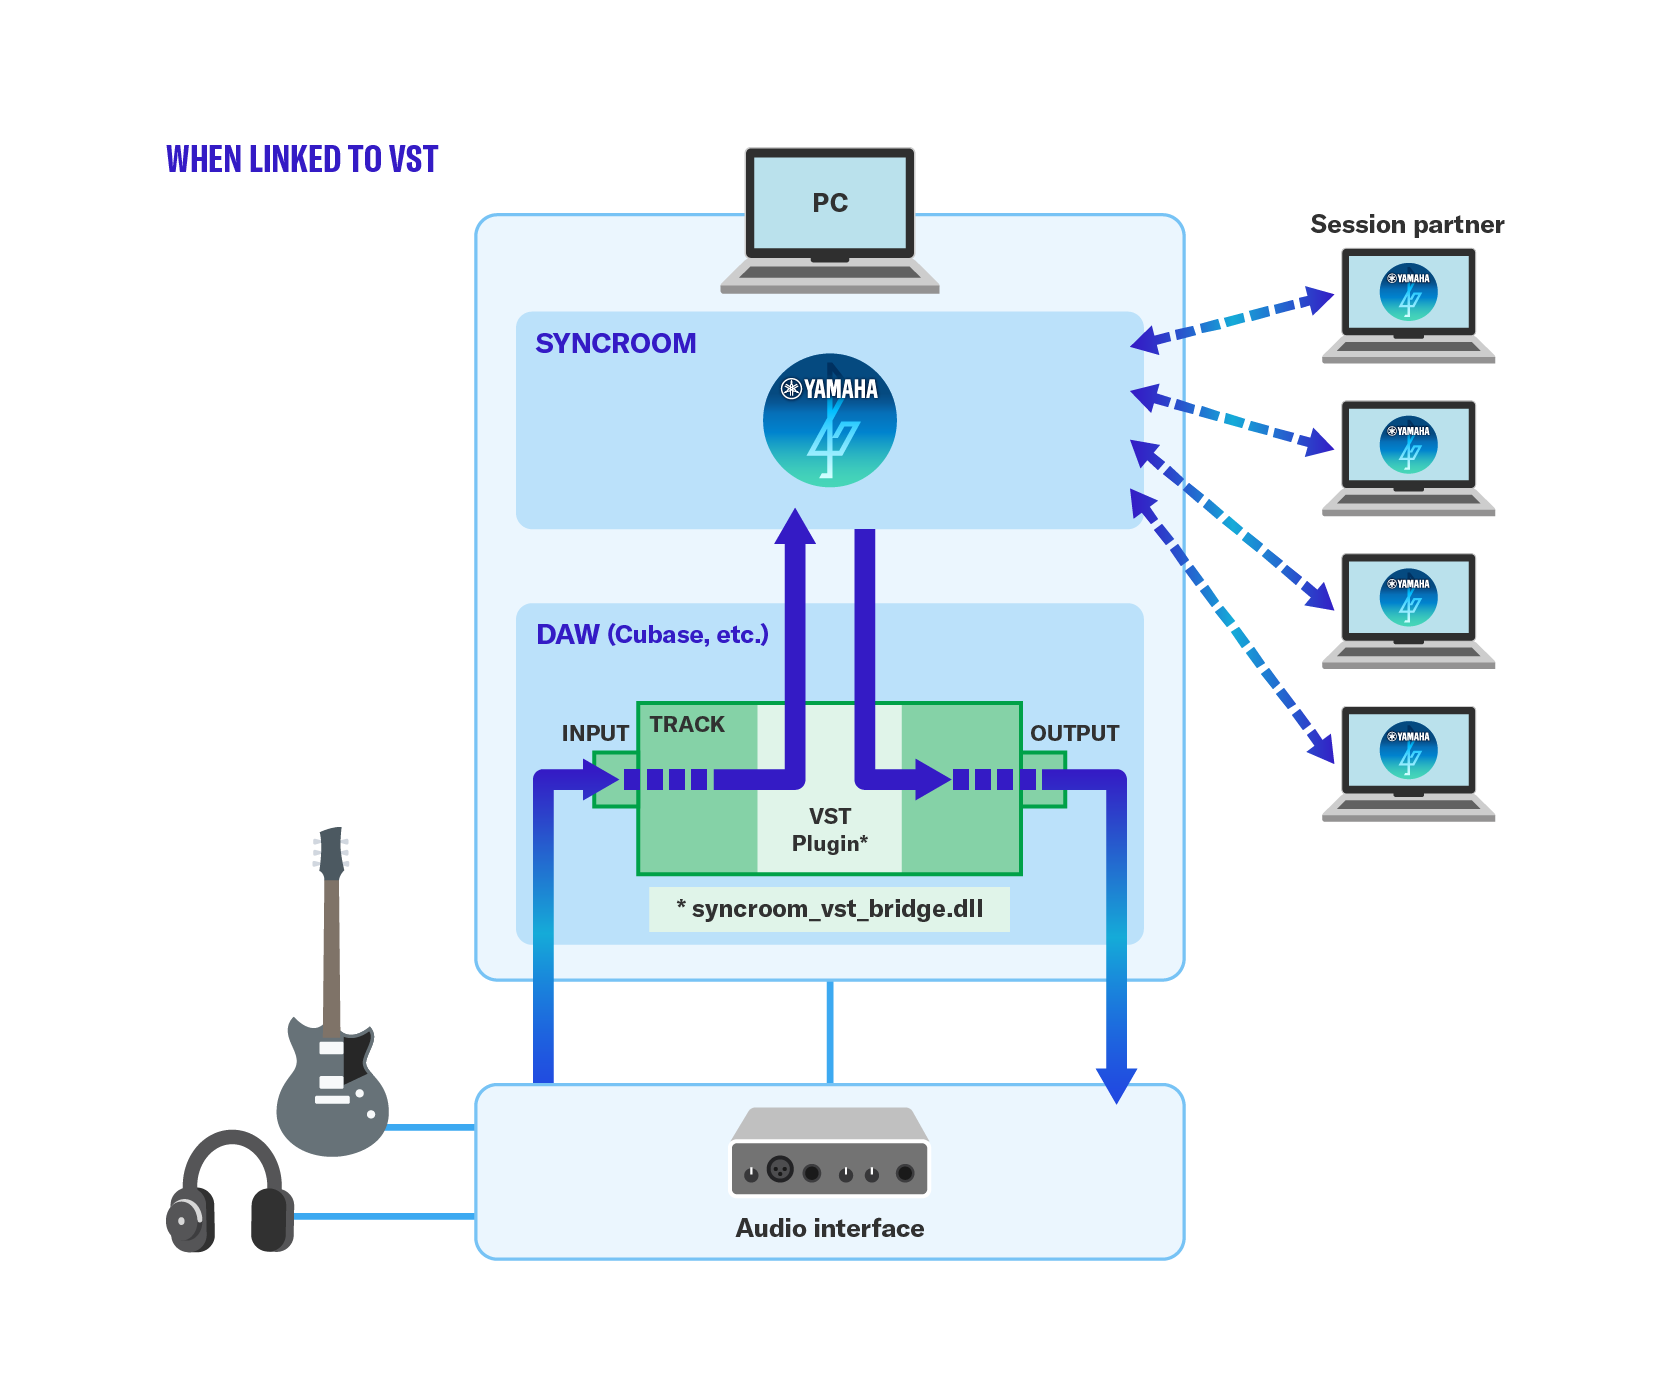
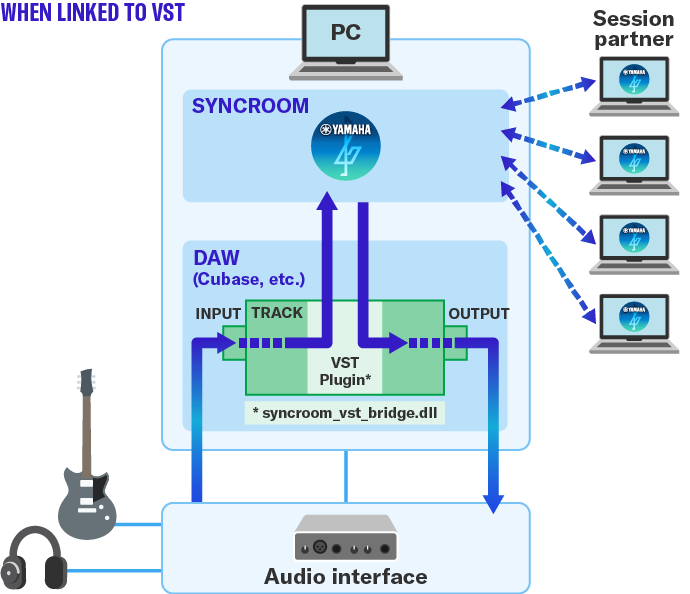
Using VST plug-ins allows you to work in linked to DAWs and the like.
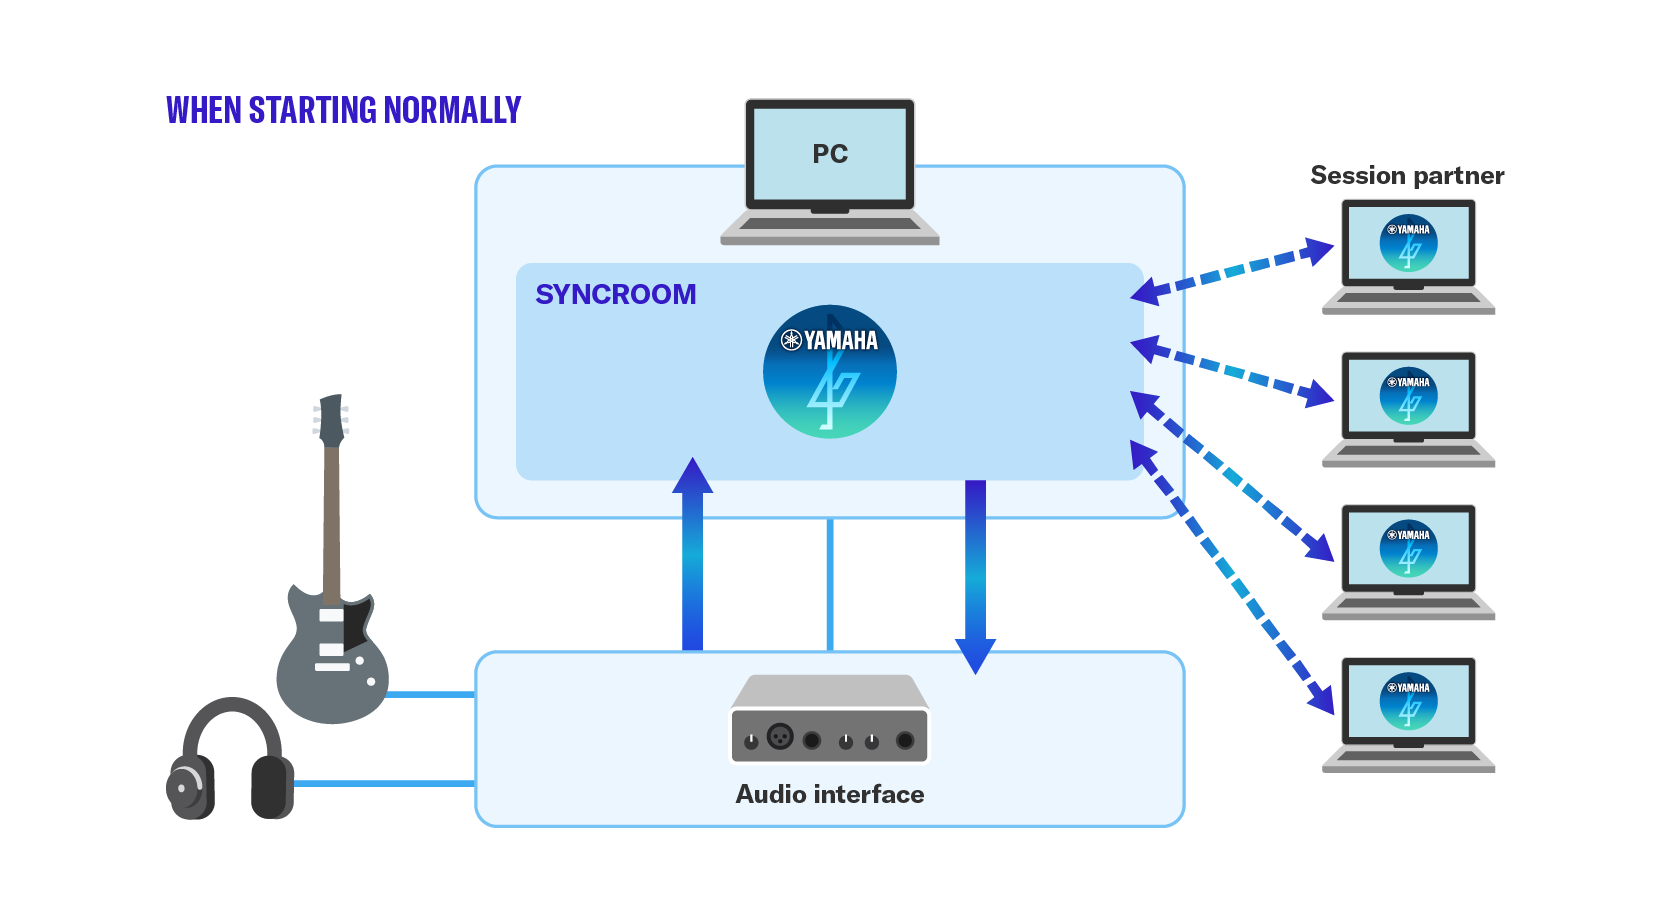
When SYNCROOM is started normally, it exchanges audio directly with the audio interface. When working linked with VST, SYNCROOM's audio communicates with your DAW or other VST host application via VST plug-ins.
SYNCROOM audio flow
The VST plug-in itself does not have SYNCROOM functions, and only exchanges audio with the SYNCROOM app itself. The audio input to the VST plug-in is sent as input to SYNCROOM, and the audio output from SYNCROOM (monitoring sound and each member's audio mixed) is returned as output of the VST plug-in.
SYNCROOM starts automatically when you use VST plug-ins in your DAW. If you start SYNCROOM again after that, if the VST plug-in is inserted, it will automatically be in the VST linked state.
When working with VST, more resources such as CPU and memory will be used than when SYNCROOM is operating alone. Depending on the performance of your PC, there may be restrictions on which VST instruments can be used simultaneously.
The attached VST plug-in may not be compatible with all DAWs (VST host applications).
Depending on the DAW, the display of SYNCROOM's delay time may be incorrect, but basically VST mode will not make the delay shorter than SYNCROOM alone.
2. How to use VST plug-ins
2-1. Installing VST plug-ins
First, download SYNCROOM, extract the files and install the application.
Copy the files in the "VSTPlugins" folder in the compressed file (syncroom_vst_bridge.dll, syncroom_vst_bridge_sub_multiout.dll, syncroom_vst_bridge.vst, or syncroom_vst_bridge_sub_multiout.vst for macOS) to the VST plug-in folder used in your DAW.
For example, for Cubase on Windows it would be C:\Program Files\Steinberg\VSTPlugins (depending on where it was installed).
Each plugin has the following functions.
syncroom_vst_bridge
Works as a VST FX plug-in (effect plug-in).
When you use this, SYNCROOM will start as "VST collaboration", the audio input to this plug-in will be sent as the input of SYNCROOM. The output from SYNCROOM (mixed monitor sound and each member's audio) is returned as the output of the VST plug-in.
syncroom_vst_bridge_sub_multiout
Works as a VSTi plug-in (instrument plug-in) and is used when you want to take output from SYNCROOM with multiple outputs.
It cannot be used alone, and must be used together with syncroom_vst_bridge. It has 12 OUTPUT channels (stereo * 6), and the monitor sound and the sound from the connected members are output separately.
*While it takes the form of an instrument plug-in for multiple outputs, it does not have the function of an instrument.
If you are using Cubase 8 or later and ASIO-Guard is enabled, the output sound may be strange and not output correctly. In this case, disable ASIO-Guard for syncroom_vst_bridge and syncroom_vst_bridge_sub_multiout by following the steps below. The following steps are explained in Cubase 10.5.
From the menu, select Studio > VST Plugin Manager.
Click the "VST Instruments" tab.
Click the bottom left "i" button (show plugin info), then click syncroom_vst_bridge_sub_multiout.
Click the part of "ASIO-Guard" that says "Enabled" and switch it to "Disabled".
2-2. Examples of using VST plug-ins
The following is a specific usage example in Cubase 10.5. The explanation below is for Windows, but the basics are the same for macOS. *Cubase Pro is necessary to record multi-output audio separately, using syncroom_vst_bridge_sub_multiout. Multi-output is possible with Cubase Elements, or the like, but individual recording is not possible.
For specific procedures, see2-2-4. Use as multi-output.
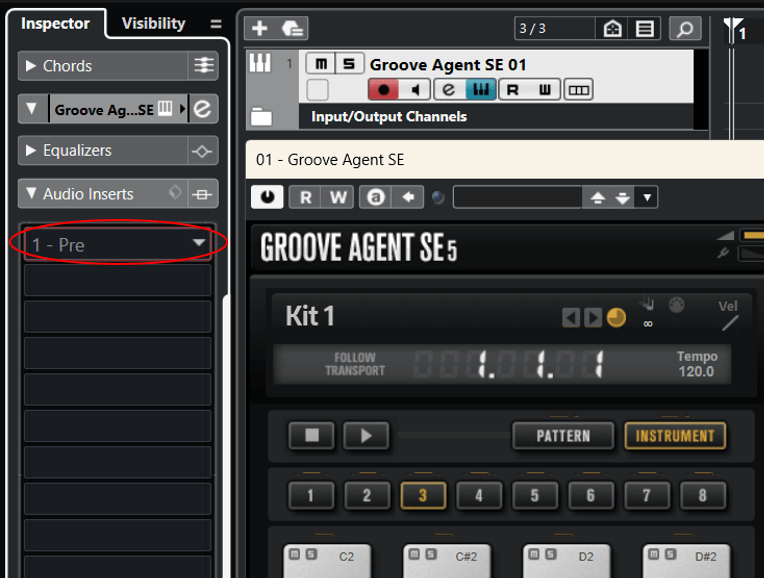
2-2-1. Use in combination with VST instruments
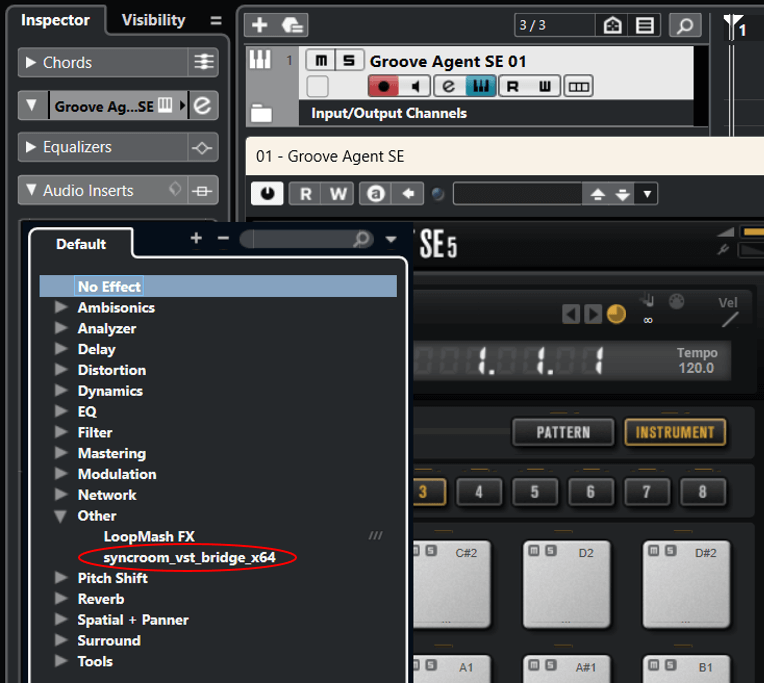
First, add an instrument track and load the VST instrument you want to use (in this example, we will explain using Groove Agent SE).
Click on "Audio Insert" and a list of effects will appear. Select syncroom_vst_bridge from this list.
SYNCROOM will startup automatically. In this state, the audio from the instrument will be sent to SYNCROOM, and the audio from SYNCROOM will be output from the track.
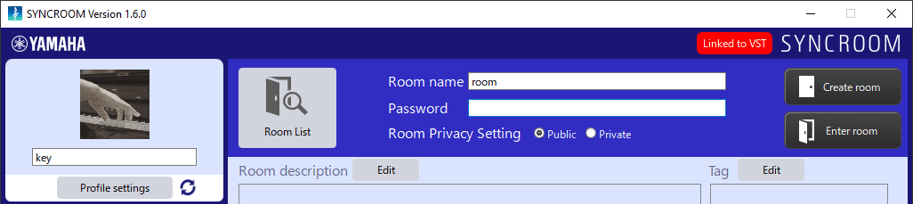
While linked with the VST plug-in, "Linked to VST" is displayed on the screen.
Launching SYNCROOM while VST plug-ins are running will cause it to automatically enter VST mode.
2-2-2. Use input voice from a microphone or other device
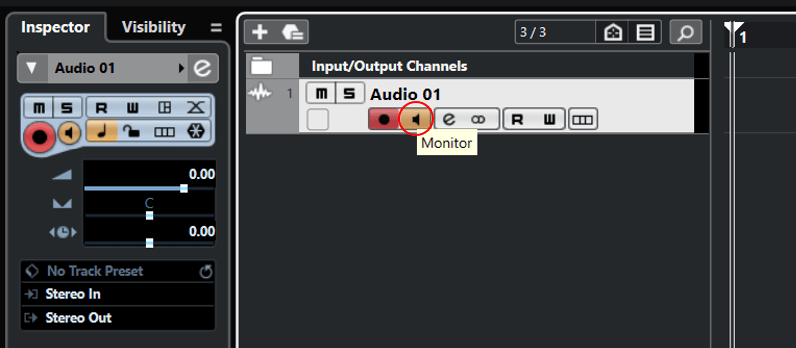
You can use input voice from your audio interface by enabling track monitoring as shown below. *If the audio interface you are using has a direct monitoring function, set it to OFF (to avoid duplicate sounds).
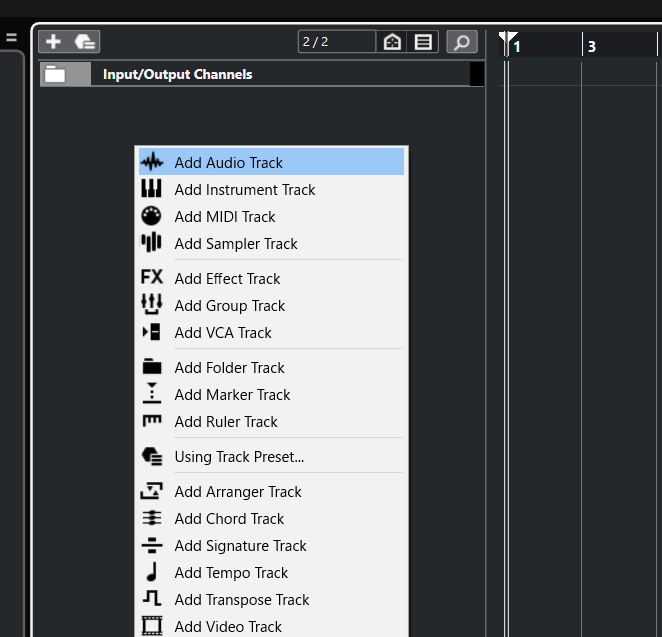
Add an Audio track.
Click the monitoring button (speaker icon) (the monitoring button is located to the right of the record button "●").
This will allow incoming audio from your audio interface to be output from the track.
Click "Inserts" to call syncroom_vst_bridge. Now the input voice from the audio interface will be sent to SYNCROOM.
You can also perform sessions with voice with effects applied by inserting various VST effects (such as reverb or amp simulator) before SYNCROOM.
2-2-3. Simultaneously use input voice such as microphone and VST instrument
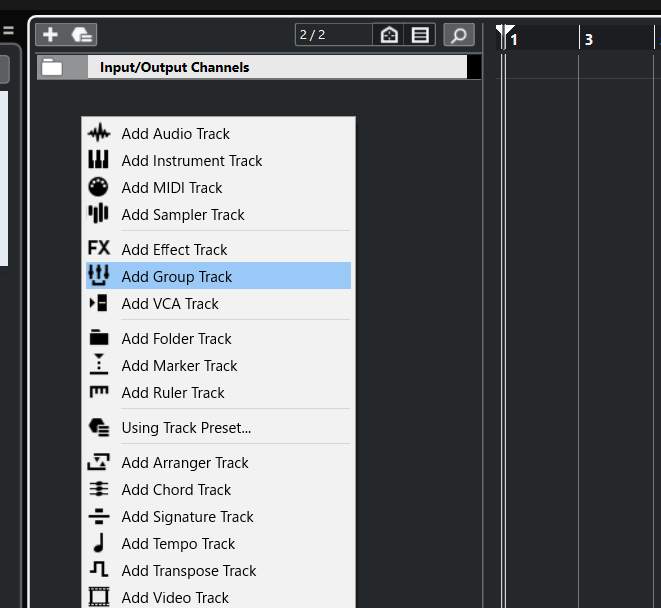
In Cubase, you can group audio from multiple tracks by using a function called "Group Channel". Specifically, the steps are as follows.
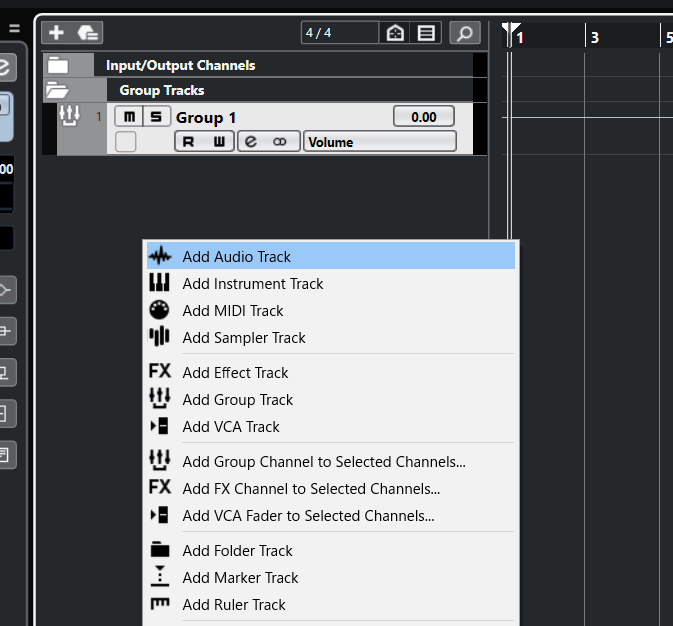
Add a "group track".
Next, add an Audio track.
As in step ② above, click the "monitoring button" to enable inputs such as the microphone.
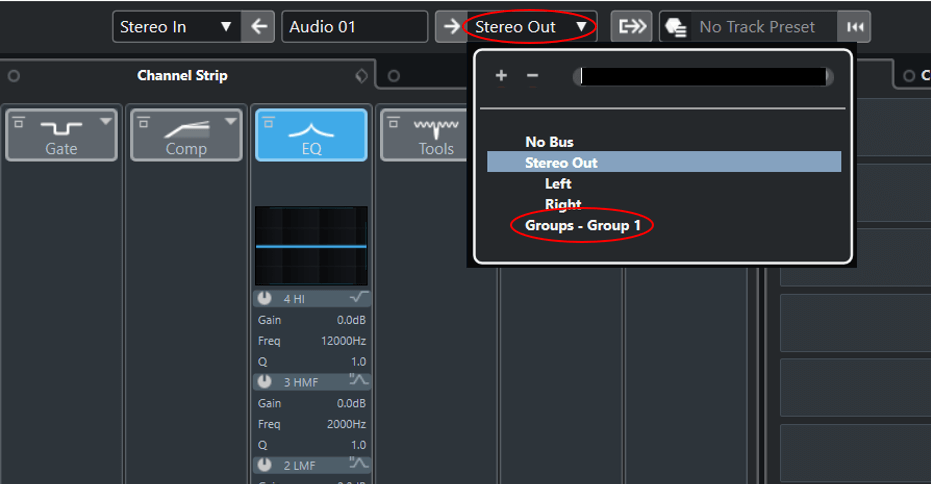
Click the button labeled "e" (edit channel settings) for the added audio track.
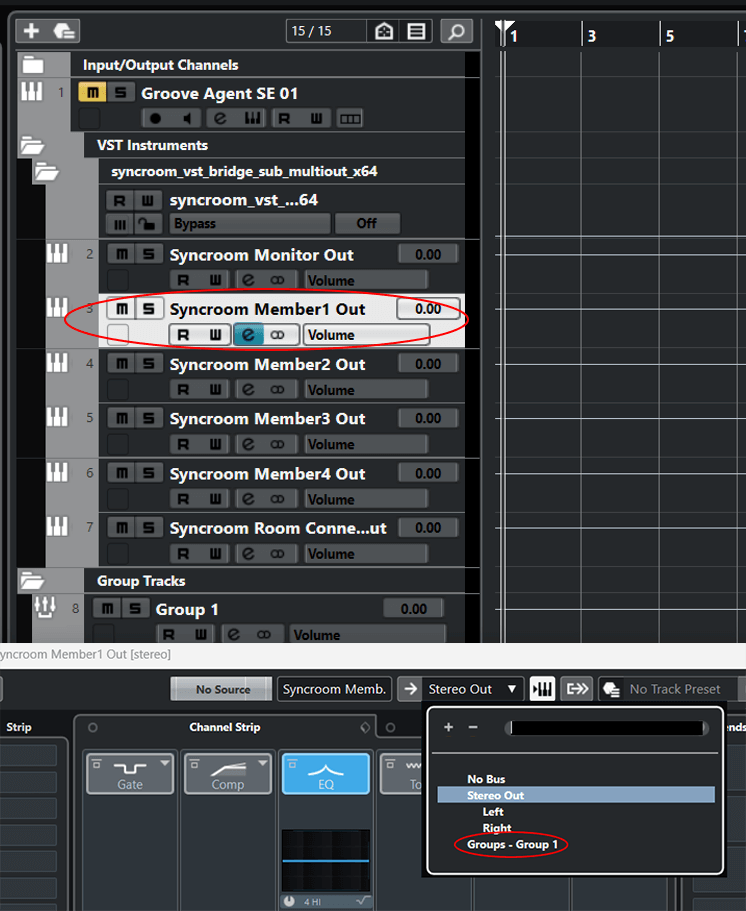
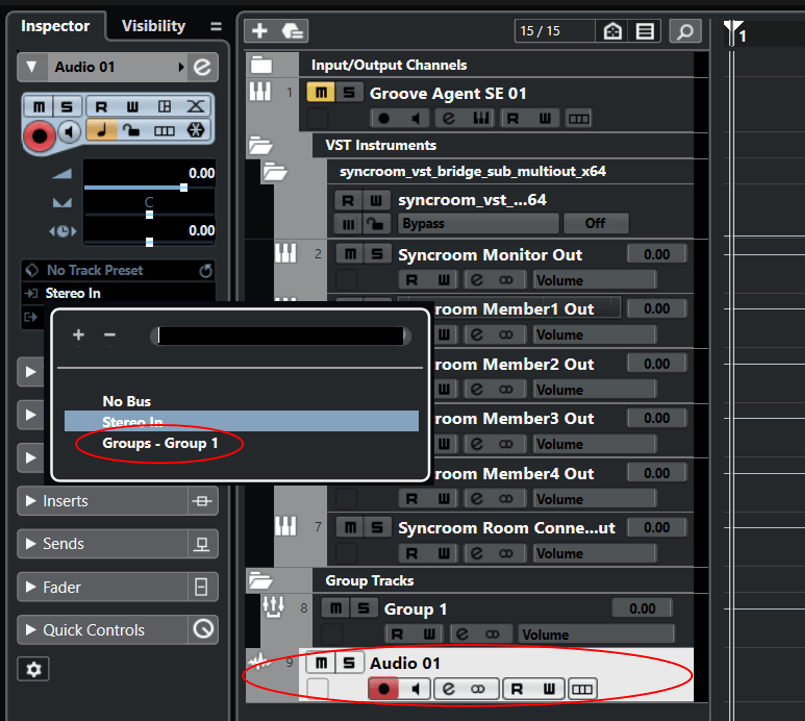
The channel setting screen will be displayed. Click on the right side of the track name (such as "Audio 01") in the upper left of the screen and select the created group channel (Group-Group1).
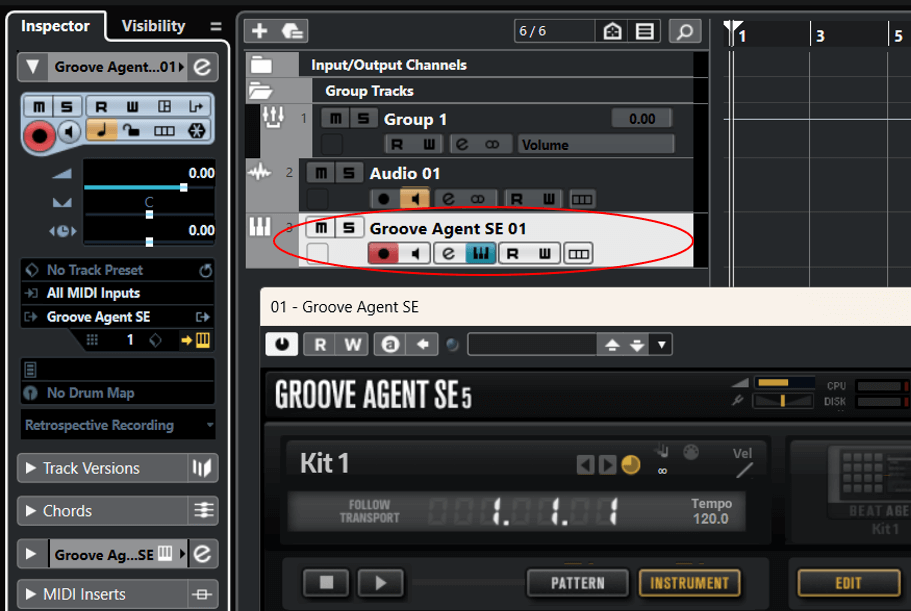
Then add an instrument track and load the VST instrument you want to use. After that, follow the same steps as the audio tracks described above to set the output of the VST instrument's track to the same group channel (Group-Group1).
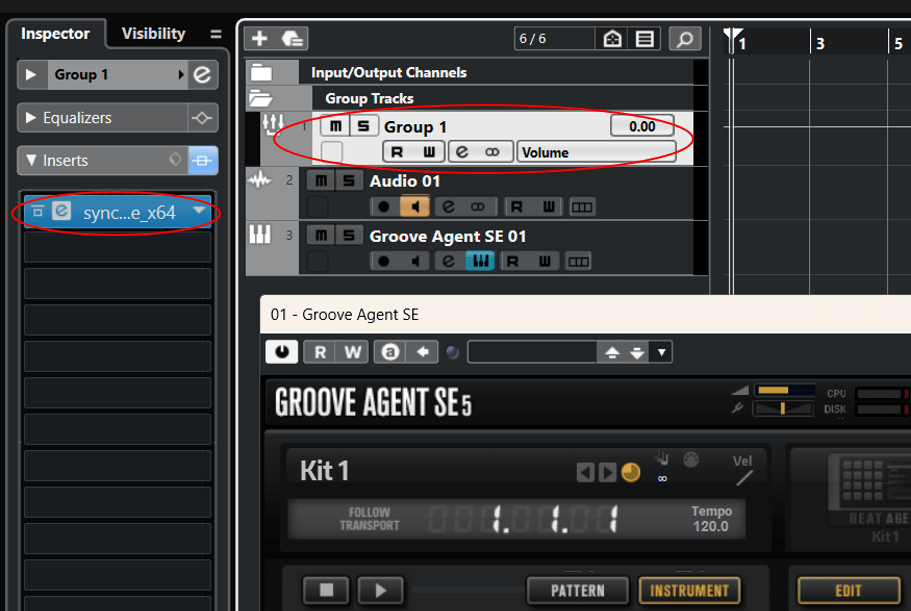
Select the "Group1" track of the group channel and call "syncroom_vst_bridge" from "Inserts" in the inspector.
Now both the input voice from the audio interface and the audio from your VST instrument will be sent to SYNCROOM.
2-2-4. Use as multi-output
First, set the above 2-2-1.
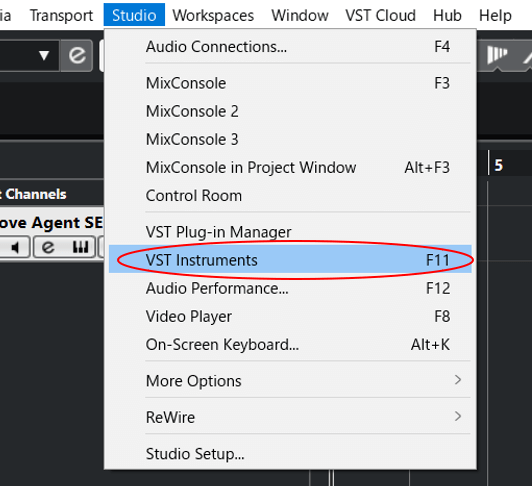
Click “Studio” in the Cubase menu and select “VST Instruments”.
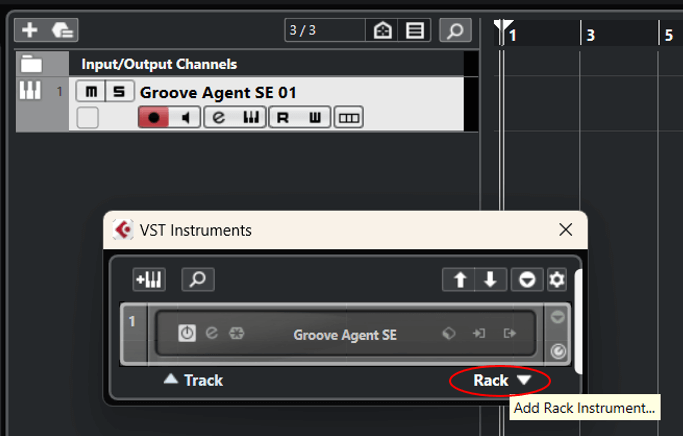
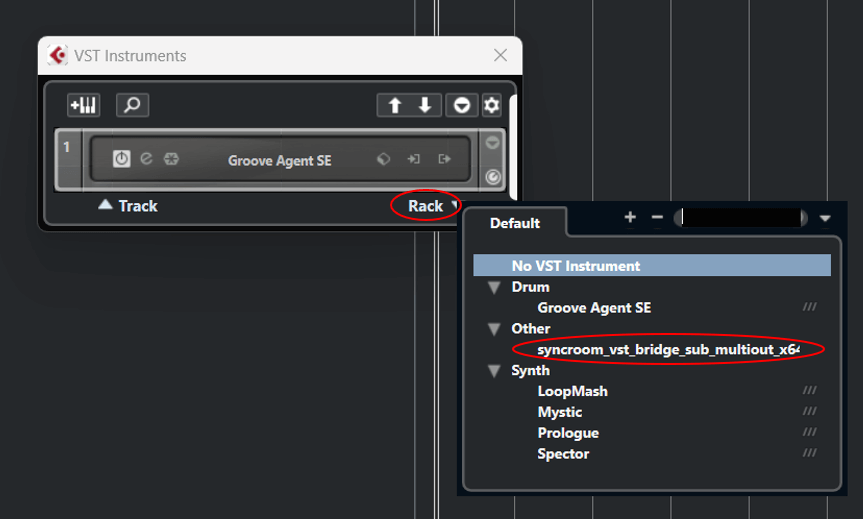
From the "VST Instruments" screen, click "Rack".
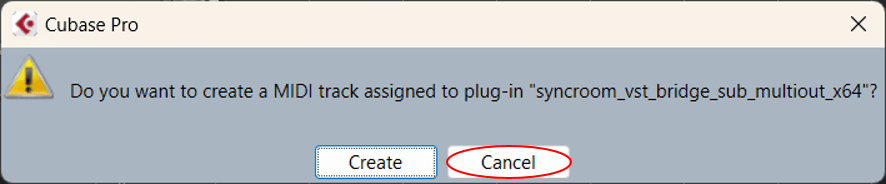
A list of instruments will be displayed. Select syncroom_vst_bridge_sub_multiout.
If you see a dialog asking whether you want to create a MIDI track, then you can click Cancel.
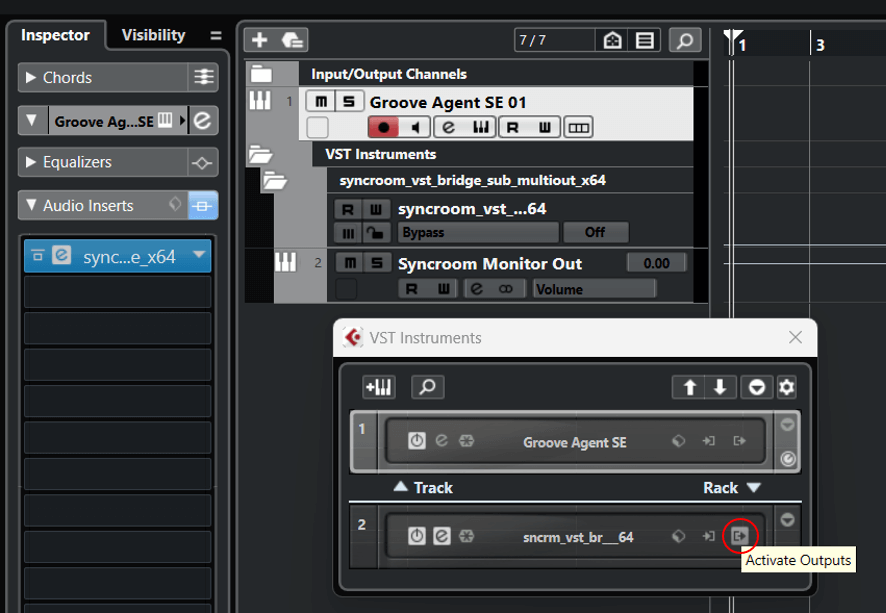
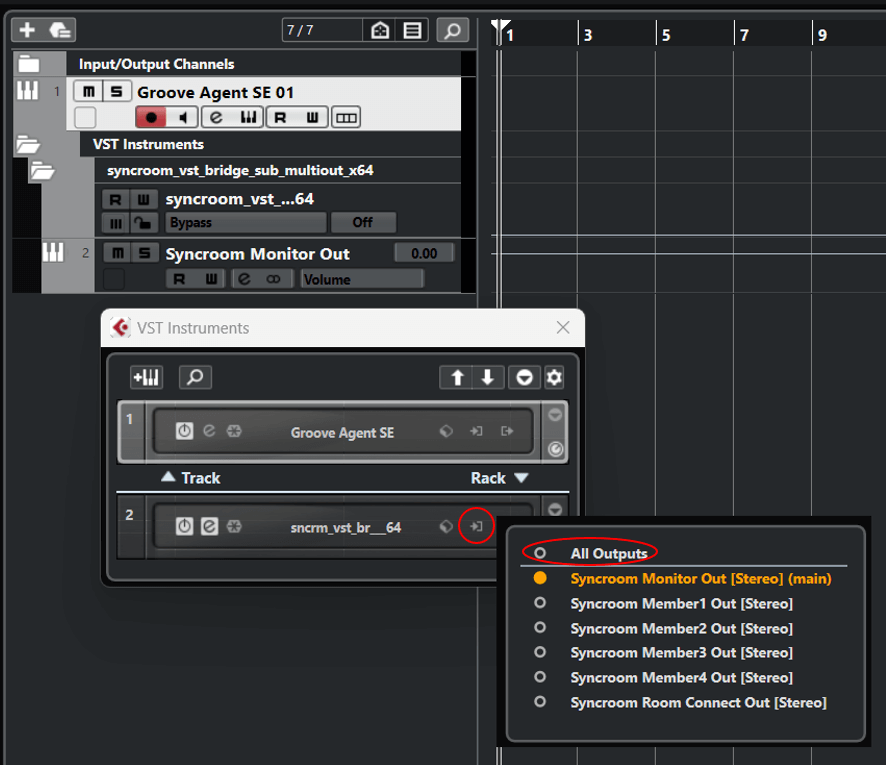
From the "VST Instruments" screen, click the "Enable Outputs" button and select "All Outputs".
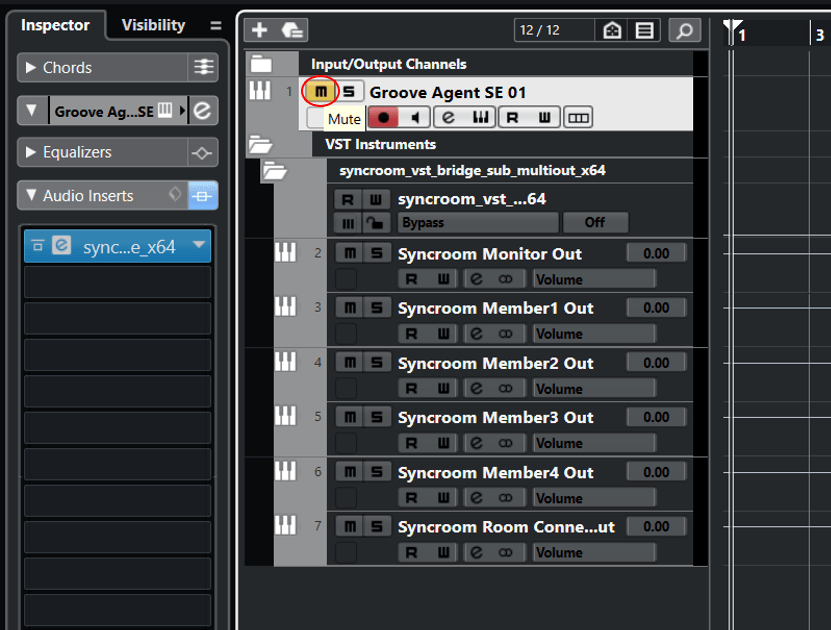
You will see 6 stereo tracks on the screen. They correspond to monitor output, the four locations of connected members, and the room connection audio (audio that reflects the pan pot on the SYNCROOM screen is output).
The multi-output settings are now complete, but since the original track (the track with the syncroom_vst_bridge inserted) and the output voice will be duplicated, so mute this.
If you are using Cubase Pro, you can record each part individually by combining it with the group channel function.
Create a group track and set the channel output of the instrument you want to record to that group track.
Create an Audio track for recording. Set the Audio track's input to the group track you want to record.