Manual Mobile version
- Watch the Easy Startup Guide video
- 1. Startup
- 1-1. Recommended Environment
- 1-2. Communication Environment
- 2. Rooms Screen (Home Screen)
- 2-1. Creating and Editing Rooms
- 2-1-1. Creating Rooms
- 2-1-2. Editing Rooms
- 2-1-3. Deleting Rooms
- 2-2. Searching for Rooms
- 2-2-1. Toggling Between Room Tabs
- 2-2-2. Room Cards
- 2-2-3. Room Detailed Display
- 2-3. Entering a Room
- 2-3-1. Selecting an Icon
- 2-3-2. Selecting a Part
- 2-3-3. Setting Up Your Device
- 2-4. Adding Favorites and Blocking Users
- 3. Room Screen (Basic Operations)
- 3-1. Adjusting Sound (Mixing)
- 3-2. Mute
- 3-3. Meaning of Other Symbols
- 3-4. User Details
- 3-5. Exiting a Room
- 3-6. Checking Room Details and Sharing Room Links
- 4. Room Screen (menu bar)
- 4-1. Chatting in the room
- 4-2. Using the metronome and playing Audio files
- 4-2-1. Playing Audio Files
- 4-2-2. Using the Metronome
- 4-3. Changing Your Settings
- 4-4. Record Audio
- 5. Users Screen
- 5-1. Searching for Users
- 5-2. User Detailed Display
- 5-3. Adding Users to Favorites
- 5-4. Blocking Users
- 6. My Profile
- 6-1. Setting Up and Editing Your Profile
- 6-2. Profile Privacy Settings
- 7. Settings Menu
- 7-1. Account Settings
- 7-2. Data Transmission Settings
- 7-3. Advanced Settings
- 7-4. Connectivity Checker
- 7-5. About SYNCROOM
- 7-6. Log out
Refer to the following manuals for how to use the iOS/iPadOS version "SYNCROOM" and the Android version "SYNCROOM β"(✳︎)
(✳︎) The Android version "SYNCROOM β" is a non-supported β version service that Yamaha Corporation is working on as a research and development theme.
1. Startup
1-1. Recommended Environment
Your device must be connected to a stable, low-latency network in order to hold a session on the mobile version of SYNCROOM. Before using SYNCROOM, please prepare the following environment.
- Devices on which you can use SYNCROOM (iOS/Android)
- Broadband environment such as optical fiber
- Wireless LAN access point (5 GHz band recommended)

1-2. Communication Environment
① With SYNCROOM, it is important to not simply have a fast communication speed (capable of large-capacity communication per second), but to be able to communicate stably in smaller time units.
② Even if you contract with the same provider and the same service, communication status varies depending on the area and time of use, so it is difficult to define "the correct line setup". If the line is congested, it may happen that you cannot connect to the room, or there will be greater latency.
③ In SYNCROOM audio communication, user terminals communicate directly with each other without going through a server (P2P connection). Audio communication may be affected depending on the line status of the other users.
④ We recommend setting the wireless LAN channel so that it does not interfere with other access points. Also, connecting multiple devices to the same access point will cause latency.
⑤ If you are using IPv4-as-a-Service, connection with the other users may be affected depending on the characteristics of the service. Also see the FAQ "Can I use SYNCROOM with the IPv4-as-a-Service ?".
⑥ We do not recommend using 4G/LTE as it tends to increase latency. We have not been able to sufficiently verify the use of 5G at present.
⑦ Be mindful of the amount of data used when using a mobile phone connection.
2. Rooms Screen (Home Screen)
On the Rooms screen, you can perform actions such as searching for rooms and creating new rooms.

2-1. Creating and Editing Rooms
2-1-1. Creating Rooms
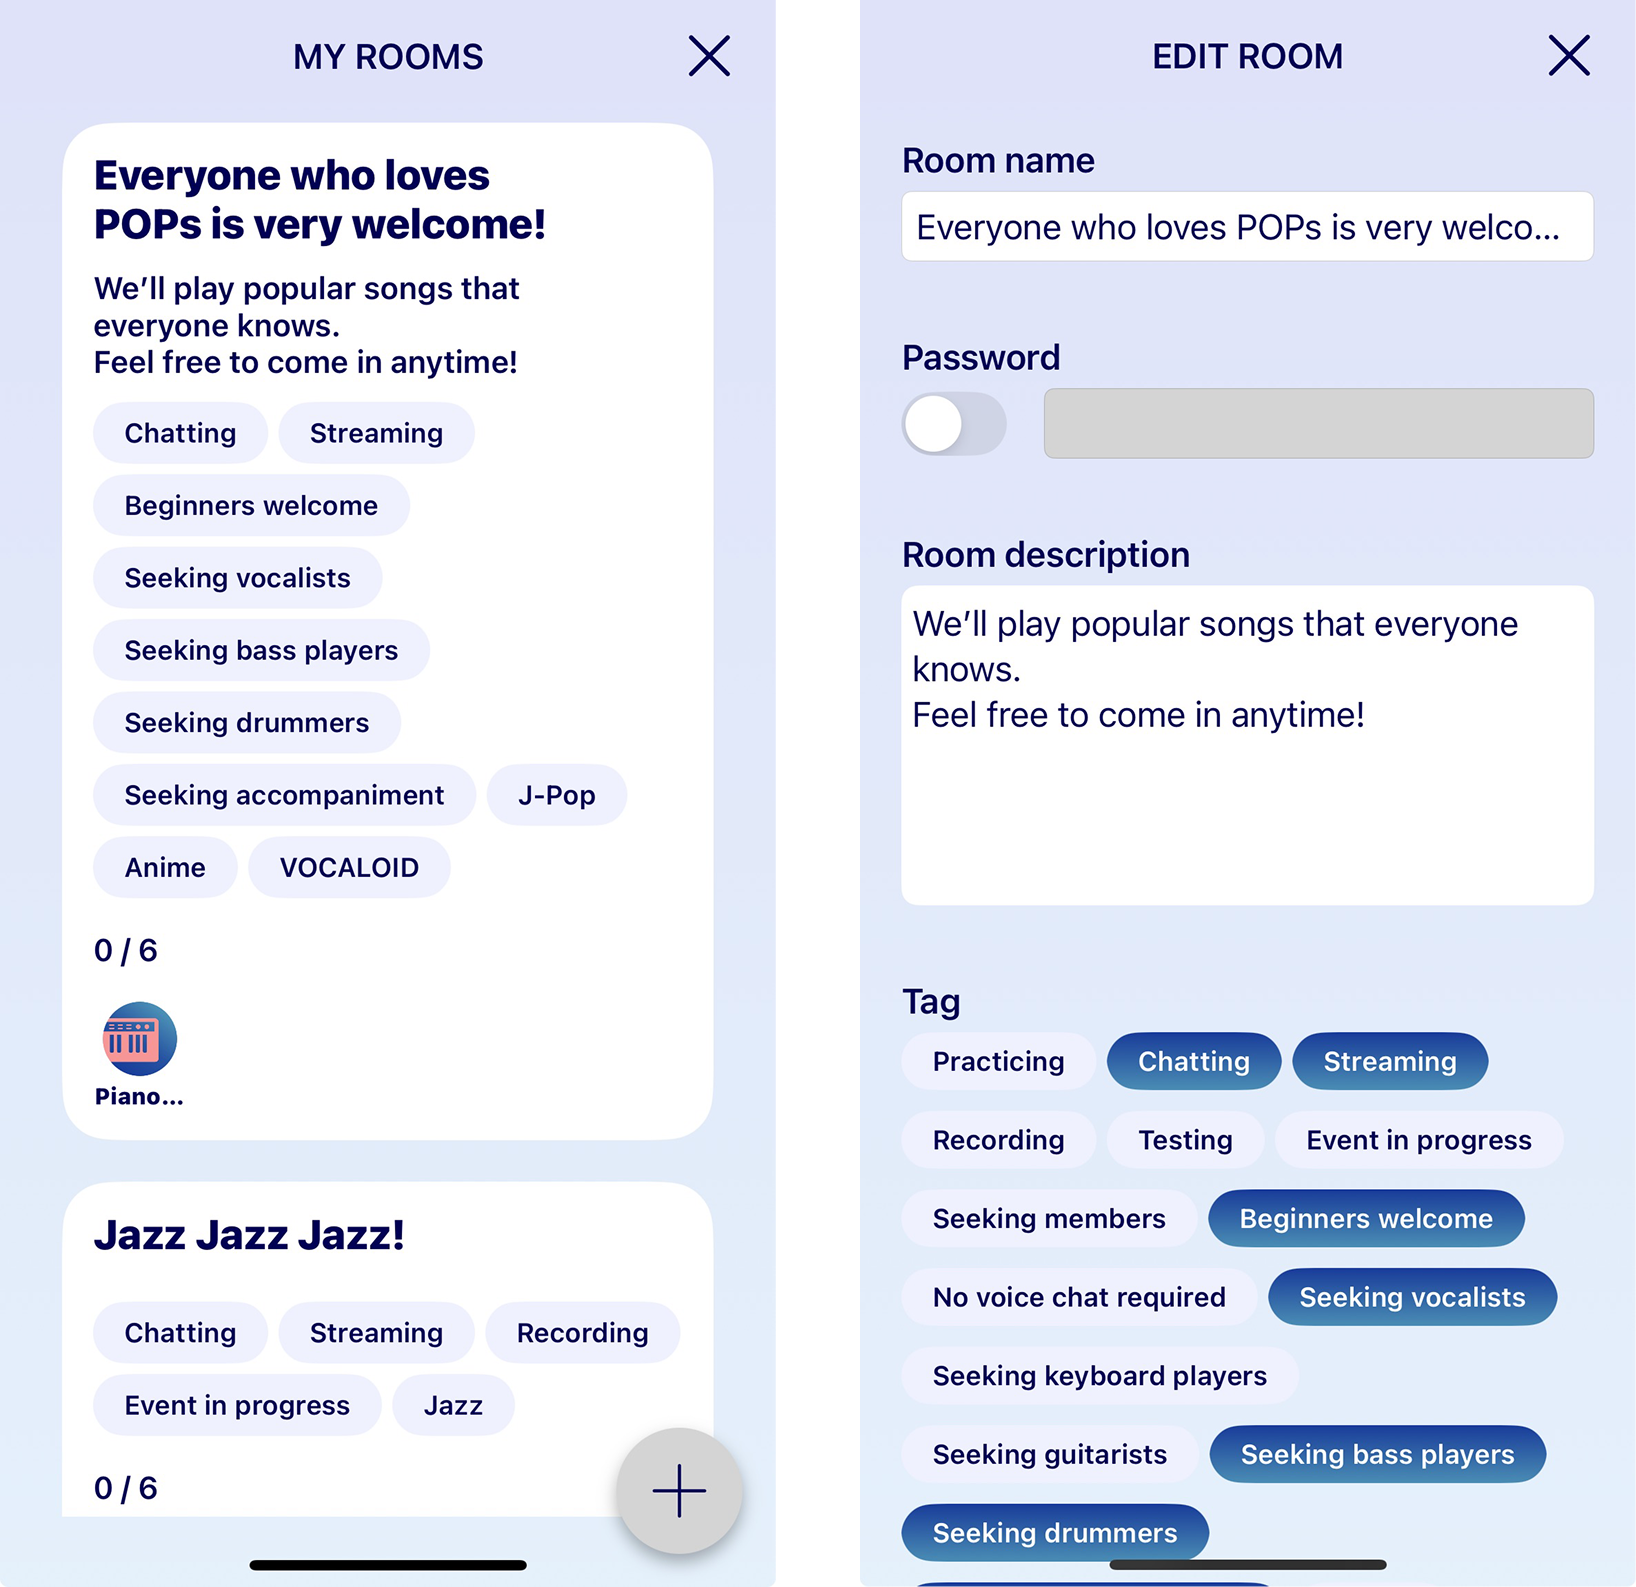
Tap the “MY ROOMS” button to go to the Rooms screen. Tap the + button to create a new room. When you have successfully created a new room, you can choose whether to enter the room immediately or not. If you do not enter immediately, the room will be a “Standby Room” and saved in MY ROOMS.
Note: You can create up to three rooms.
An Active Room will last up to six hours after you create it. If you want to continue your session, you will need to create a new room.
- ❶ Room name
- Enter the name you want for the room.
- ❷ Password
- If you set a password, you can create a room where only users who know the password can enter.
- ❸ Room Description
- Enter a description of the room. This will help other users find a room that suits them.
- ❹ Tags
- Select which tags will be displayed on the Rooms screen. This will help other users find a room that suits them.
- ❺ Make Room Public
- Switch “Make room public” on to make the room public. When you enter your room, it will appear under the “Active Rooms” tab. If you do not enter the room, it will appear under the “Standby Rooms” tab.
2-1-2. Editing Rooms
If you tap the card of a created room in MY ROOMS, the detailed display for rooms will appear. Tap the “Edit” button to make changes to what you entered on the edit screen.
If you have set a password for the room, the “Reset Password” button will be displayed. Tap the button to delete and reset the password.
2-1-3. Deleting Rooms
If you tap and hold a room card, the “Delete Room” button will appear. Press it to delete the room you created.
Note: If you do not enter the room you created, it will be a “Standby Room”. If you do not enter for one month, the room will be automatically deleted.

2-2. Searching for Rooms
Tap the  at the top of the "Room" screen to conduct a partial search on room names, comments, and tags, or filter on password protection .
2-2-1. Toggling Between Room Tabs
If you toggle between the Active Rooms and Standby Rooms tabs on top of the screen, you can see the rooms you can currently enter and rooms that are on standby.
- Active Room: Room that you can currently enter.
- Standby Room: Room you cannot join until the room creator has entered.
Note: If a room creator did not immediately enter the room when it was created, it will be a “Standby Room”. When the room’s creator enters a Standby Room, it will become an “Active Room” and other users will be able to enter.
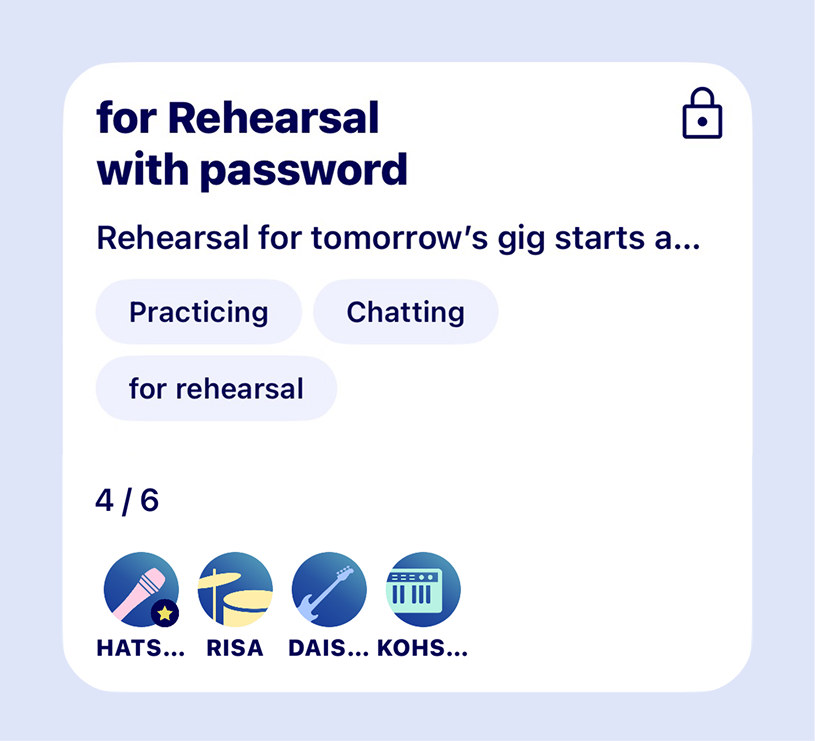
2-2-2. Room Cards
A room card contains the following information about the room.
- ❶ Room name
- ❷ Password icon
This icon will only appear on rooms that require a password.
- ❸ Room comments
- ❹ Room tags
- ❺ Room participants
The “favorites” icon will be displayed on the icon of users you have added to your favorites.
2-2-3. Room Detailed Display
If you tap a room card, the detailed display will appear. The detailed display will show the nicknames, parts, Beginner symbol, and favorites icons of the users in the room.
The username of the room creater is indicated in blue.
Tap a user’s icon and you will be redirected to that user’s profile.
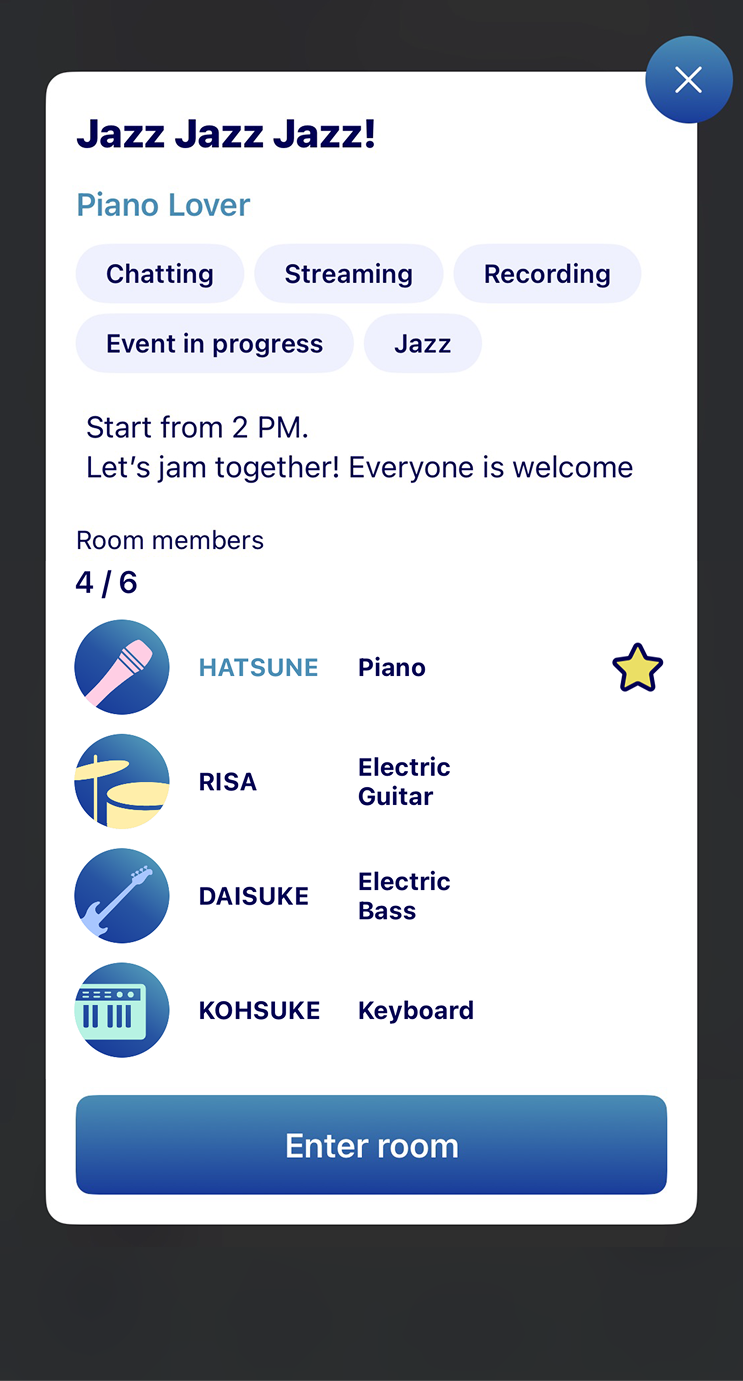
2-3. Entering a Room
If you tap “Enter room” on the detailed display of a room, you will be redirected to the “Individual Settings” screen. You can select icons and parts, and configure advanced settings for your device.
2-3-1. Selecting an Icon
If you tap on your user icon, you can select its design (shape) and color.
Note: You cannot select a default icon when linked to your X icon. For details, see “Link app to X”.

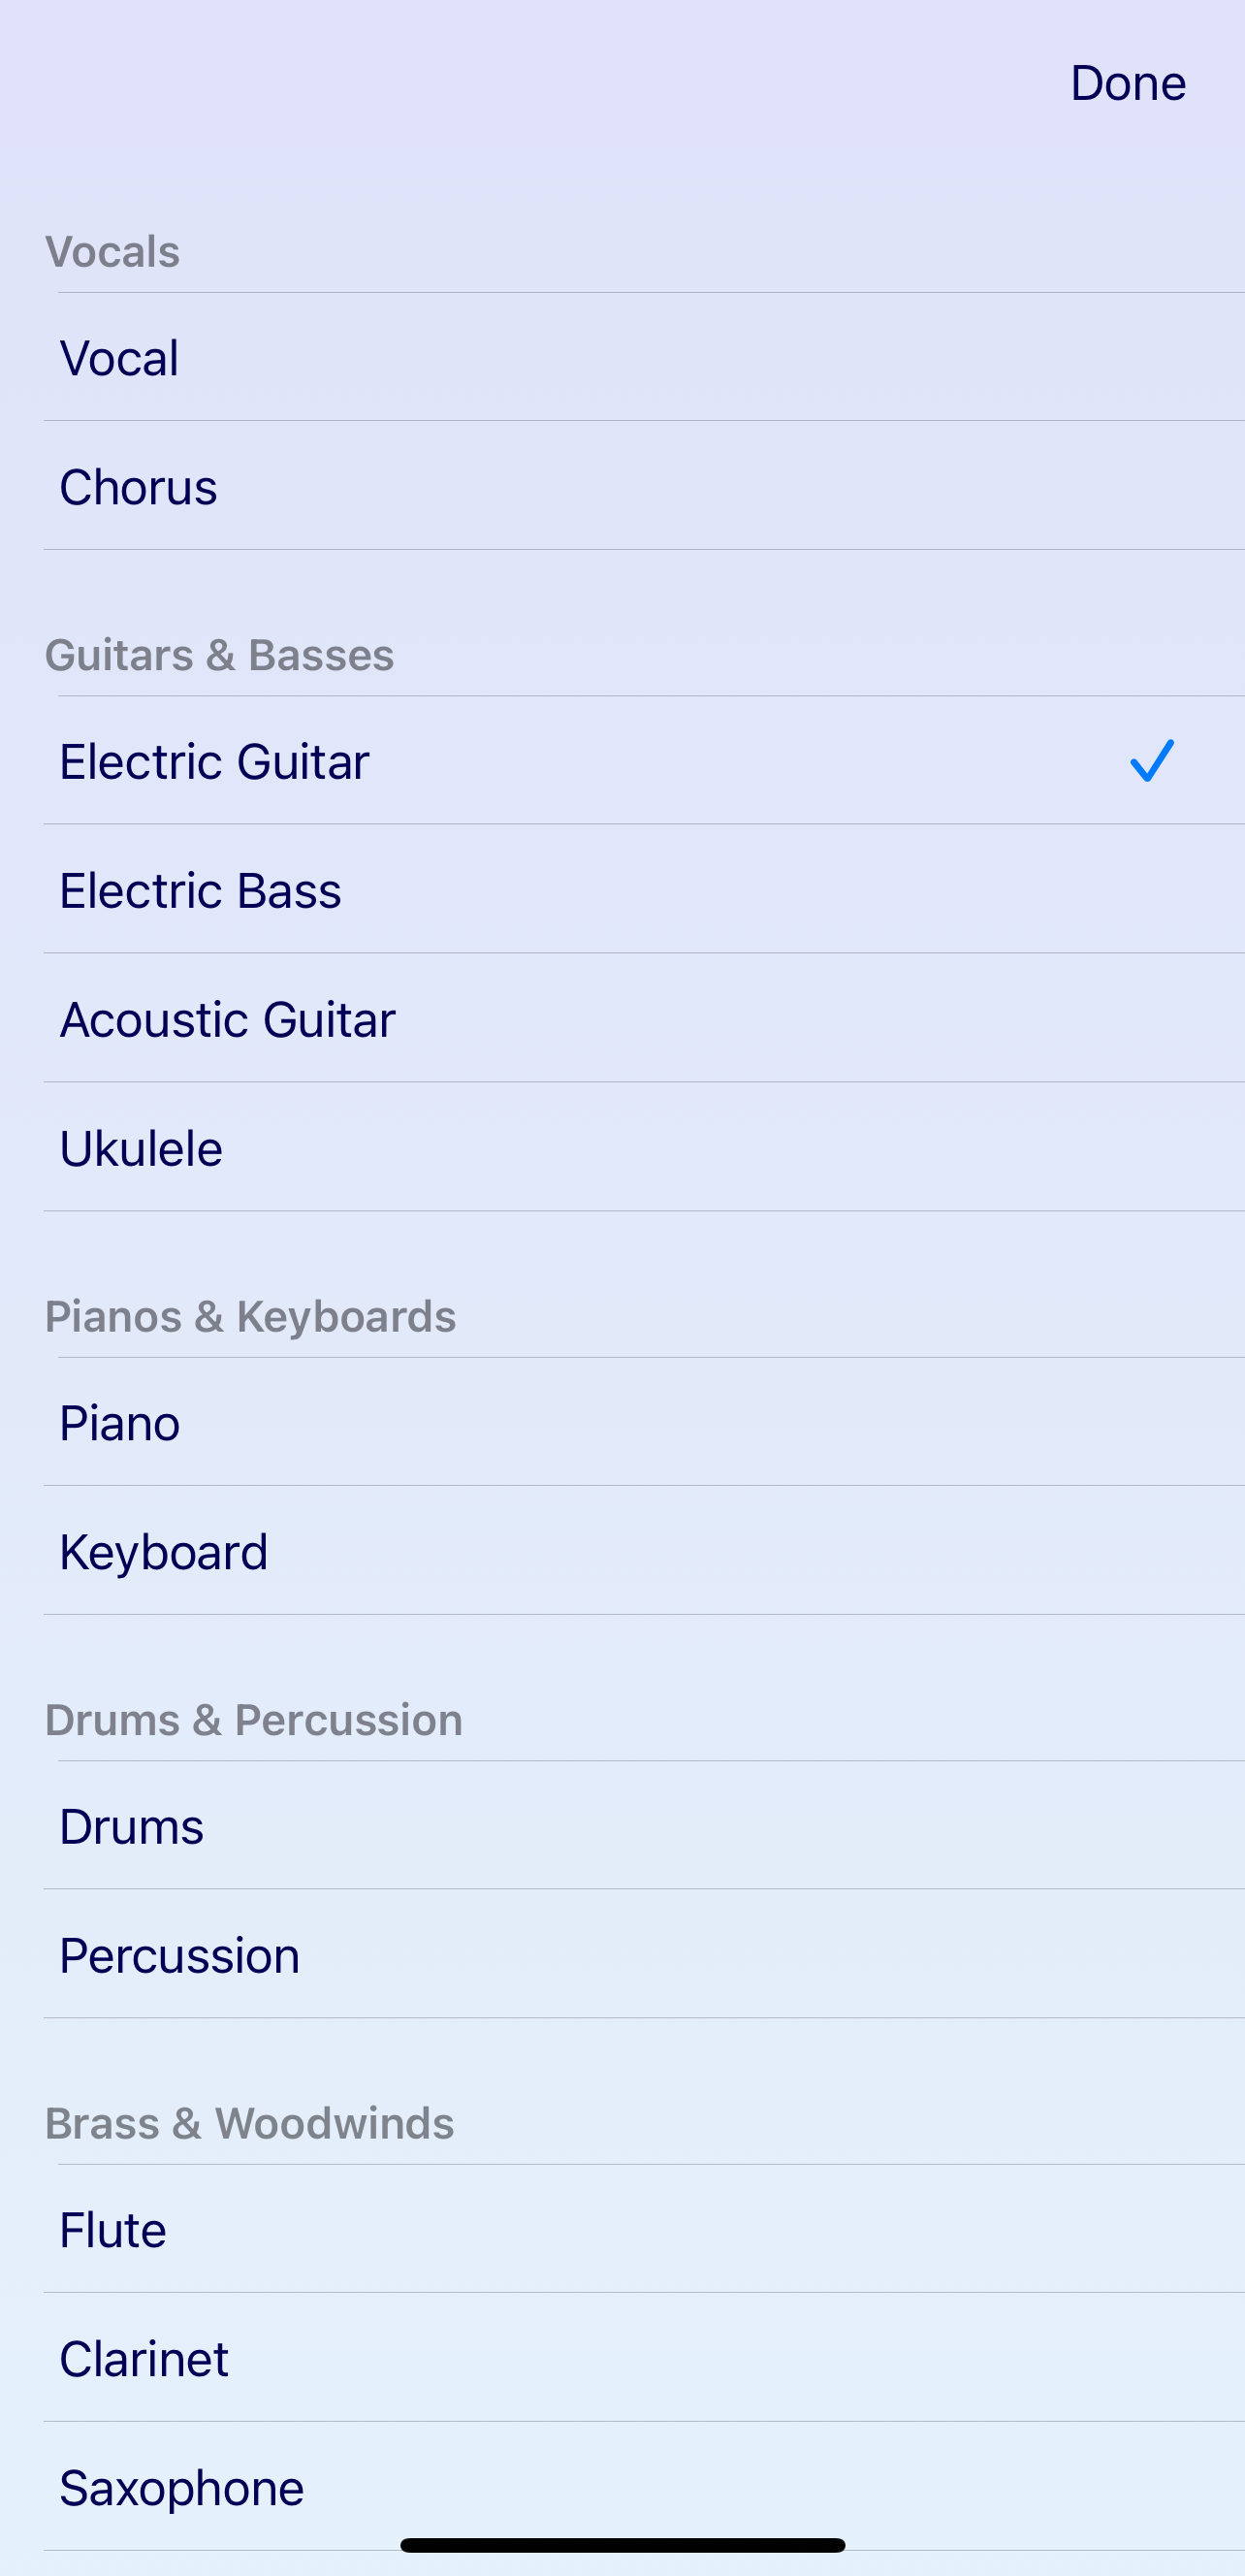
2-3-2. Selecting a Part
Select the part you will play in the room. If the part you want is not on the list, select “Custom” and enter the part.
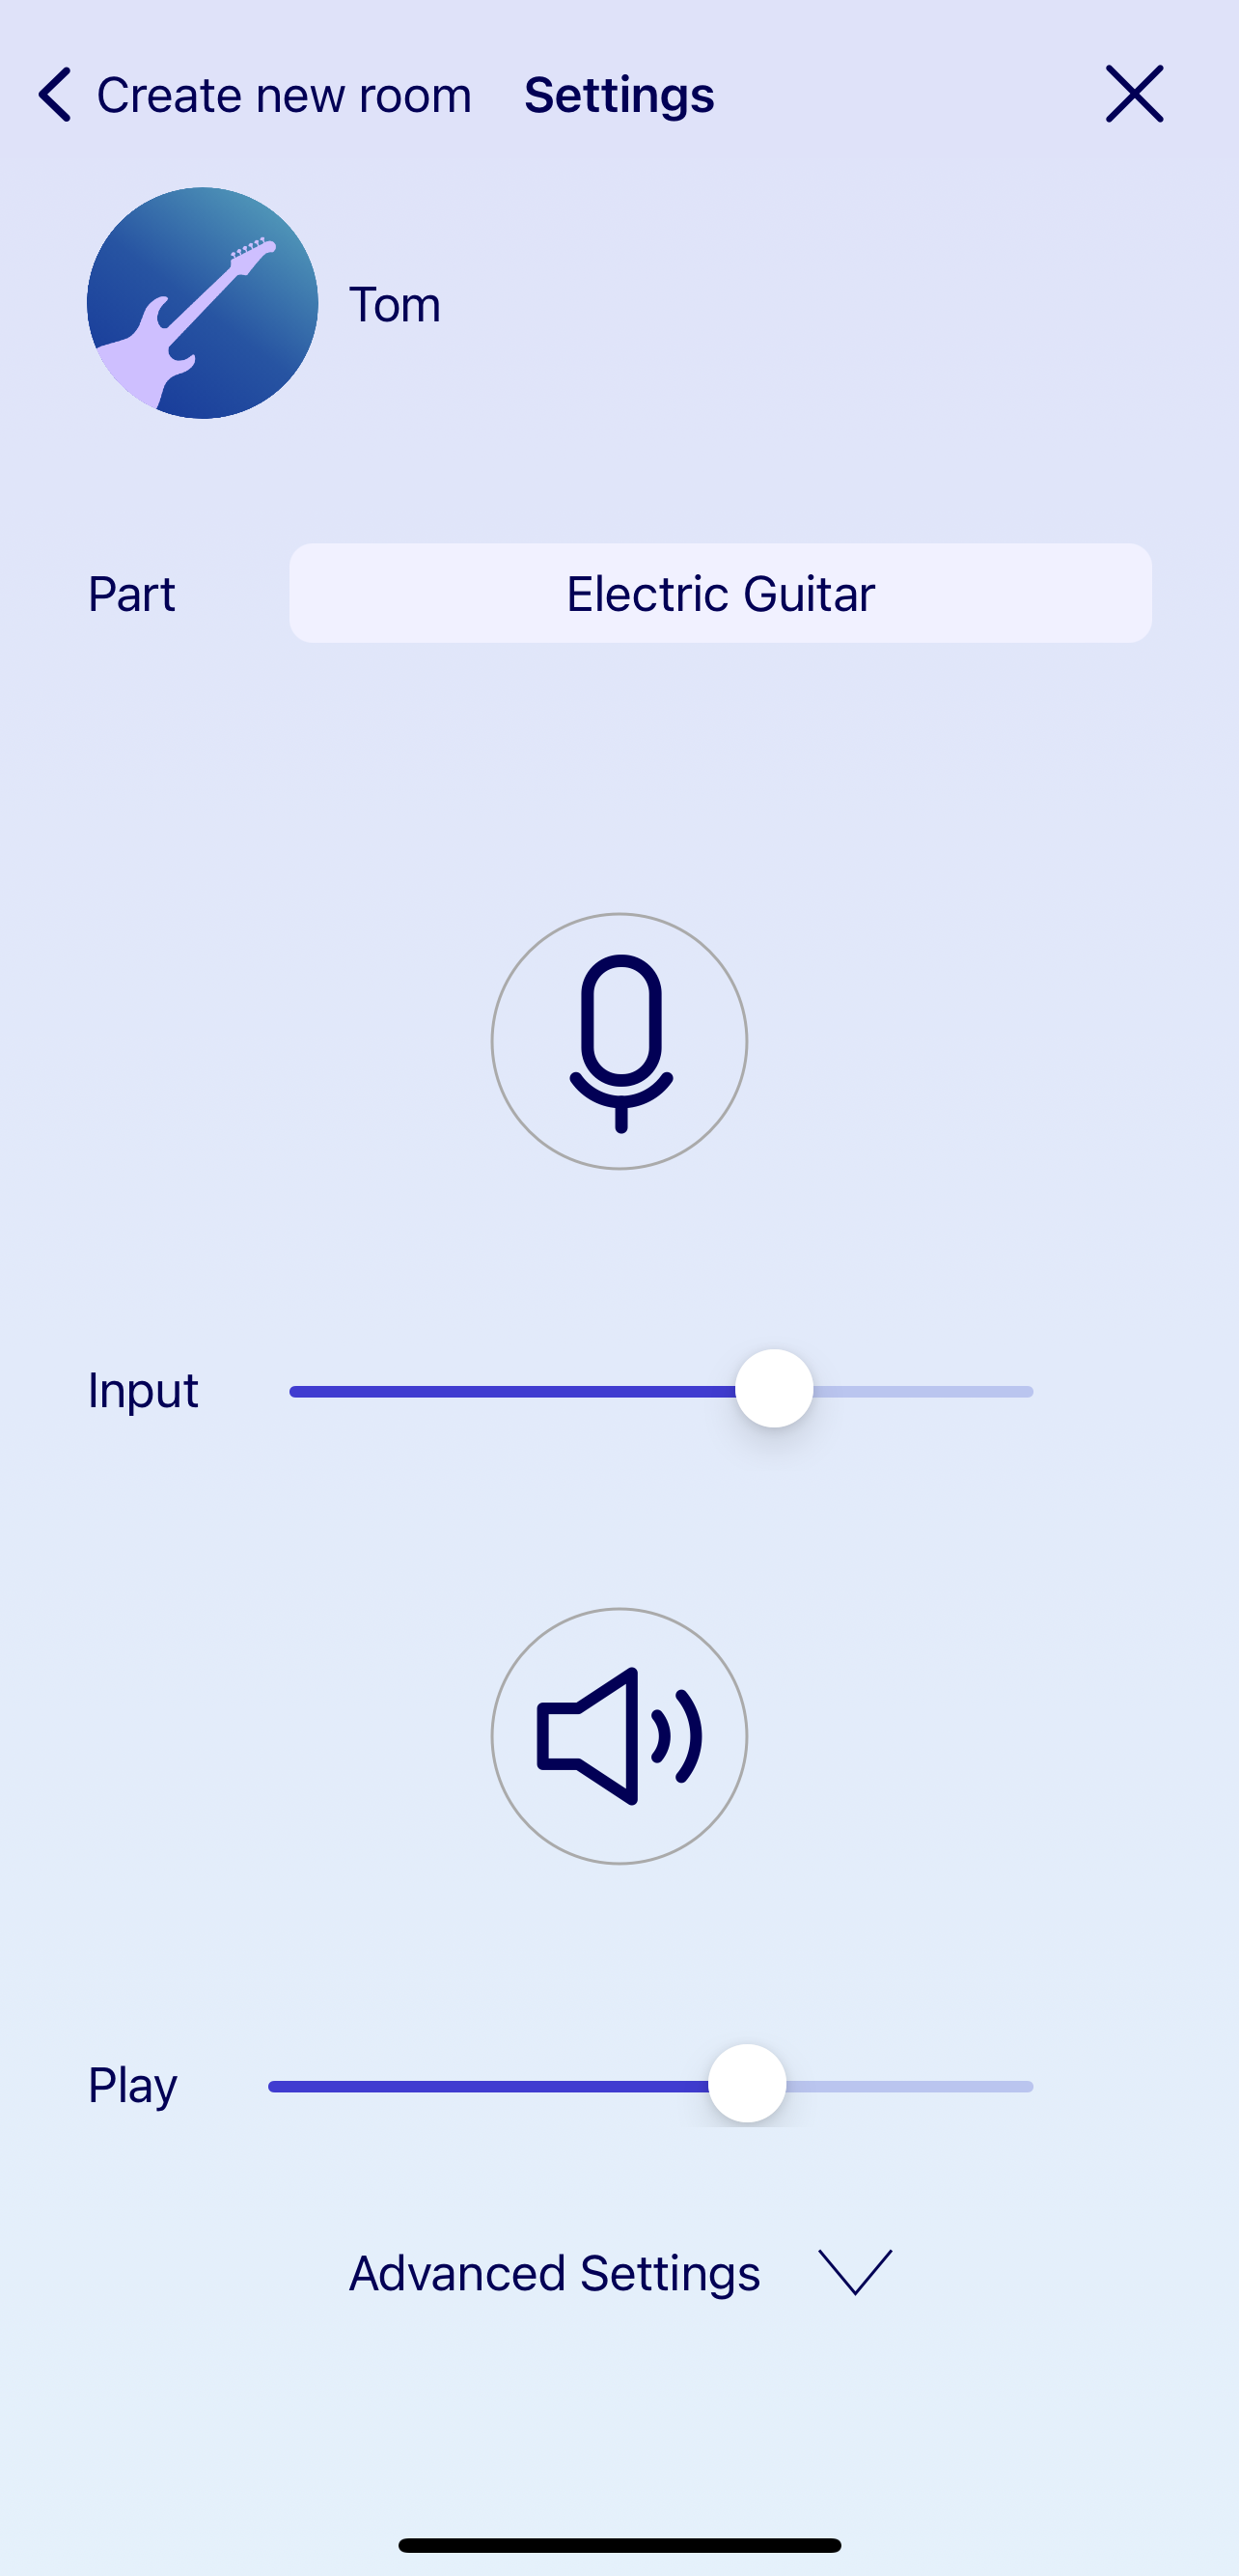
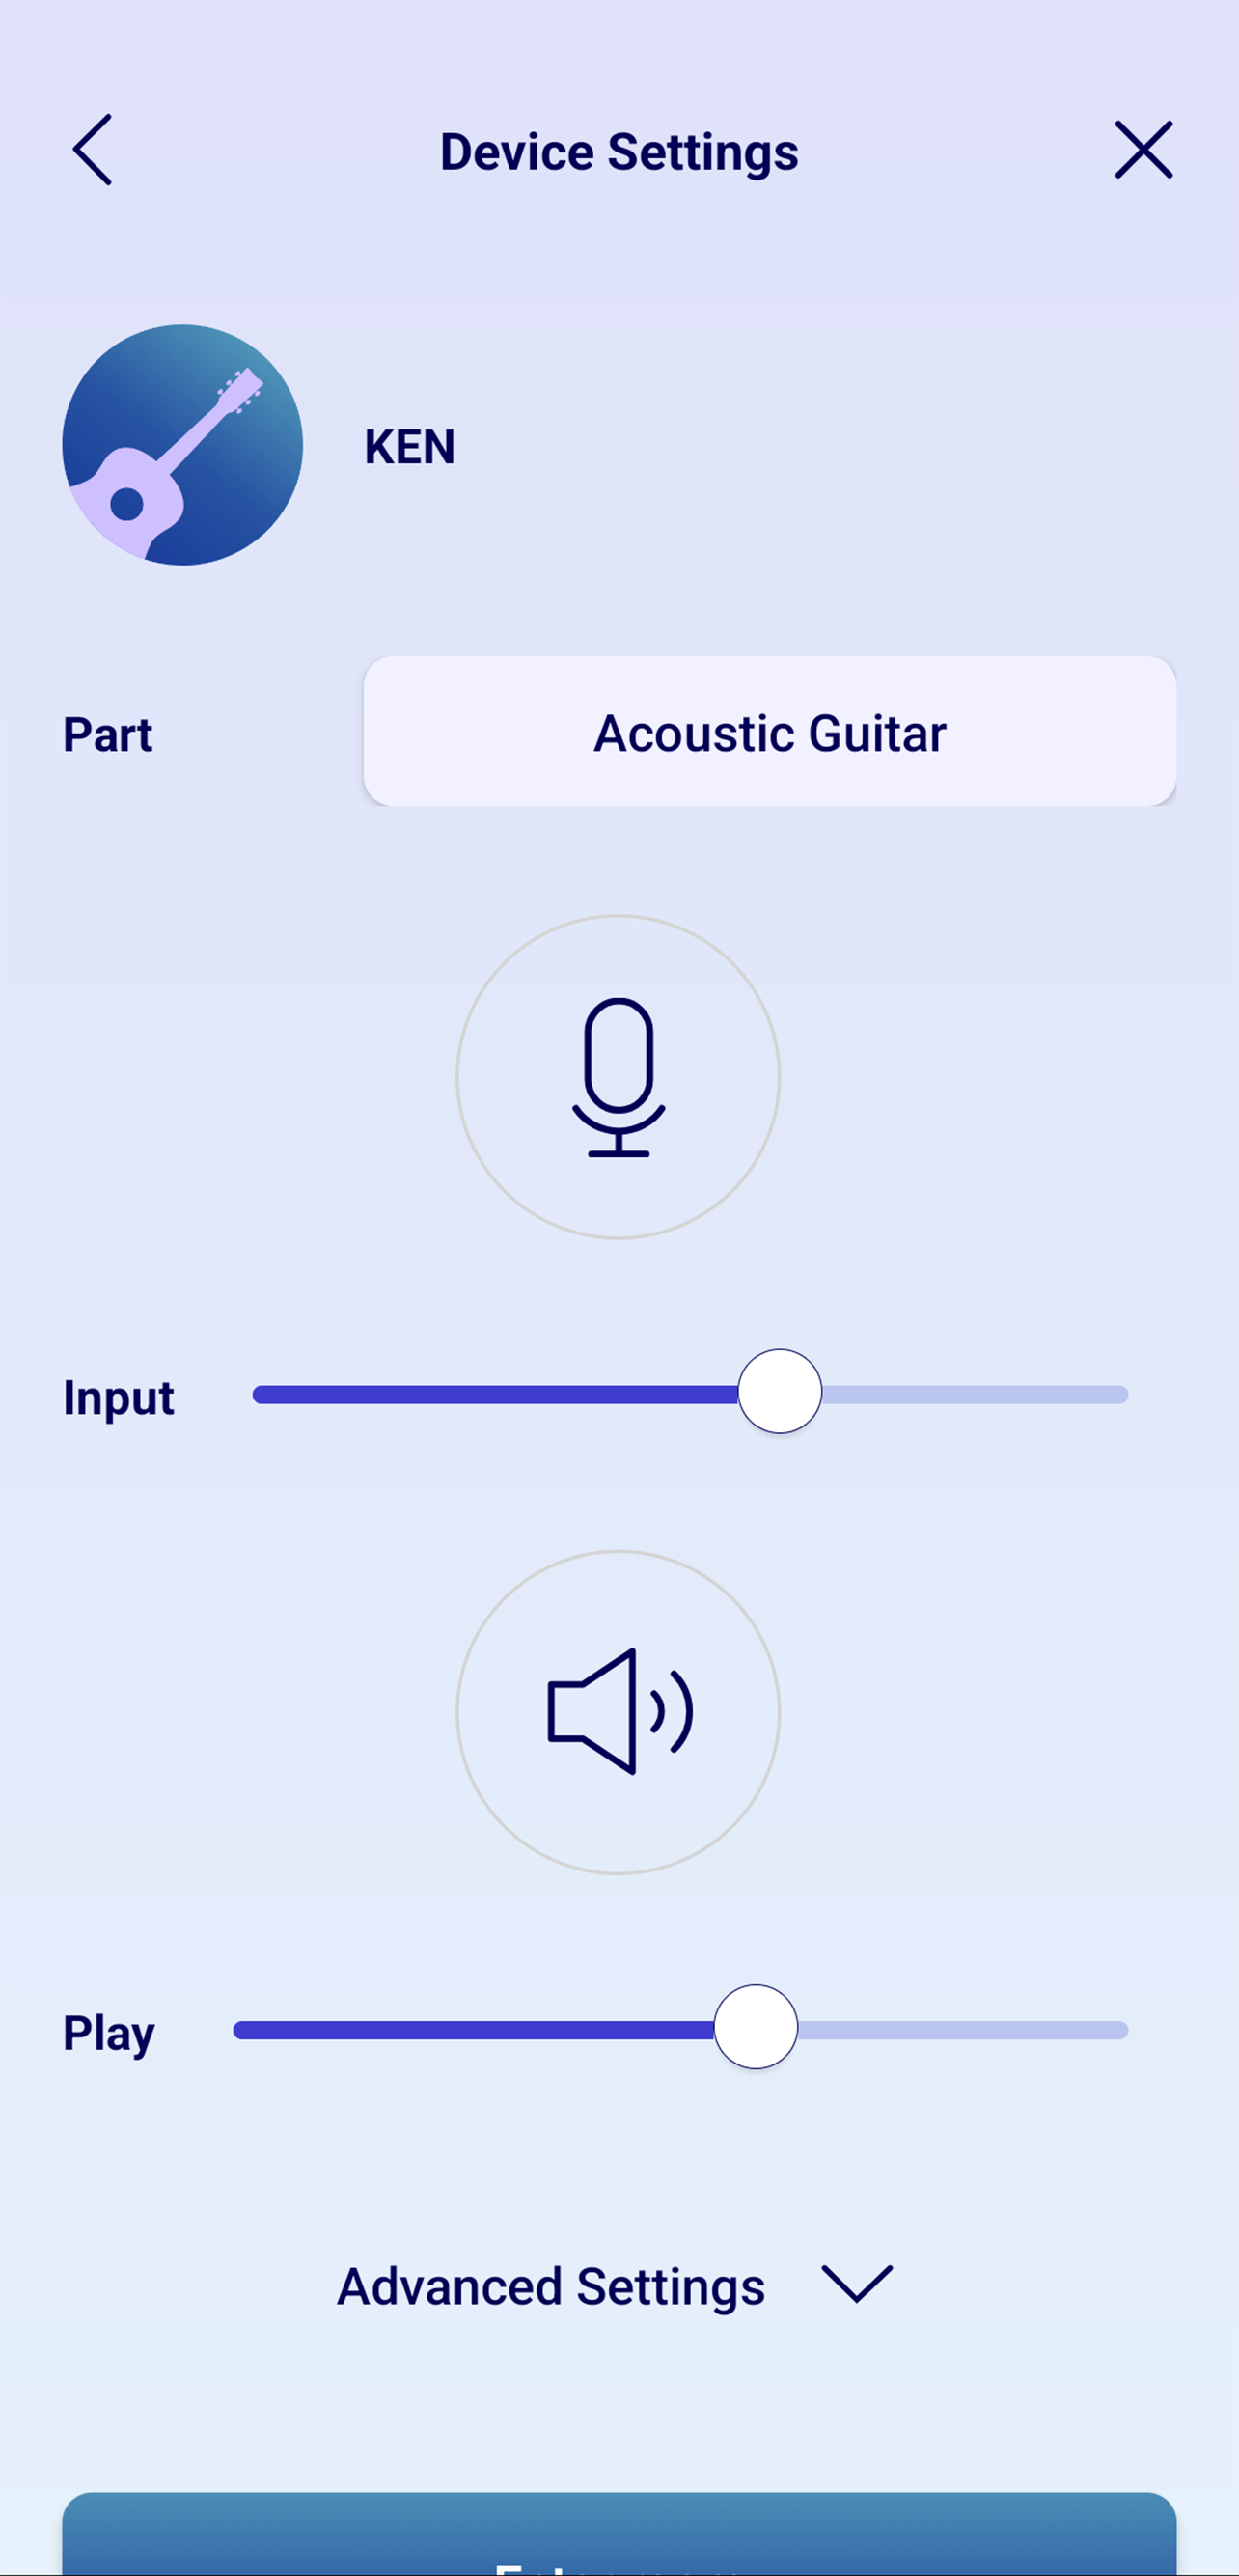
2-3-3. Setting Up Your Device
- ❶ Input
Tap the microphone icon to see if your microphone responds to sound. If it does not respond, confirm your input device in “Advanced Settings”.
- ❷ Speakers
Tap the speaker icon to see if sound is being output. If not, confirm your output device in “Advanced Settings”.
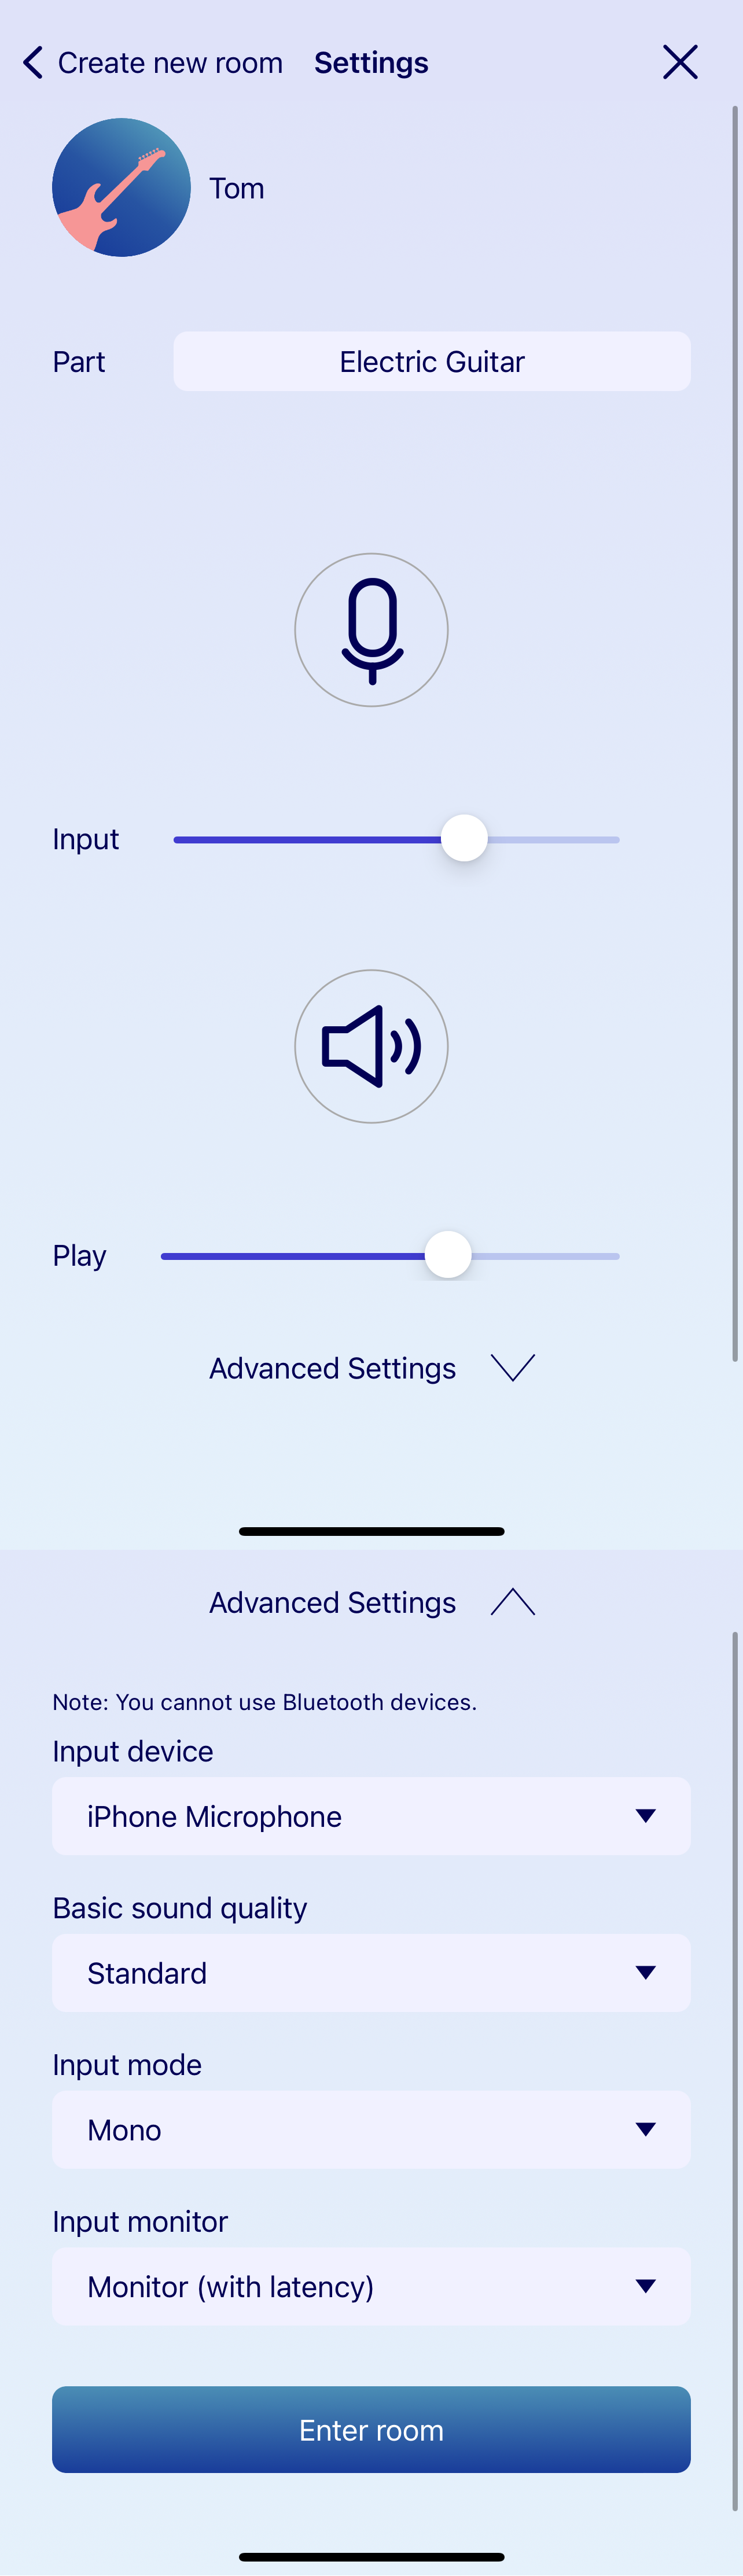
- ❸ Advanced settings
- ❹ Input device
Select the device you want to use for audio input.
- ❺ Output device
Select the device you want to use for audio output. Normally you should have no problems if “Auto” is selected, but you can change this if you want to specify the device to use.
Note: The iOS/iPadOS version of SYNCROOM does not have the Output Device option. - ❻ Basic sound quality
Set the sound quality of audio data transmitted between you and other members. Choose “Standard”, “High quality”, or “Prioritize bandwidth”. If your settings are different from that of other users when connected, the setting with the lowest sound quality will be used.
- ❼ Input mode
Select whether you want to handle the inputted audio as mono or stereo. Mono should be fine if using a normal microphone, but select “Stereo” if connecting instruments with stereo outputs such as a synthesizer.
- ❽ Monitor Input
Configure your audio input monitoring settings. By default, it will be set to “Do not monitor”. This means that audio input will not be output from your device. If you select “Monitor (without latency)” or “Monitor (with latency)”, you will be able to hear the sound you input. “With latency” means that you will hear the sound you input after a slight delay. This may make it easier when playing with someone that has latency.
- ❾ Buffer size
Select as low of a buffer size as possible. This will keep latency low and allow you to have an enjoyable session. If there is noise in the audio, increase the buffer size little by little until the noise is gone.
Note: The iOS/iPadOS version of SYNCROOM does not have the Buffer size option.
2-4. Adding Favorites and Blocking Users
If you hold down a room card on the Room List, a pop-up menu will appear.
- Add room creator to favorites:
This will add the creator of the room to your favorites. Users you have added to favorites will have a “favorites” icon on their user icon on the room card. - Block room creator:
This will block the creator of the room.
Note: For more details about favorite and blocked users, see “Users Screen”.

3. Room Screen (Basic Operations)
When you enter a room, you can enjoy a session with other users who are in the same room. If another user is in the room, that user's icon will be displayed in addition to your own icon. If a user exits the room, that user's icon will disappear.
3-1. Adjusting Sound (Mixing)
You can adjust other user's volume by changing the distance of other user's icon from your icon. You can also adjust the stereo position by shifting other user icons left or right.
*You cannot move your own icon position.
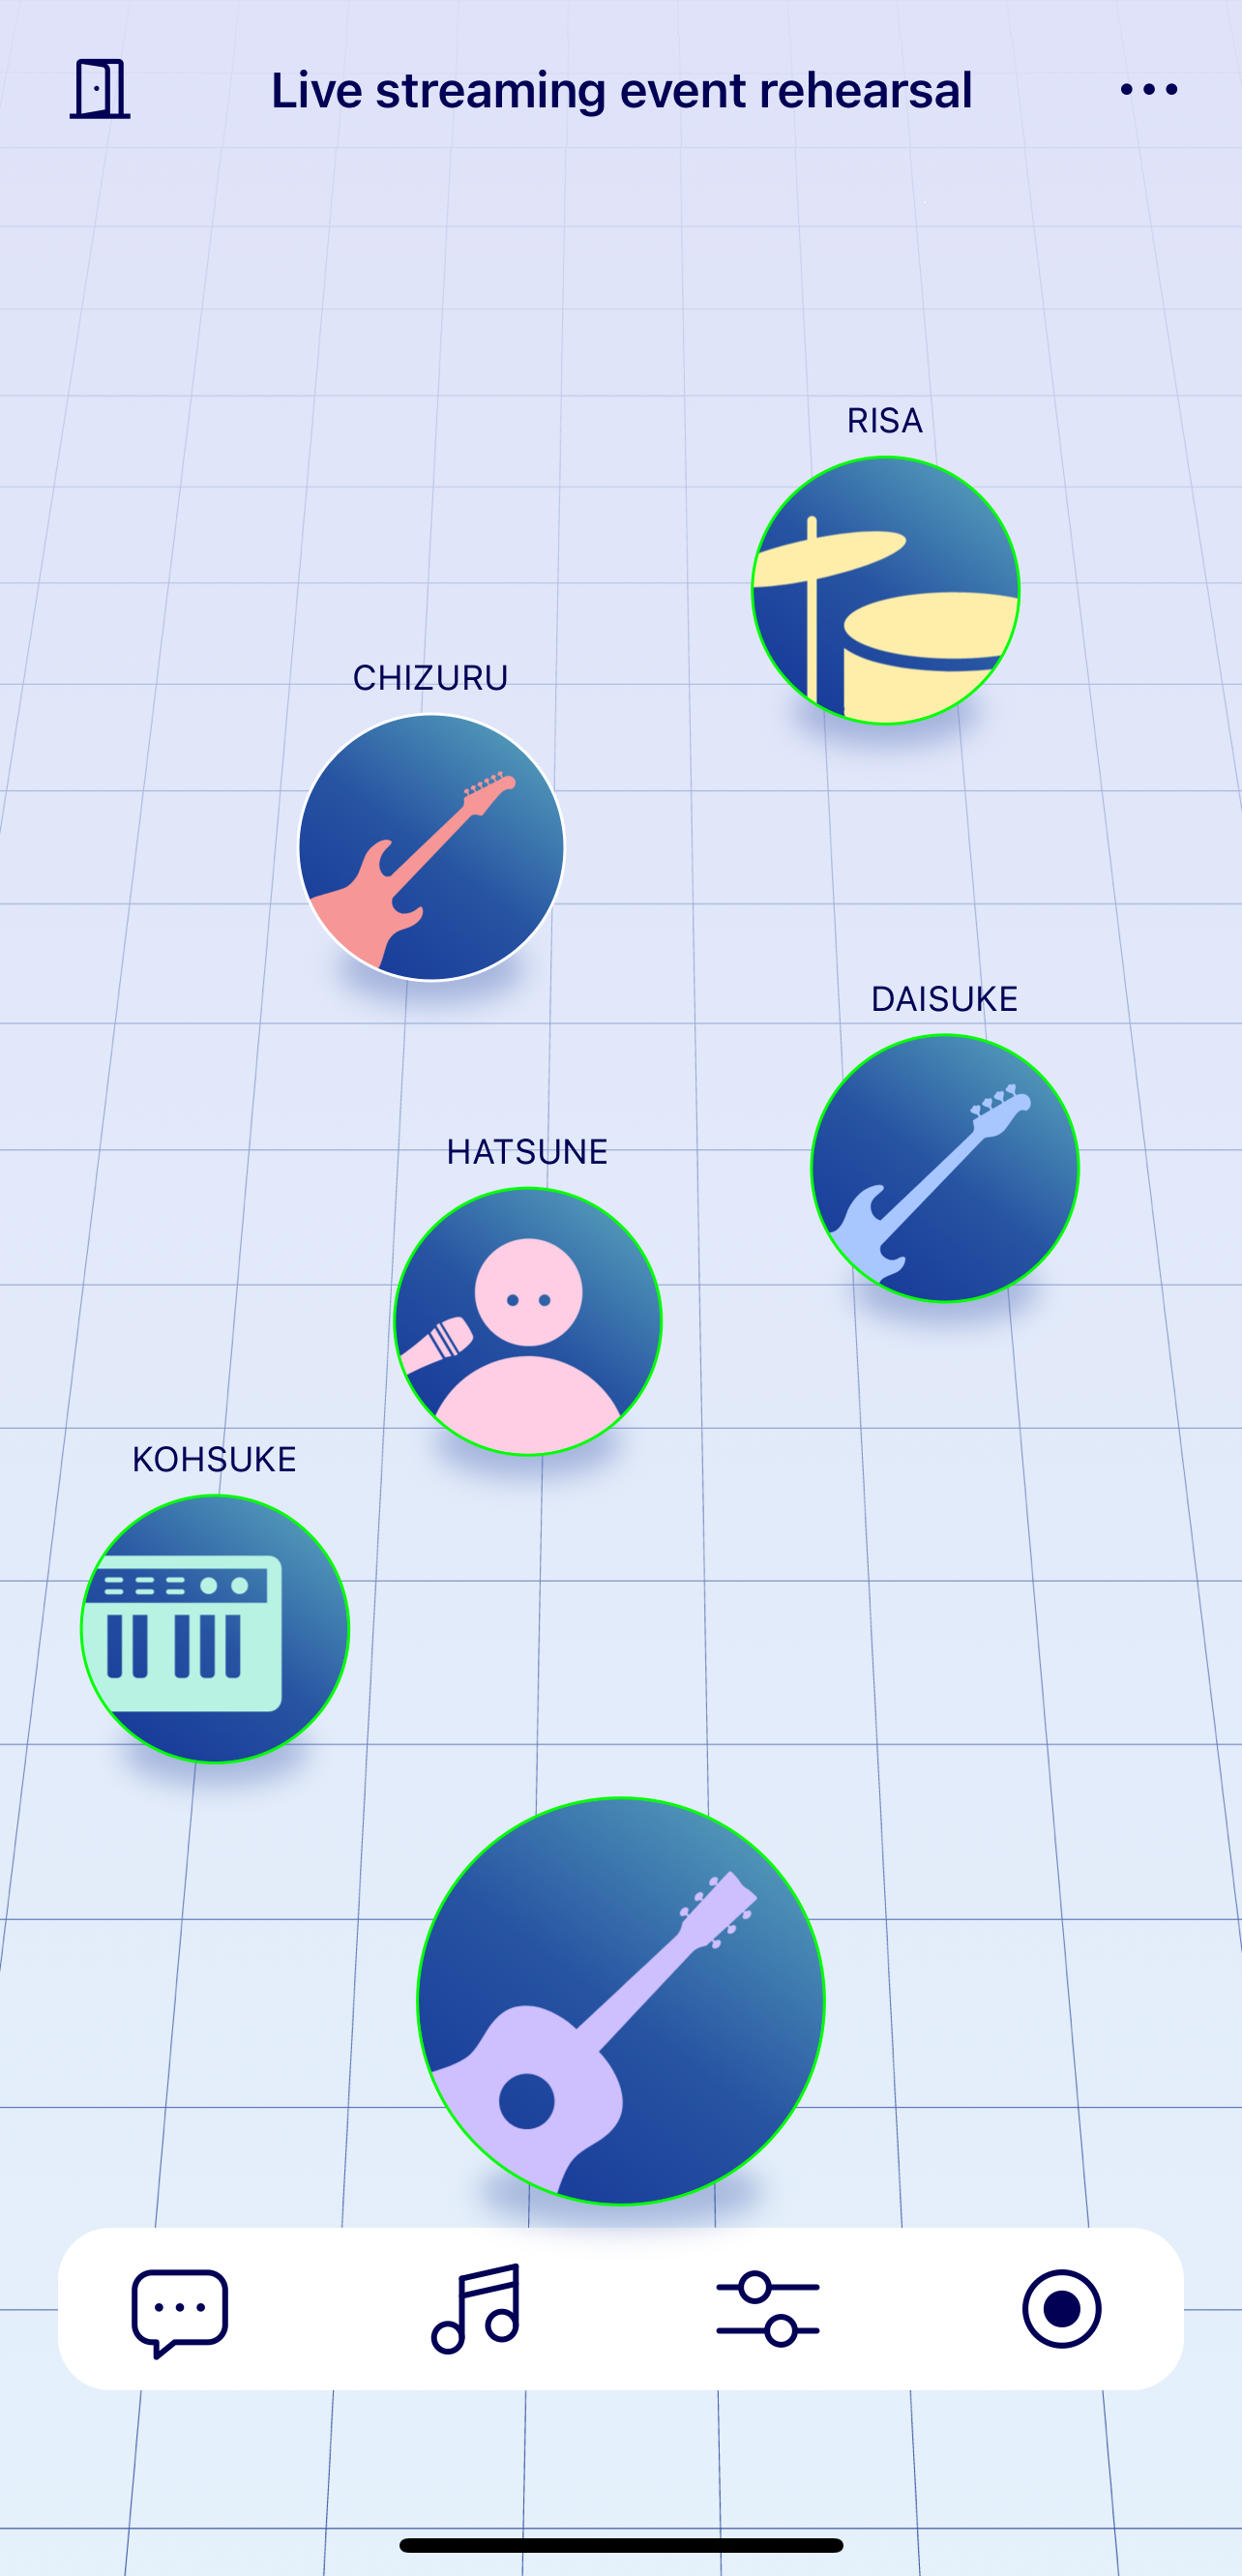
3-2. Mute
You can mute a user's sound by tapping their icon. Tap their icon again to unmute them.

3-3. Meaning of Other Symbols
- The ring around each user icon represents the volume level of that user.

- When other users are recording audio, you will see that the user is recording.

- If the network connection between you and another user is unstable, a warning mark will be displayed on that user's icon. The warning mark will disappear when the connection improves.
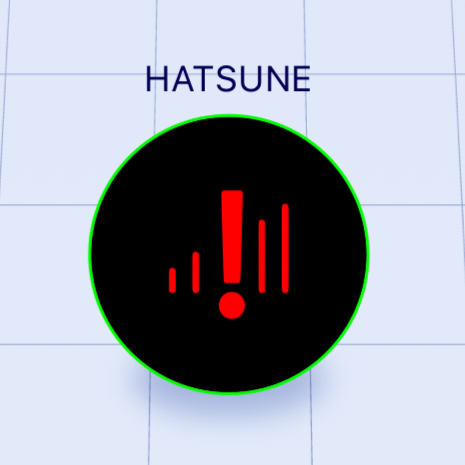
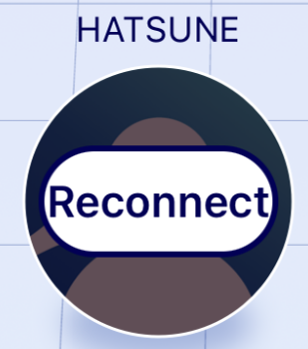
- If the network connection falls below a certain standard, you may be disconnected.
- The first time connection fails, or cuts off during a session, "Reconnect" is displayed in the icon for that user. Tap the "Reconnect" button to start reconnection.
3-4. User Details
If you hold down the icon of another user, the detailed display of the user will appear. You can add the user to your favorites, block or report them, copy their User ID, or force them to exit the room (only the room creator can do this). For details, see “5-2. Users Screen”.
3-5. Exiting a Room
Tap  to exit a room. If all users exit a room, the room will become a “Standby Room”.
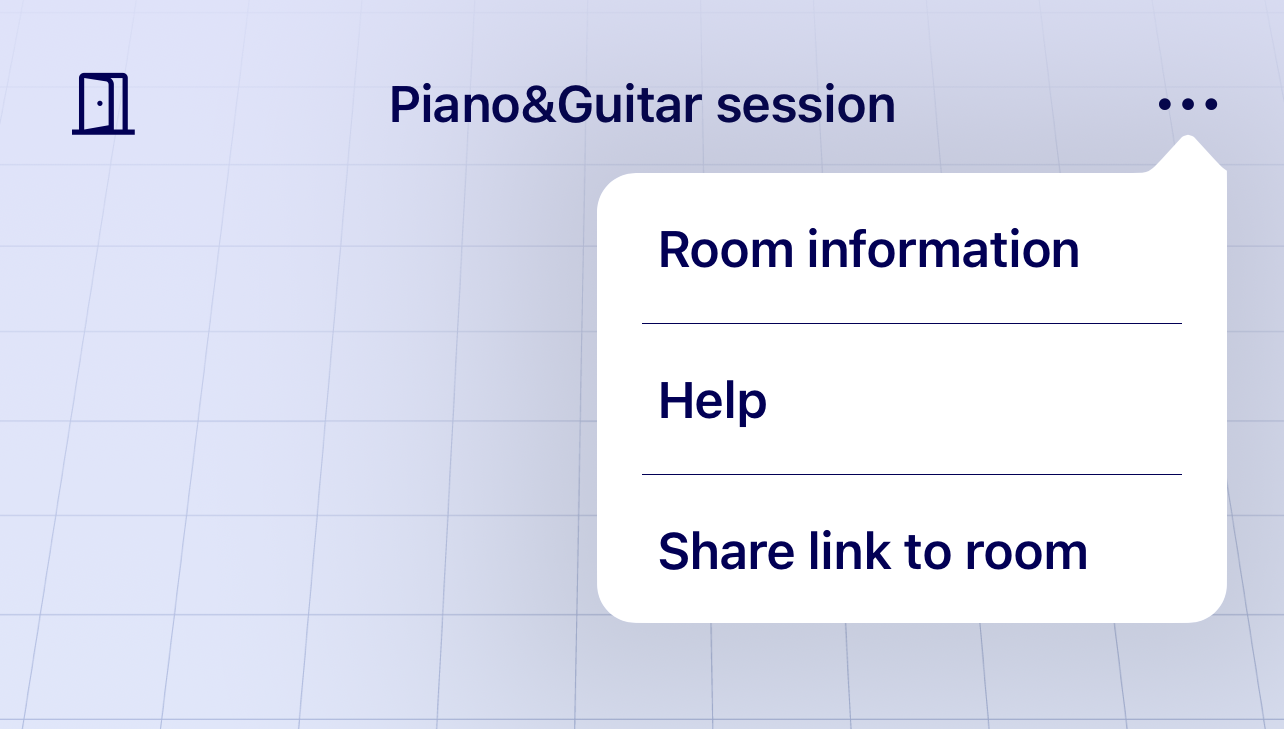
3-6. Checking Room Details and Sharing Room Links
Tap “…” on the upper right of the room to open the menu. The menu provides the following options: “Room details”, “Help”, and “Share link to room”.
- If you select “Room details”, it will display detailed information on the room. If you are the creator of the room, you can edit the room’s information here.
- If you select “Share link to room”, you can share the link to the room on other apps or copy the link to the room. When someone opens a shared link, they can enter the room.
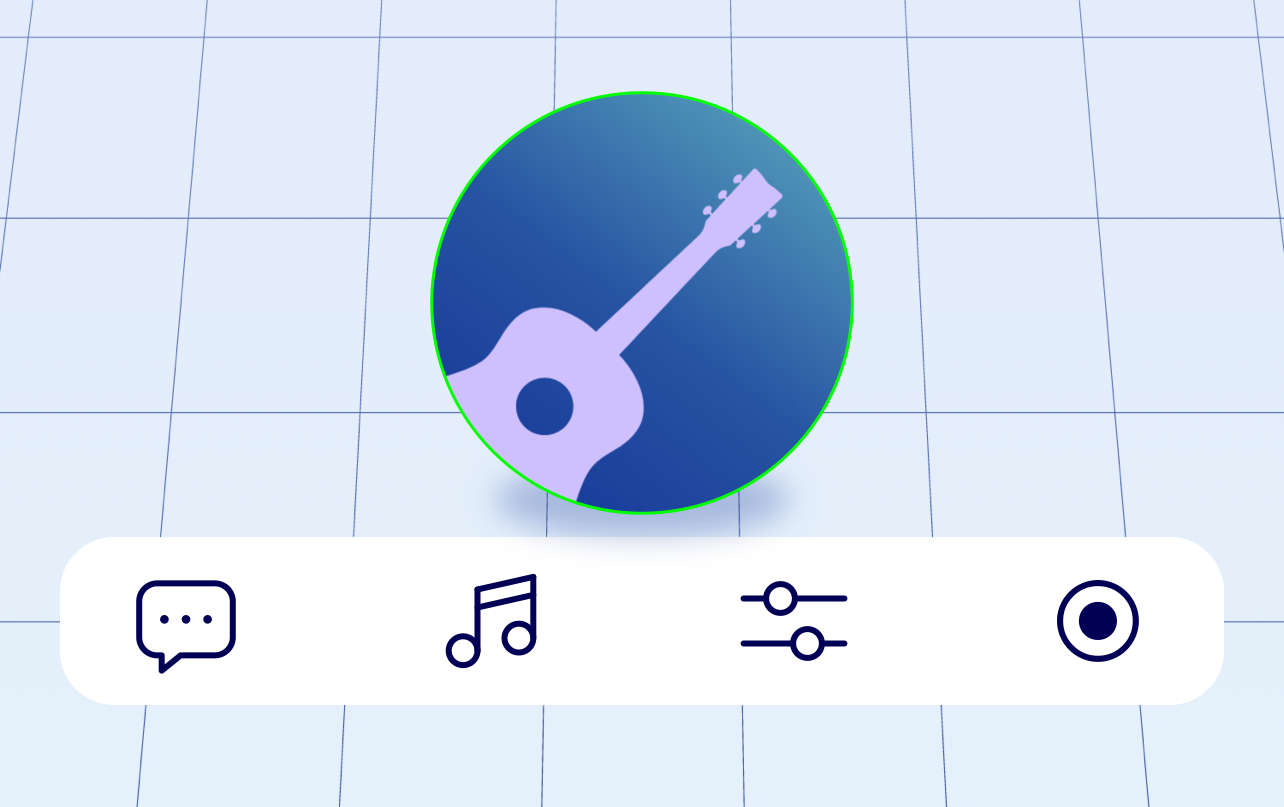
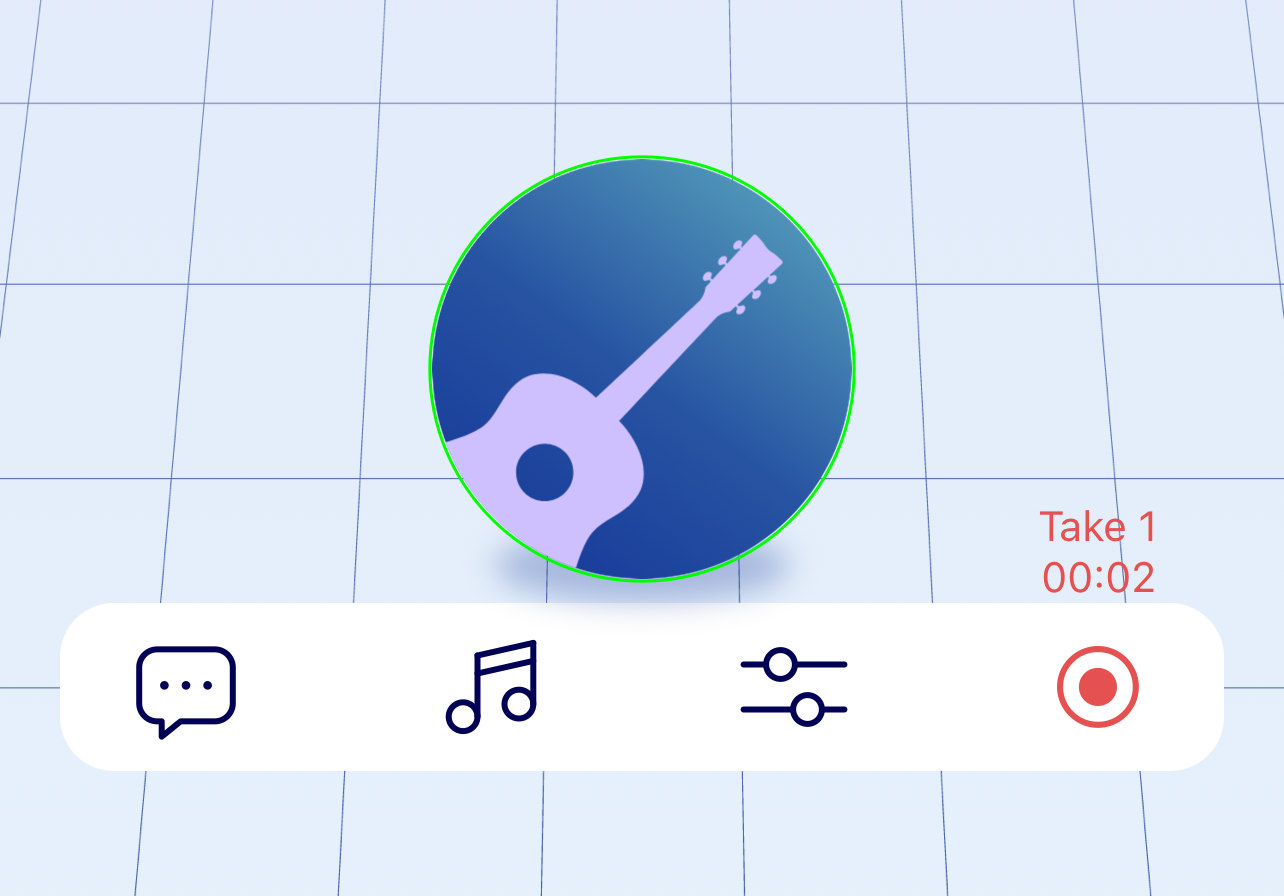
4. Room Screen (menu bar)
- ❶ Chat Icon
- ❷ Music Note Icon
- ❸ My Setting Icon
- ❹ Record Audio Icon
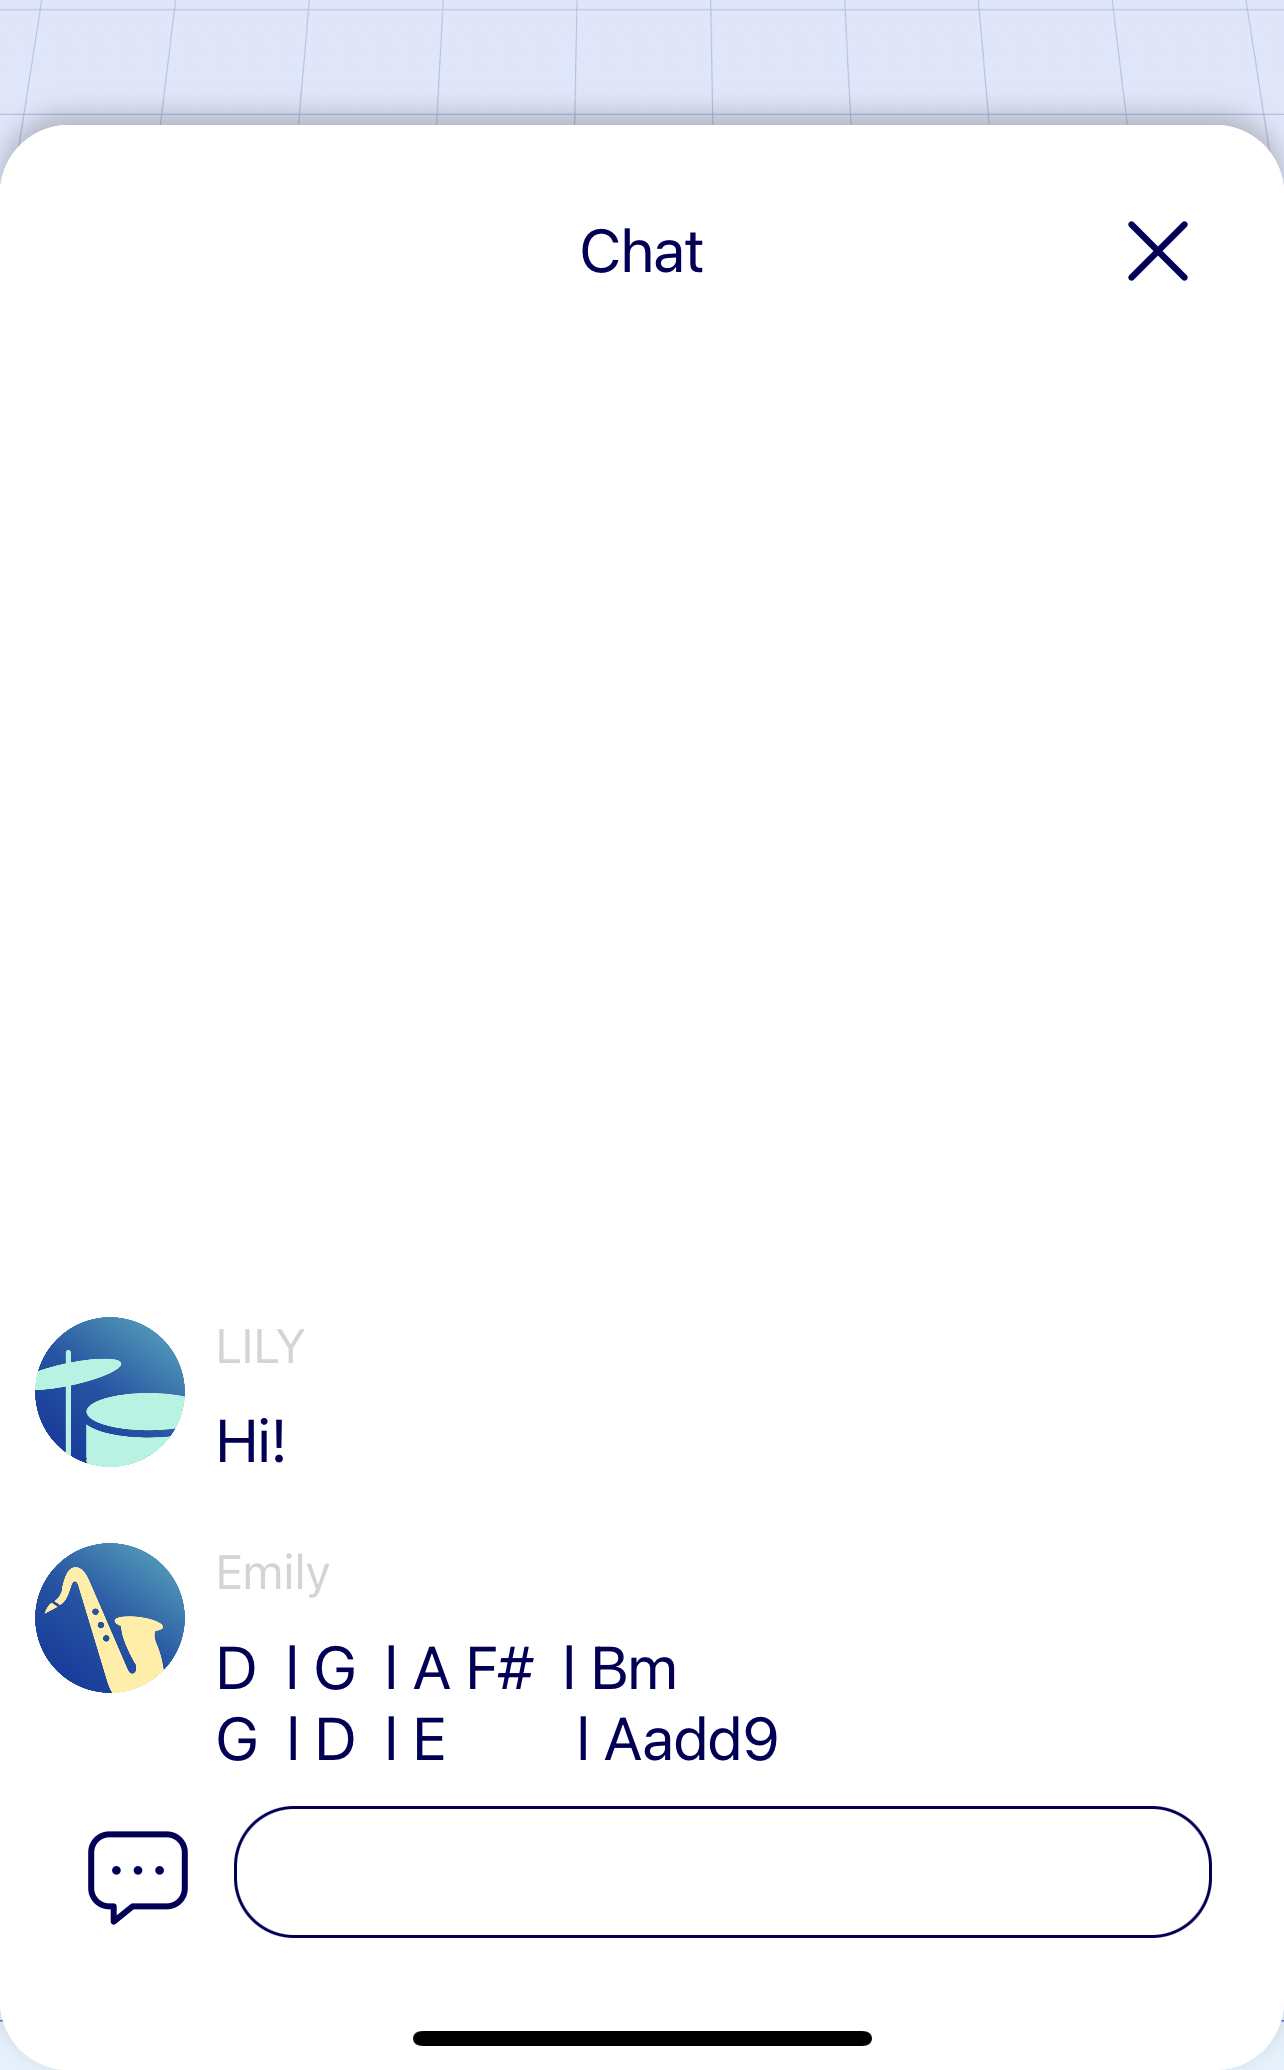
4-1. Chatting in the room
You can chat with other users who are in the same room by tapping on the chat icon.
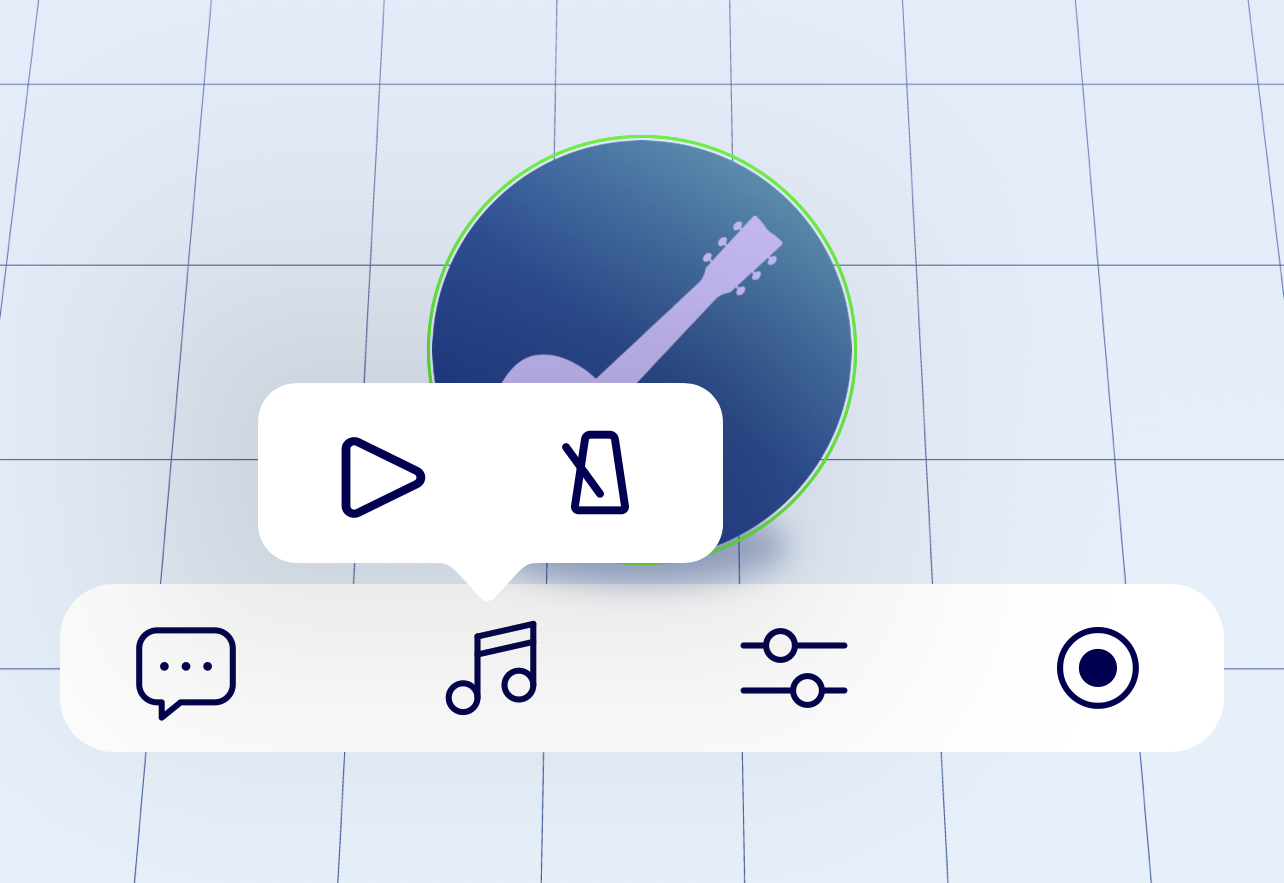
4-2. Using the metronome and playing Audio files
Tap the musical note icon to make a menu pop up. You can then select whether to use the metronome or play an audio file.
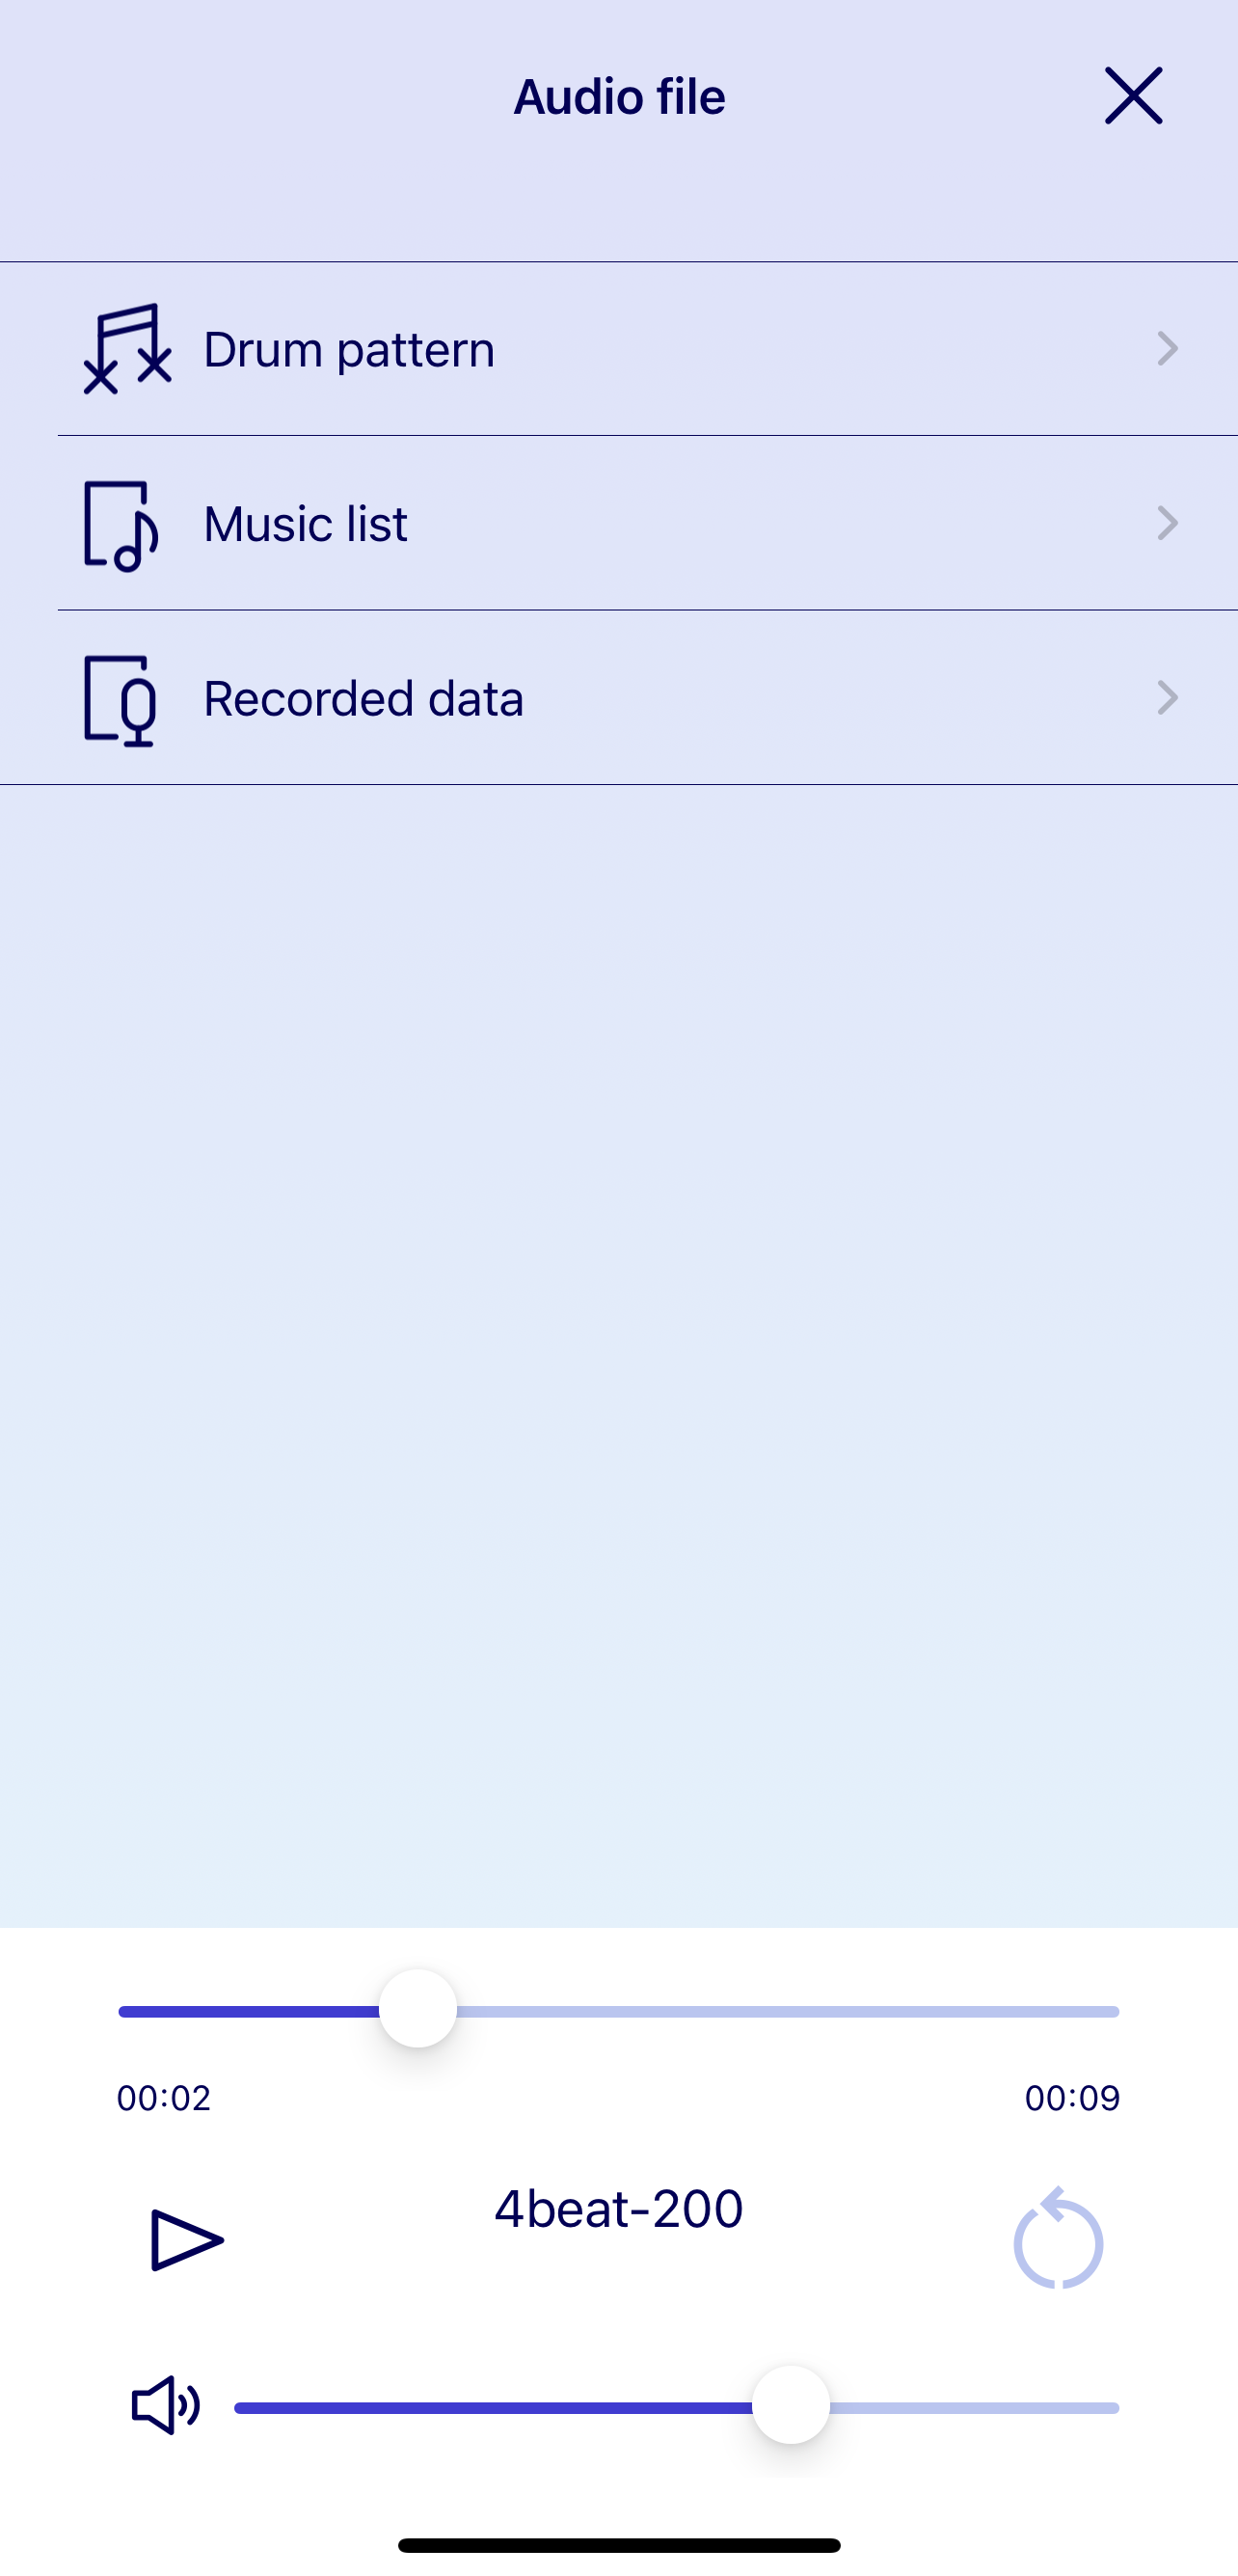
4-2-1. Playing Audio Files
When you play an audio file, all users in the same room will share the playback sound.
- ❶ Drum Pattern
You can select from several built-in drum patterns.
- ❷ Music List
You can select from audio files stored on your device.
- ❸ Recorded Data
You can select from the sound sources recorded in SYNCROOM.
- ❹ Play Button
Play the selected audio file.
- ❺ Loop Button
Toggles loop playback of the selected audio file ON/OFF.
- ❻ Adjust Volume
Adjusts the volume of audio files.
- ❼ Seek Bar
Specifies the playback position of the file.
The metronome and audio file cannot be played at the same time. You can also use the metronome when someone in the room is recording. However, audio files cannot be played.
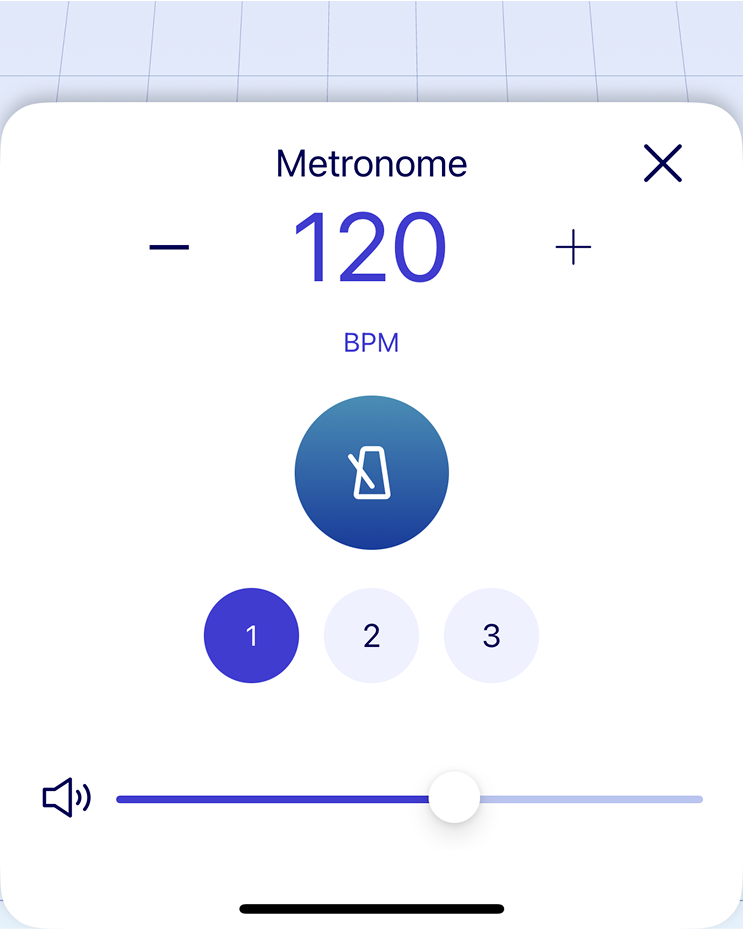
4-2-2. Using the Metronome
When using the metronome, all users in the same room share the metronome sound.
- ❶ Metronome Icon
Switches the metronome ON/OFF.
- ❷ "+" Icon
Raise the tempo.
- ❸ "-" icon
Lower the tempo.
- ❹ Tempo Display
Shows the current tempo.
- ❺ Adjust Volume
Adjusts the volume of the metronome.
- ❻ Change Tone
You can select one of three metronome tones.
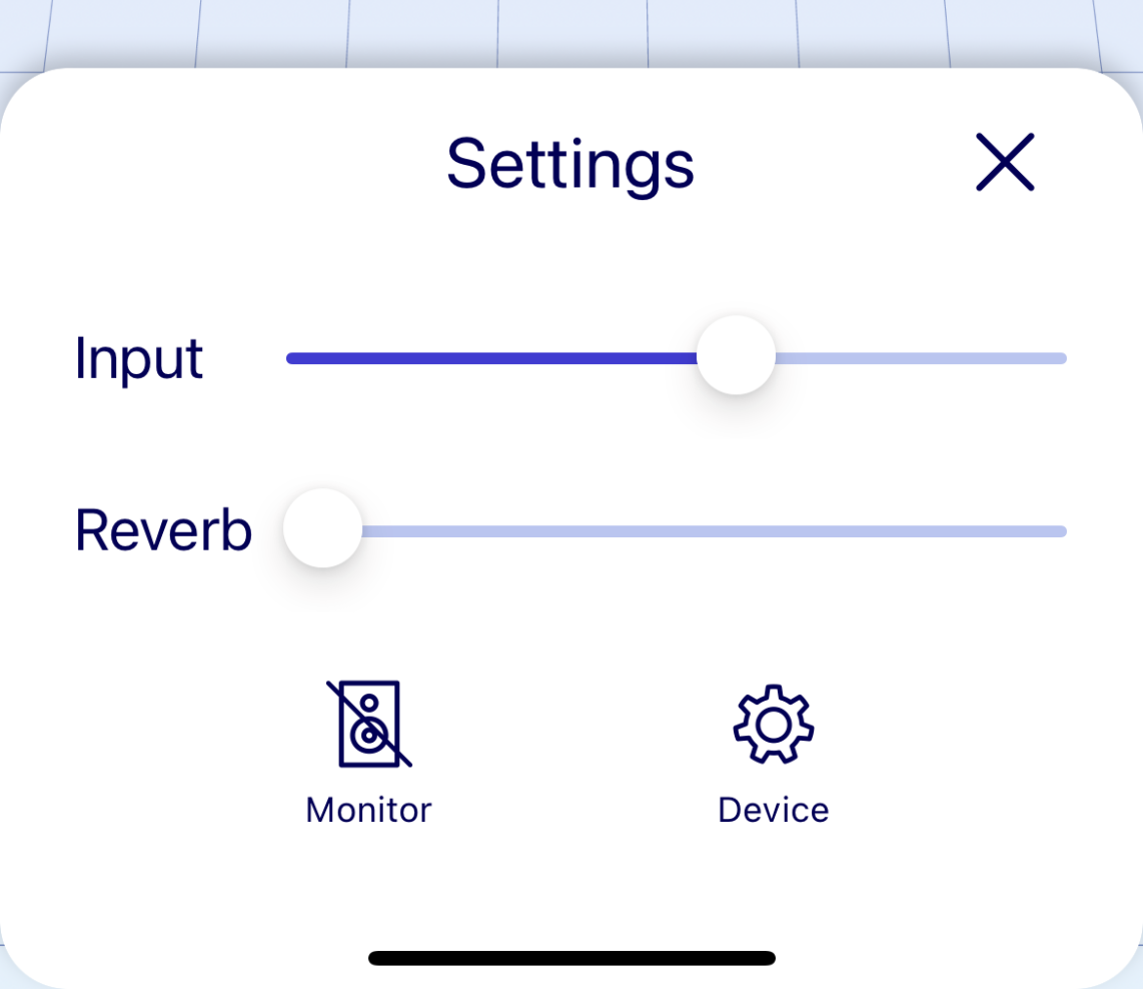
4-3. Changing Your Settings
Tap the “My Settings” icon to change the following settings.
- ❶ Input
Adjust your input volume.
- ❷ Reverb
Adjust the level of reverb applied to the sound you input.
- ❸ Monitor
Switch the monitor on and off. When the monitor is on, you will be able to hear the sound you input.
- ❹ Device
This will redirect you to the Individual Settings screen.
4-4. Record Audio
Tap the record button to start recording your session in the room. Tap it again to stop recording audio. Recorded sound source files are saved under "Recorded Data" in the audio file menu. When you start recording audio, other users in the same room are notified that you are recording.
5. Users Screen
From here you can view other users’ profiles.
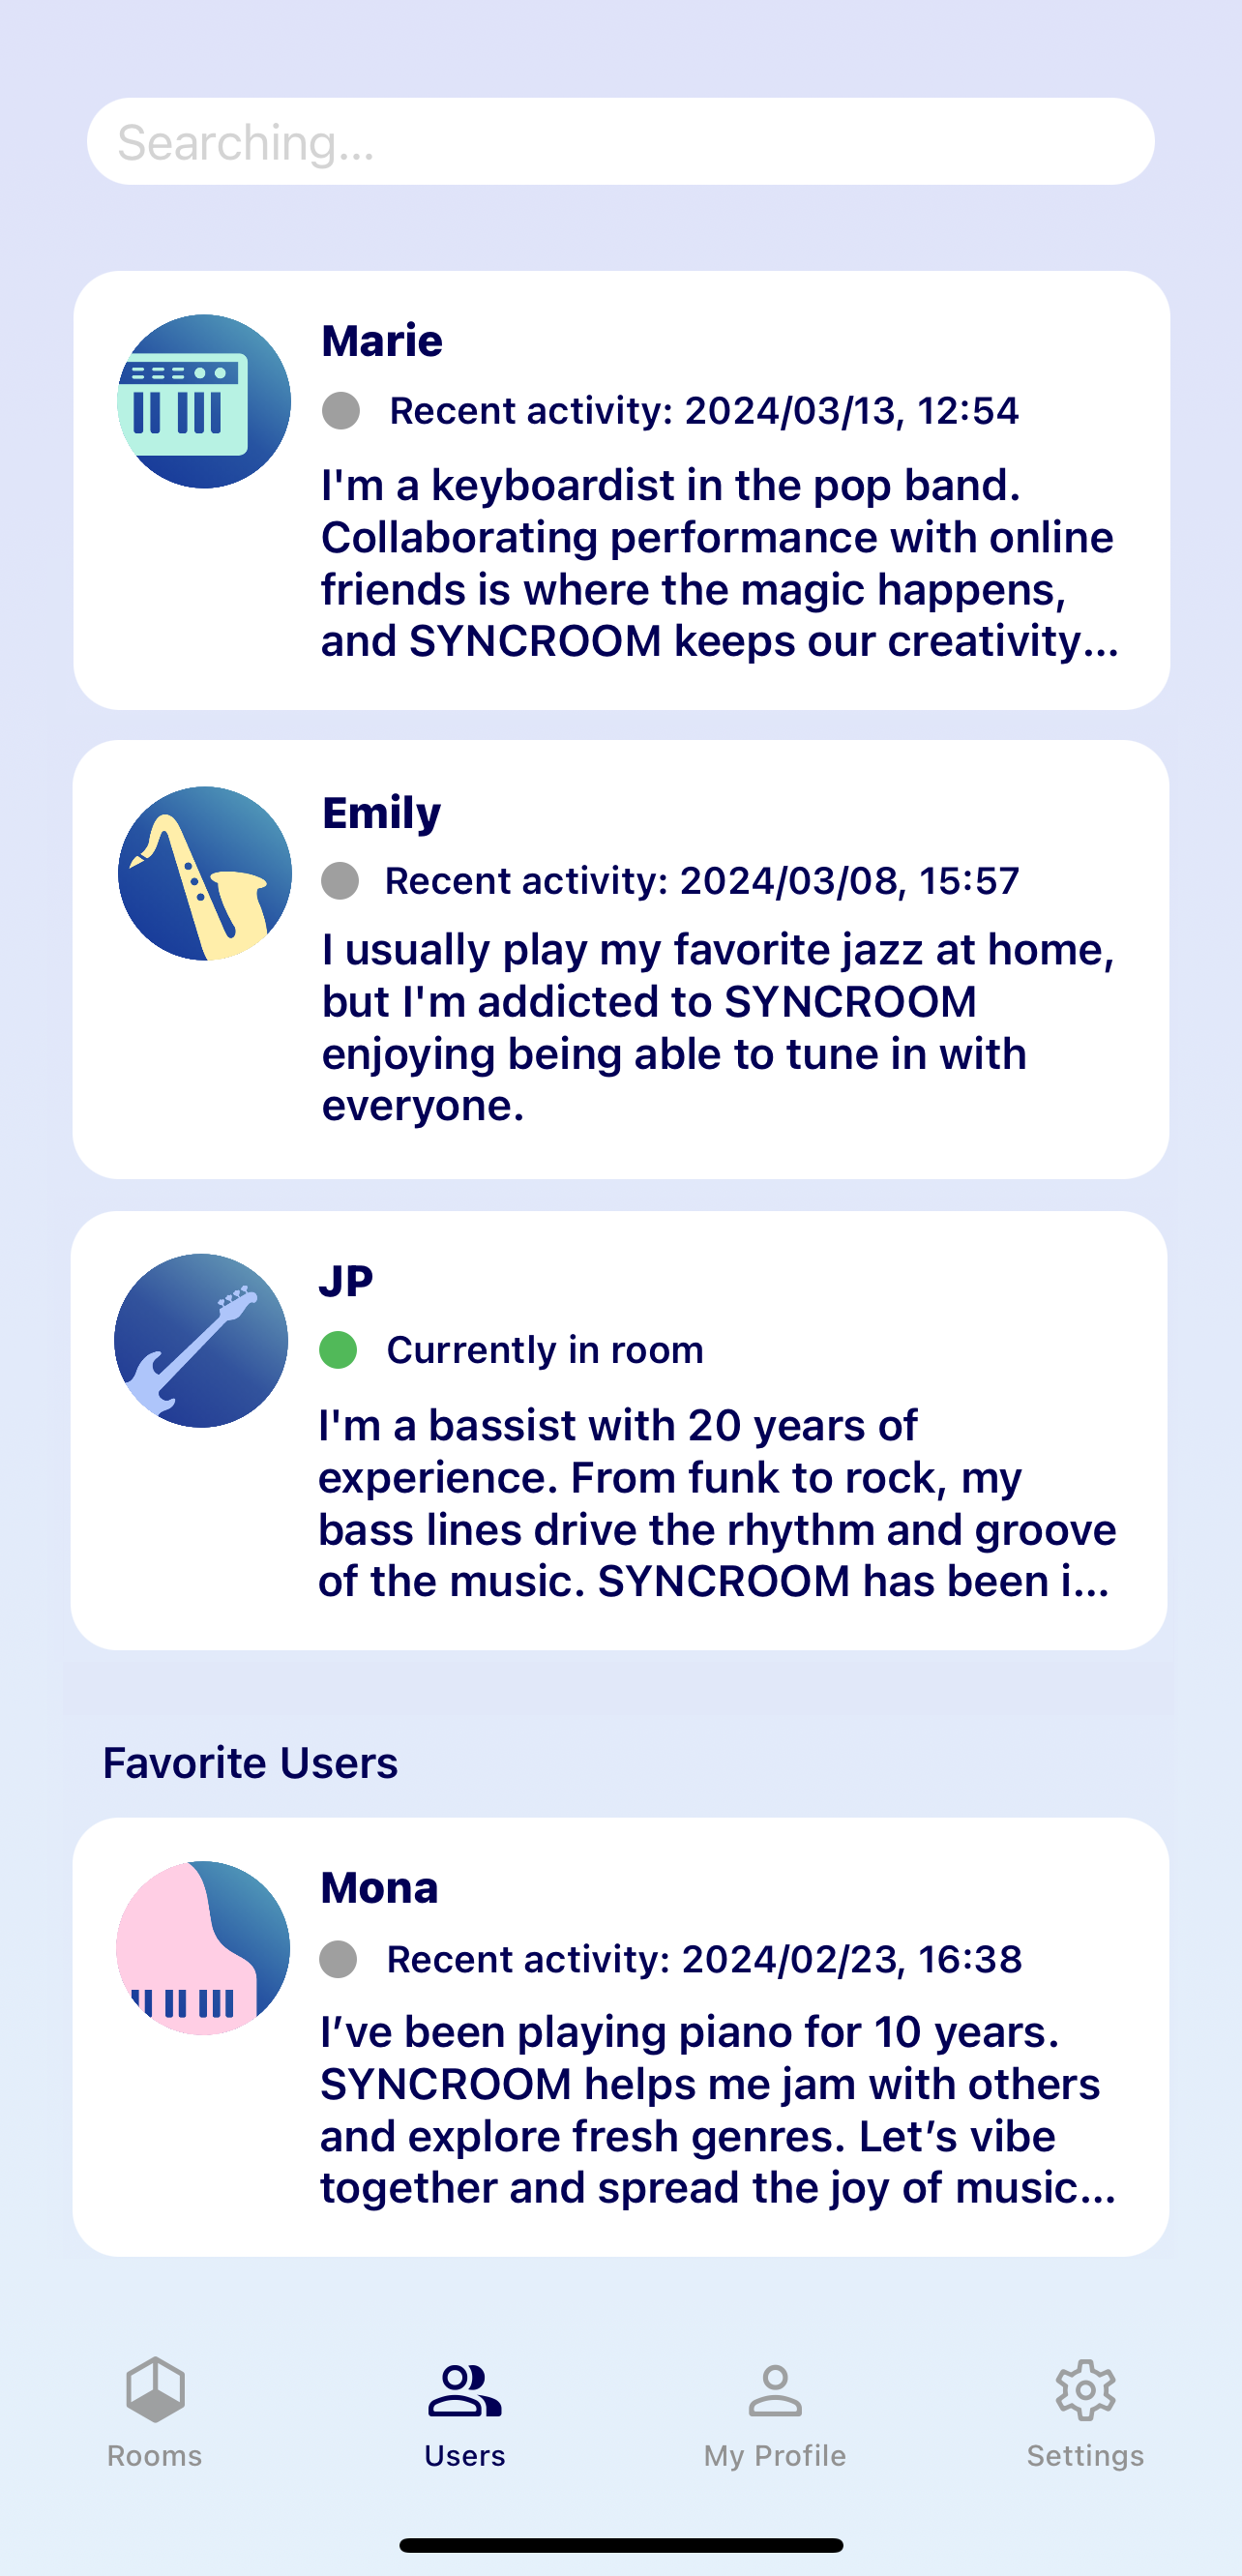
5-1. Searching for Users
Search for other users using criteria such as keywords in their nickname, self-introduction, favorite music genres, or products of interest. If you don’t run a search, users will be displayed here randomly. Users with private profiles, users you have blocked, and users who have blocked you will not be displayed in the search results.

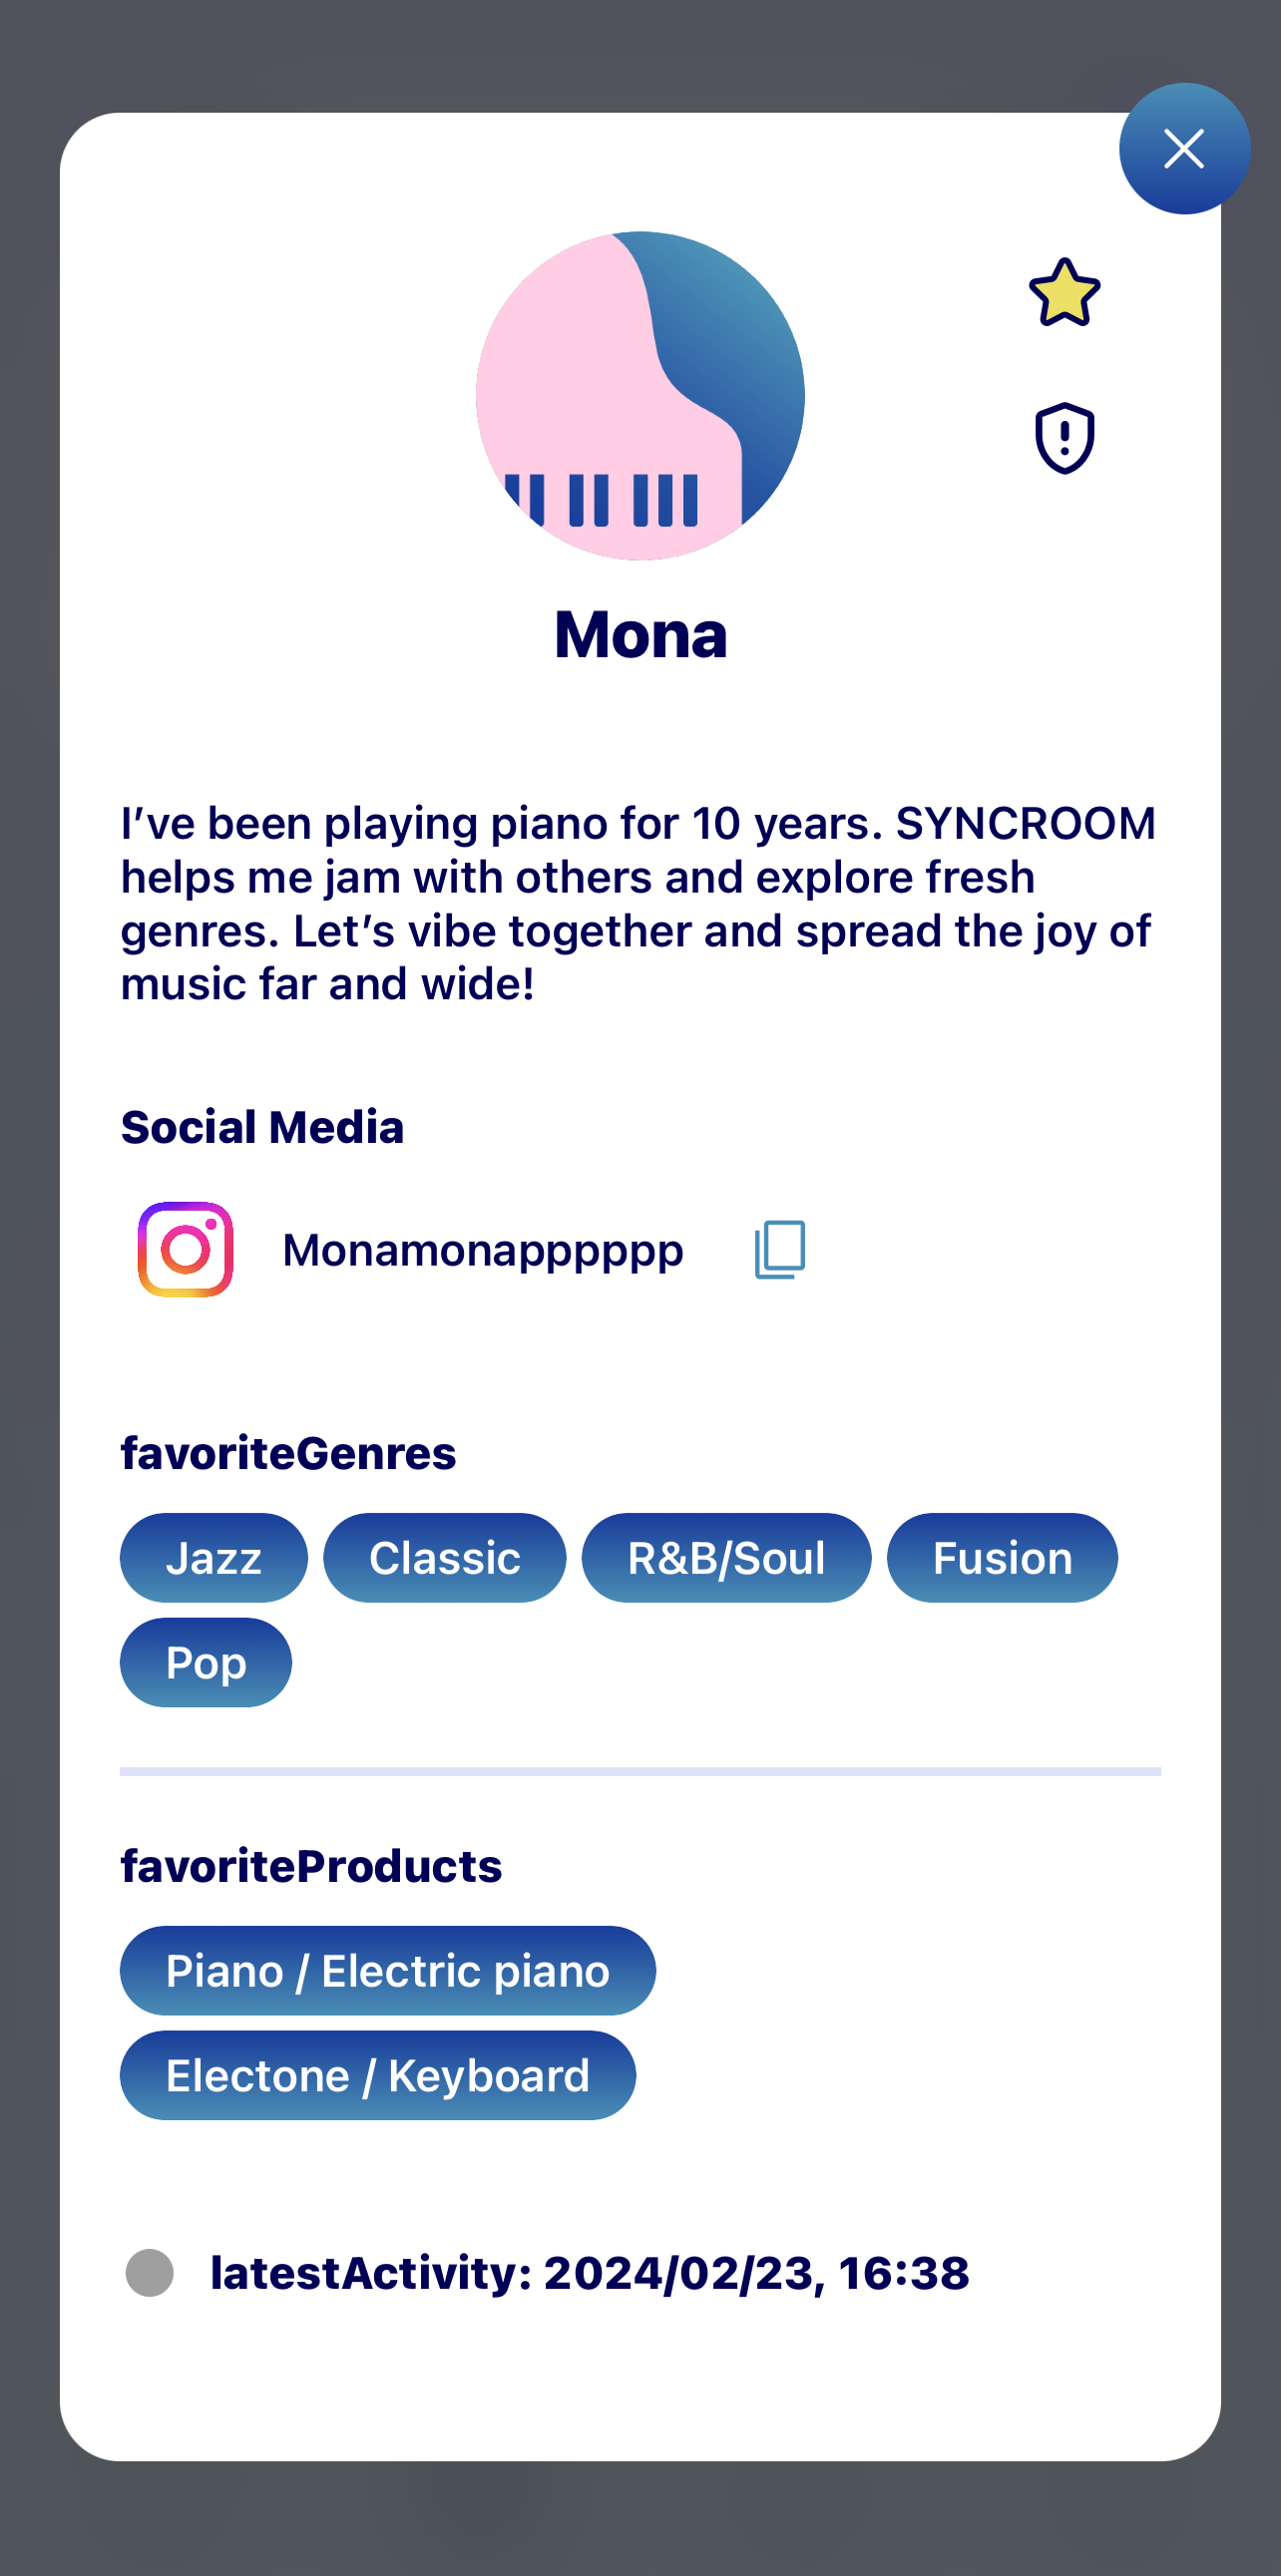
5-2. User Detailed Display
When you select a user, their detailed profile will appear. You can add the user to your favorites, block or report them, copy their User ID, or force them to exit the room (only the room creator can do this). If the user has set their profile to private, only their user ID, icon, nickname, and Beginner symbol (if they have applied it) will be displayed.
Public profile

Private profile

5-3. Adding Users to Favorites
Tap the “favorites” icon on the detailed display of the user to add the user to your favorites. You can add up to 100 users. Tap the “favorites” icon on a favorite user again to remove them from your favorites.
Note: Favorite users will be displayed under the randomly displayed users on the Users screen.
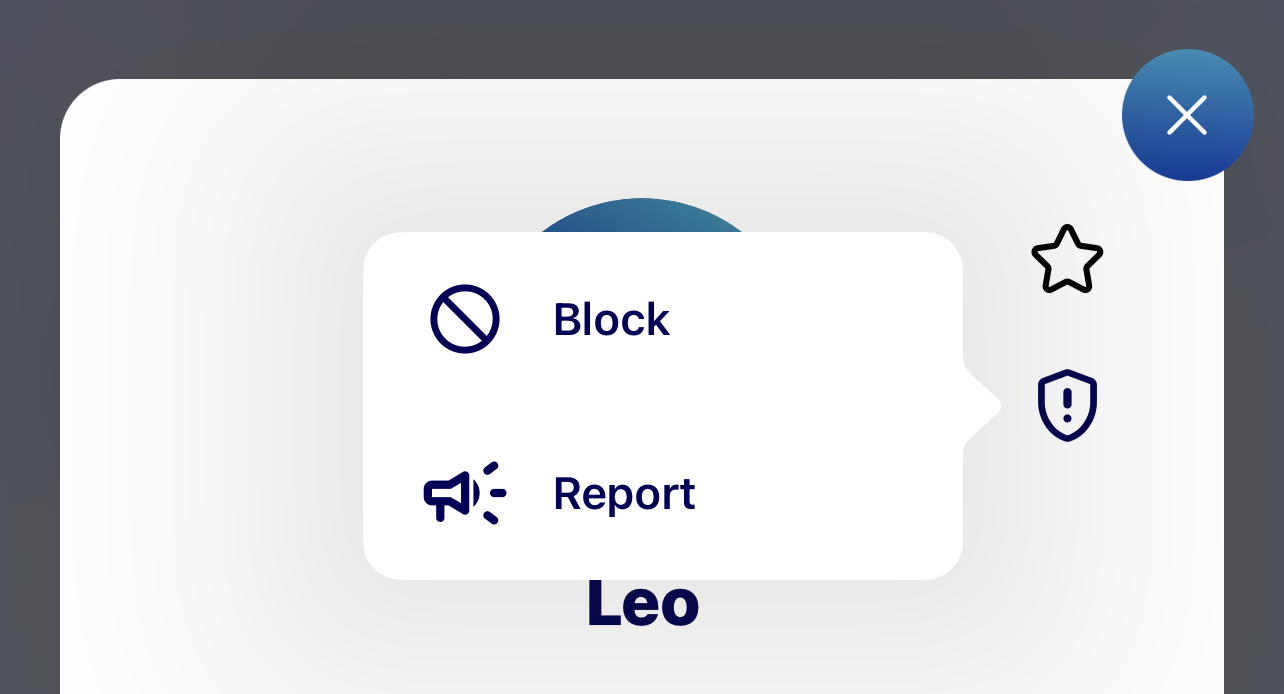
5-4. Blocking Users
Tap “ ” on the Users Screen and then select “Block this user” to block a user. The user will not be notified that they have been blocked.
You can check blocked users by going to “Settings”, then “Account Settings”, and then to “Manage blocked users”.
When you block a user, the following will occur.
- When you view a blocked user’s User Detailed Display, the message “You are blocking this user” will appear.
- If a blocked user tries to view your User Detailed Display, it will say “This user’s profile is private”.
- If one of you is blocking the other, the rooms created by either user will not be displayed on the other’s Room List.
- If one of you is blocking the other, neither user will not show up in the other’s user search results.
- If a blocked user tries to enter a room you have created, they will automatically be forced to exit the room.
Tap “Unblock this user” to unblock a blocked user.
6. My Profile
You can check and edit your profile, and view your session history and rooms.
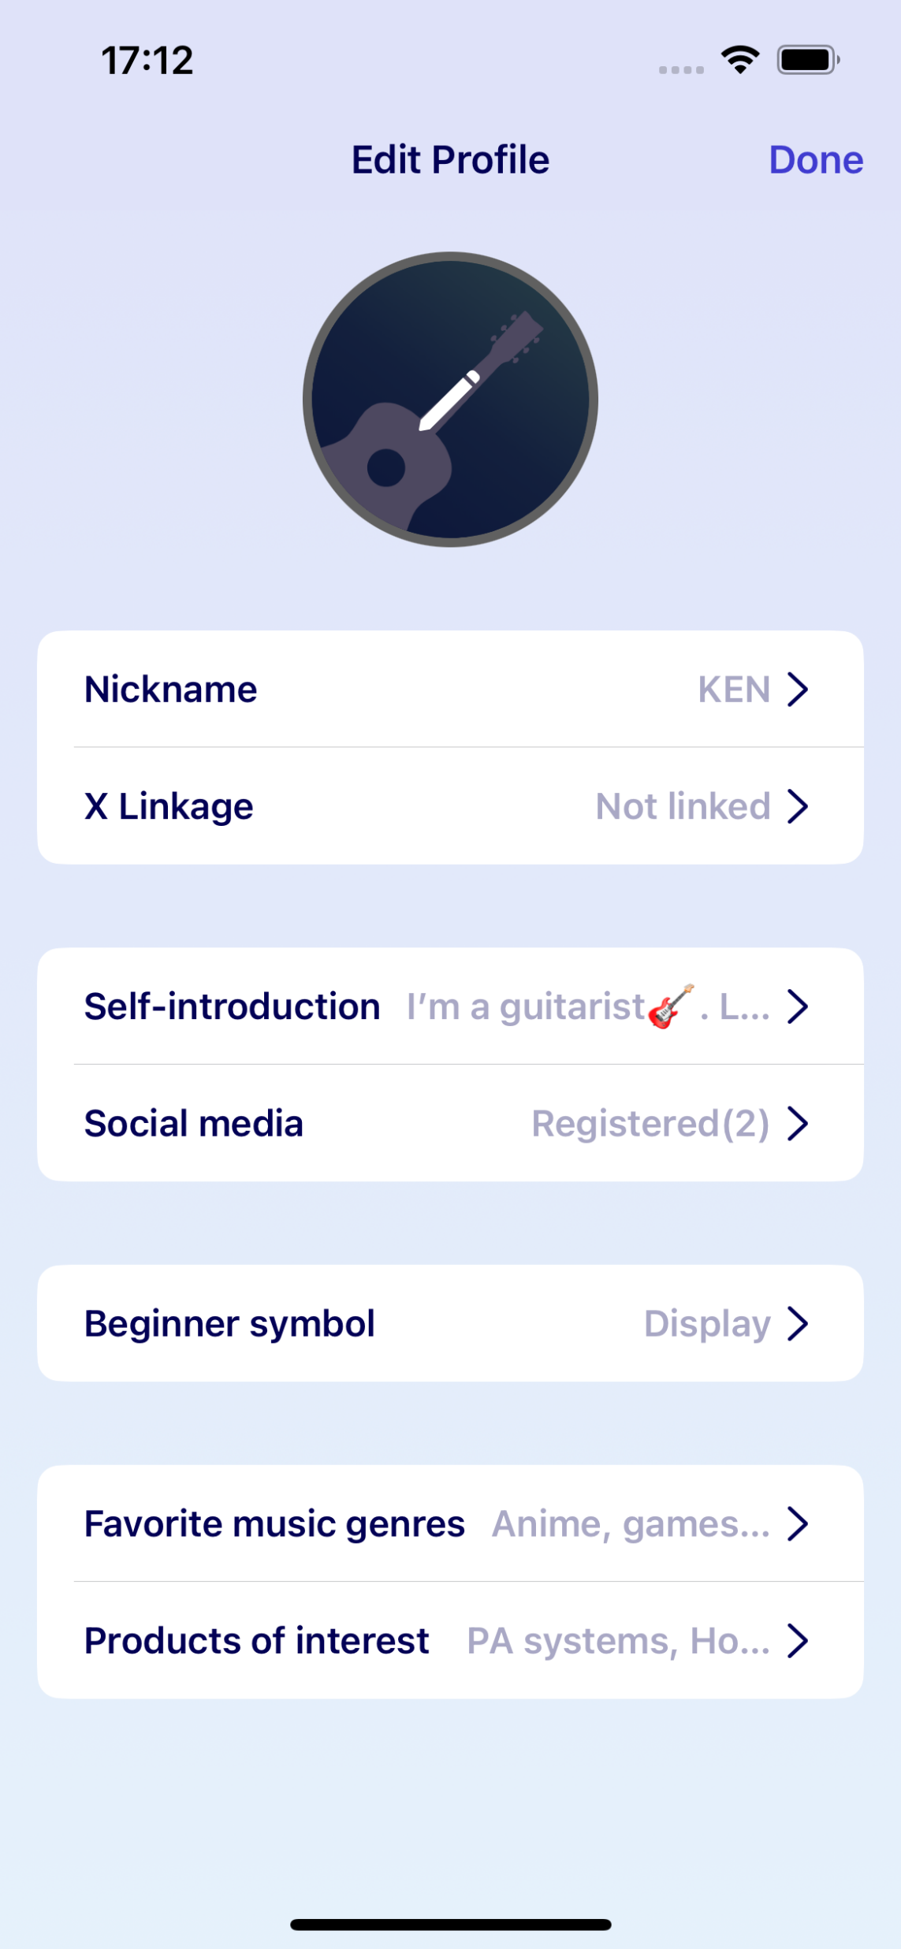
6-1. Setting Up and Editing Your Profile
You can edit the following information on your profile.
- ❶ Select icon
Choose the design (shape) and color of your icon. You cannot select a default icon when linked to your X icon.
- ❷ Nickname
You can choose one nickname per account. If you select “Use my X nickname” when linked to X, you will not be able to edit your nickname.
- ❸ Self-introduction
You can write a brief description of yourself.
- ❹ Link app to X
Link to the X app and use your X icon and nickname in SYNCROOM, or set it to automatically tweet when you create a room. Follow the steps below to link to X.
- Link to X (when first setting up)
(1) Press the “Link app to X” button on the profile edit screen.
(2) Your browser will open and the X authorization window will appear. Log in to your X account if you are not already logged in.
(3) Press “Authorize app”.
(4) If authorization is successful, you will redirected back to the profile edit screen.
Note: By default, your X icon and nickname will be used. - Change linked X items
(1) Press “Link to app X” on the profile edit screen.
(2) The following items will be checked, but you can uncheck them if you want.Note: By default, “Use my X icon as My Profile icon” and “Use my X nickname” will be checked.
- Tweet automatically when creating a room
When a room you created is active, it will automatically be tweeted. - Use my X icon as My Profile icon
The icon you use for X will be used in SYNCROOM. - Use my X nickname
The nickname you use for X will be used in SYNCROOM.
- Tweet automatically when creating a room
- Disconnect from X
(1) Press “Link app to X” on the profile settings (edit) screen.
(2) If you tap “Disconnect from X”, the link will be disconnected and you will be redirected back to the profile settings (edit) screen.
- Link to X (when first setting up)
- ❺ Social Media Links
Register your social media account IDs and URLs.
- ❻ Favorite Music Genres
Select your favorite music genres.
- ❼ Products of Interest
Select products that interest you.
- ❽ Display a Beginner symbol
You can choose whether to add a Beginner symbol beside your nickname. If you are not confident with performing music, you can use this to tell other people that you are a beginner.
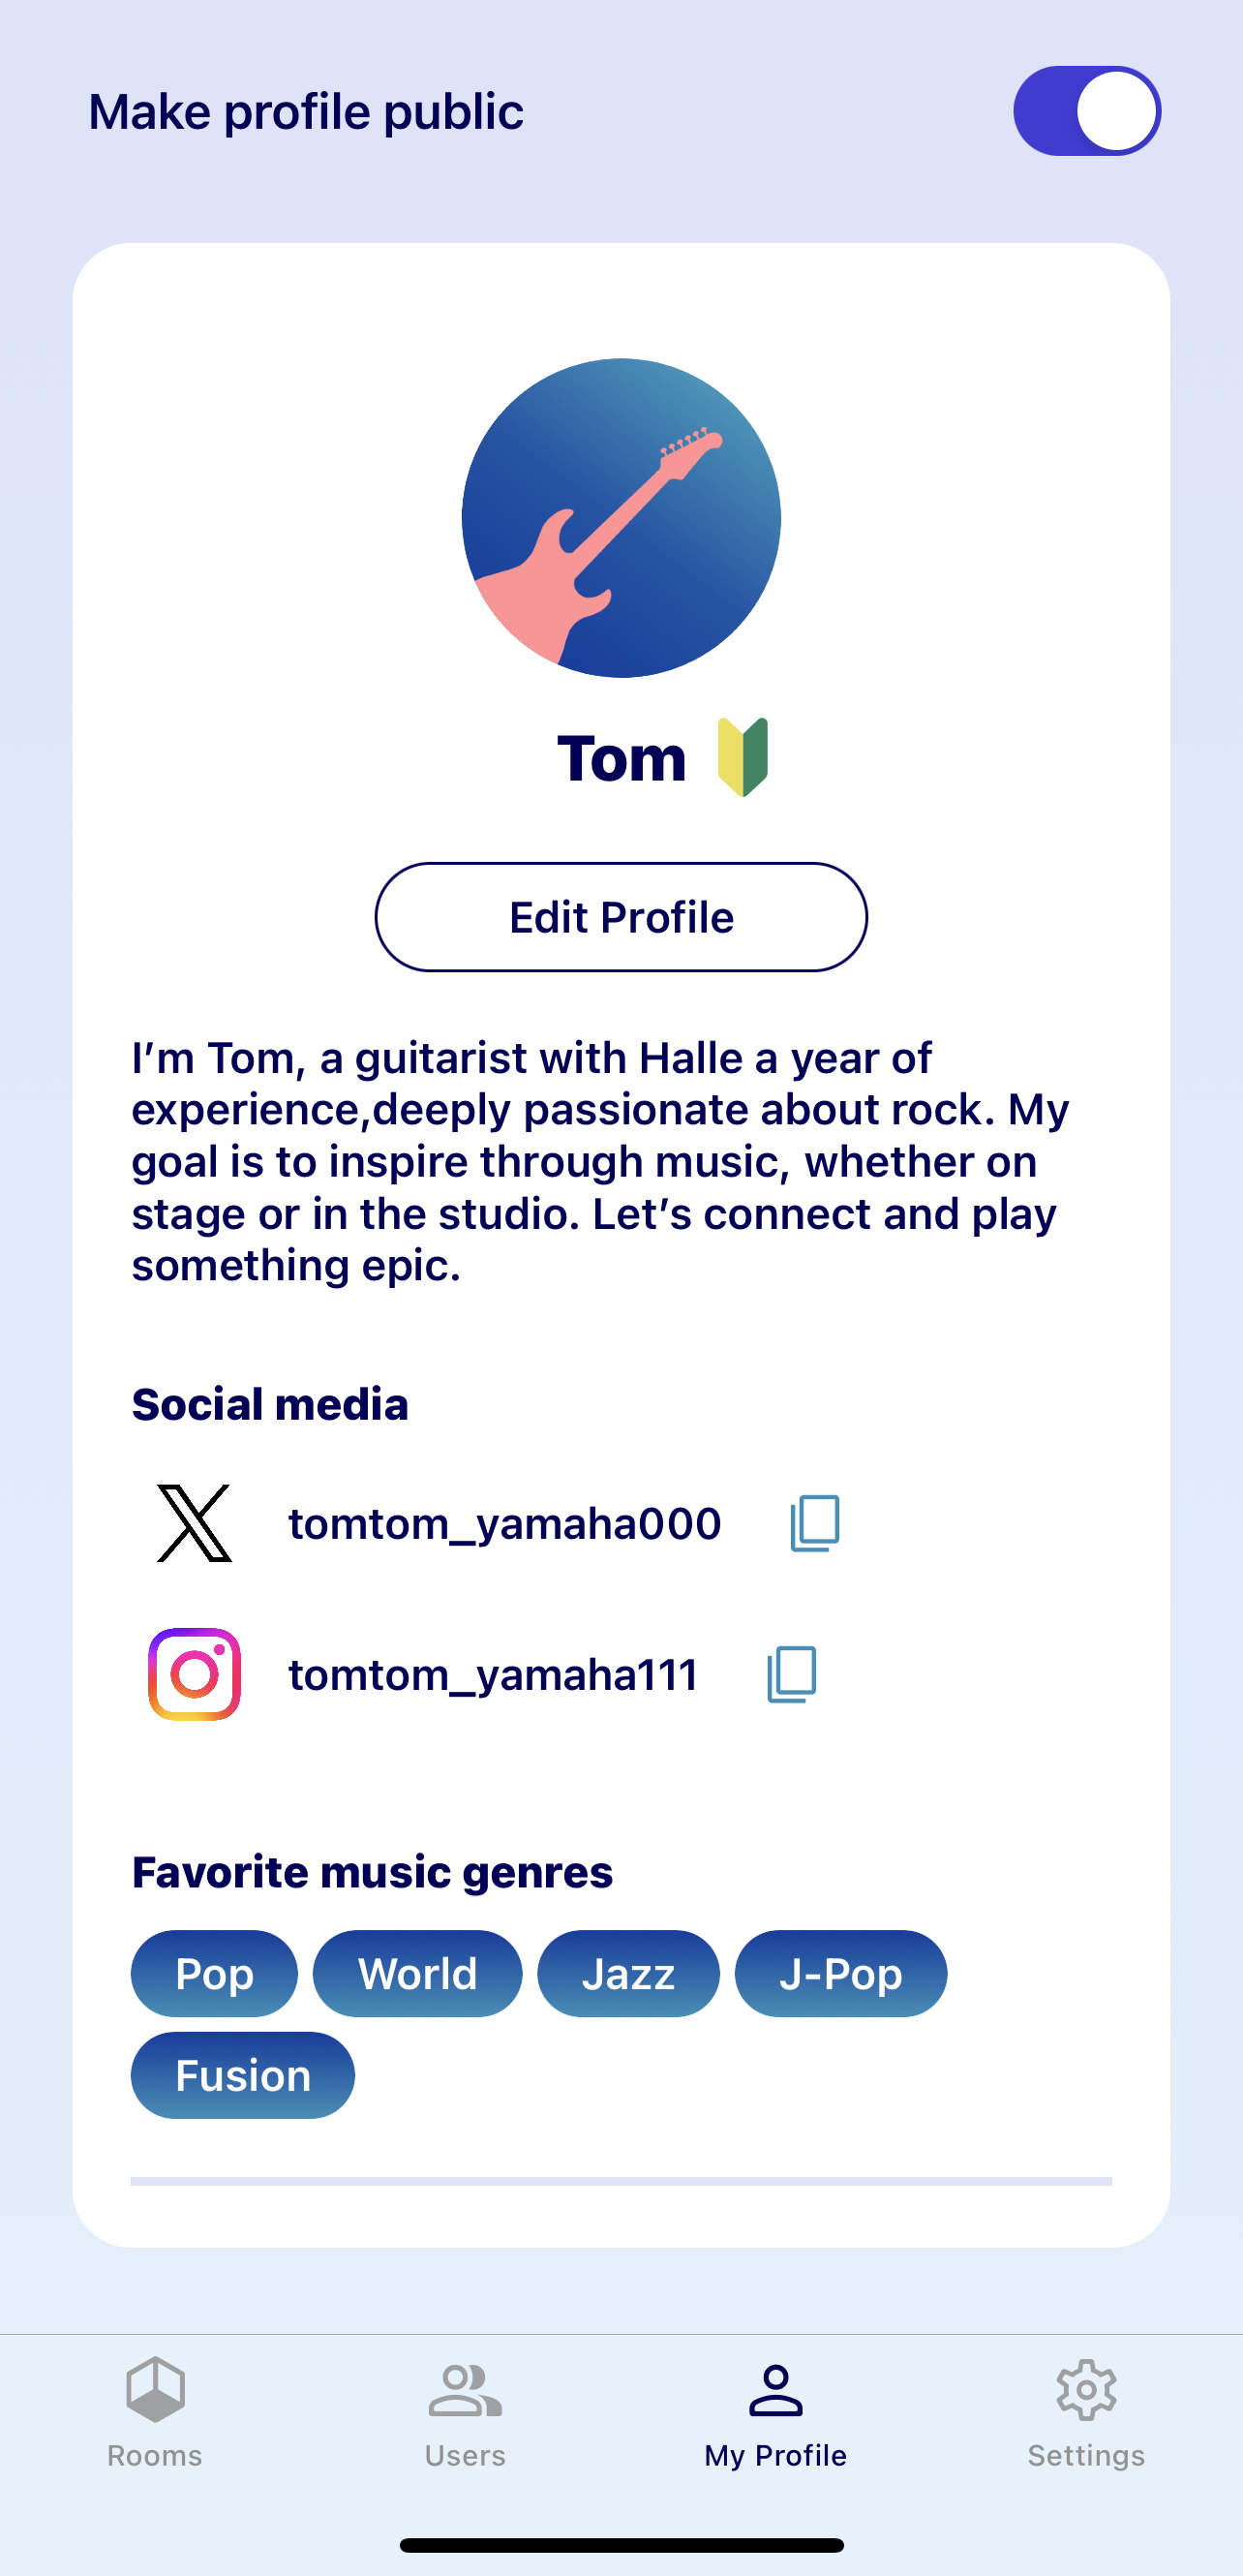
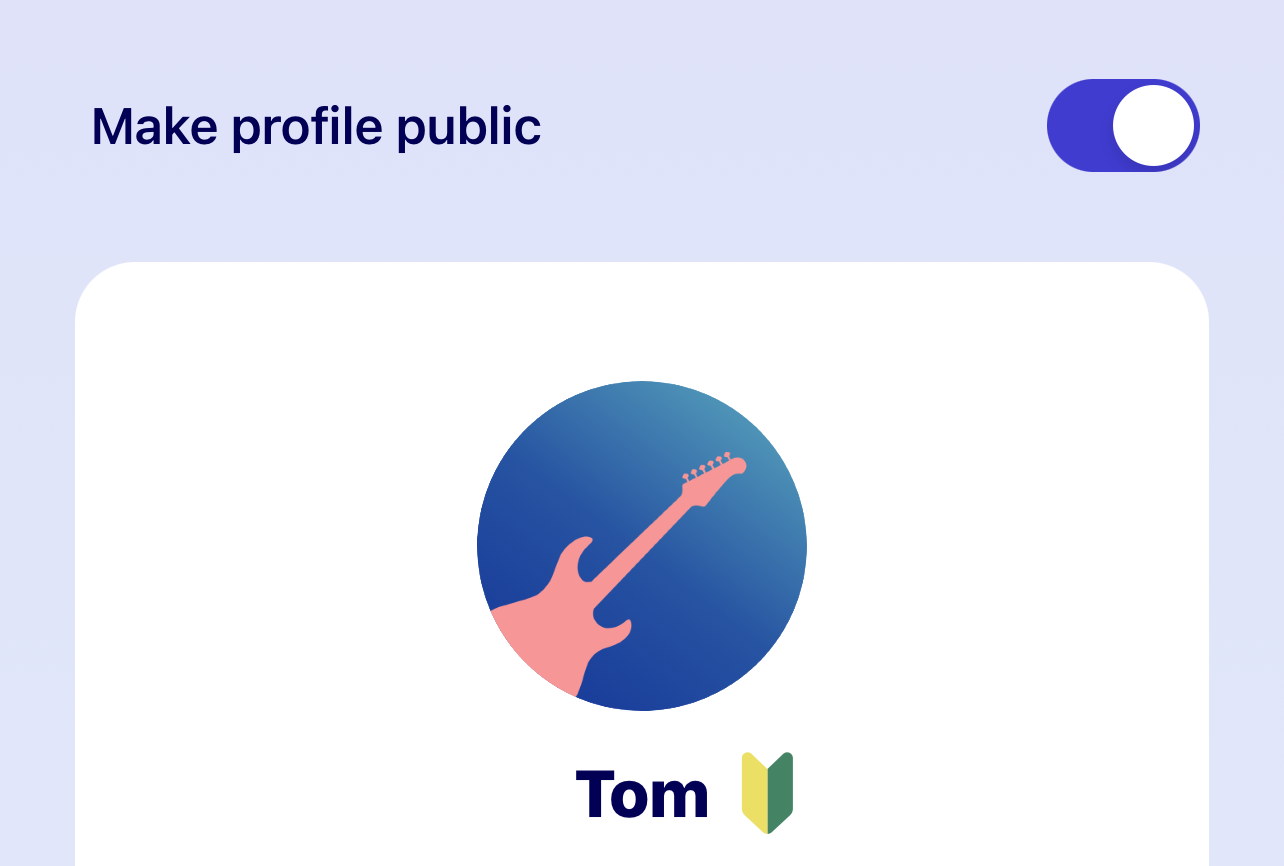
6-2. Profile Privacy Settings
If you switch “Make profile public” on, your My Profile page will be made public to users. If you switch it off, your profile will be private. When set to private, other users will only be able to see your icon, nickname, and Beginner symbol (if you have applied it), and your profile will say “This user’s profile is private”. Also, other users will not be able to search for you when your profile is private.
*Note that information required by the system, such as your user ID, icon, nickname, and the Beginner symbol (when set) will be displayed even if your profile is private.
My Profile Settings
7. Settings Menu
Press the settings icon to open the settings menu.

7-1. Account Settings
Tap Account Settings to change the following settings.
- ❶ Delete profile information
Delete all information including SYNCROOM nickname and icon.
- ❷ Manage and confirm member information
You will be redirected to the Yamaha Music ID member site.
- ❸ Check public profile
This displays your My Profile that other users see. You can check the profile information you have made public. You can also copy the User ID by tapping the icon next to the User ID.
- ❹ Manage blocked users
This displays the users you have blocked. You can unblock users and specify IDs to block users here.
7-2. Data Transmission Settings
Configure privacy settings.
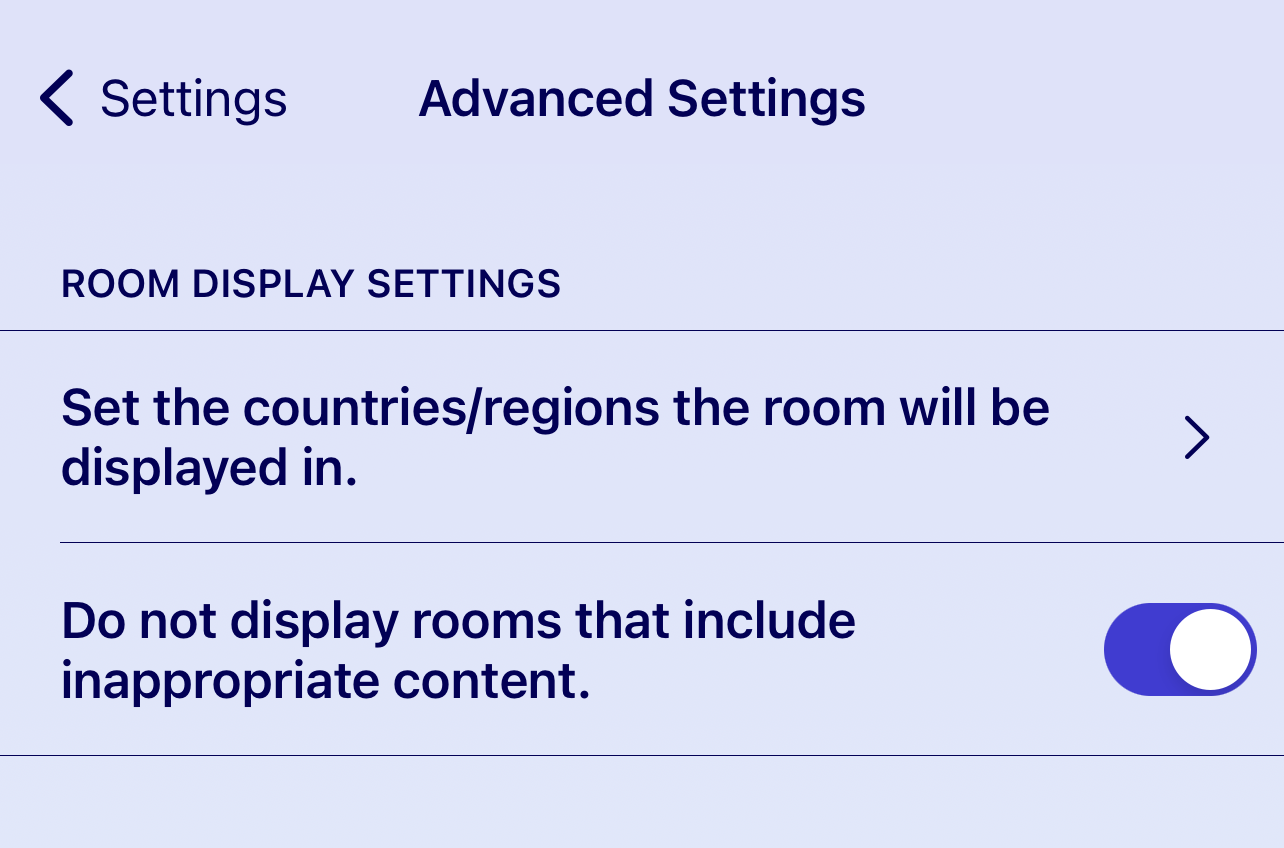
7-3. Advanced Settings
- Set the countries or regions the rooms you create will be displayed in.
- You can also choose whether to display rooms with inappropriate content (iOS only).
7-4. Connectivity Checker
Check your current connection status.
7-5. About SYNCROOM
- ❶ Manual
View the manual.
- ❷ Software License Agreement
View the Software License Agreement.
- ❸ Privacy Policy
Configure privacy settings.
- ❹ License Display
View license information.
- ❺ Inquiries
Send a question or comment about SYNCROOM.
7-6. Log out
Log out and restart the app. After it restarts, you will need to log in again to use the app.
- Watch the Easy Startup Guide video
- 1. Startup
- 1-1. Recommended Environment
- 1-2. Communication Environment
- 2. Rooms Screen (Home Screen)
- 2-1. Creating and Editing Rooms
- 2-1-1. Creating Rooms
- 2-1-2. Editing Rooms
- 2-1-3. Deleting Rooms
- 2-2. Searching for Rooms
- 2-2-1. Toggling Between Room Tabs
- 2-2-2. Room Cards
- 2-2-3. Room Detailed Display
- 2-3. Entering a Room
- 2-3-1. Selecting an Icon
- 2-3-2. Selecting a Part
- 2-3-3. Setting Up Your Device
- 2-4. Adding Favorites and Blocking Users
- 3. Room Screen (Basic Operations)
- 3-1. Adjusting Sound (Mixing)
- 3-2. Mute
- 3-3. Meaning of Other Symbols
- 3-4. User Details
- 3-5. Exiting a Room
- 3-6. Checking Room Details and Sharing Room Links
- 4. Room Screen (menu bar)
- 4-1. Chatting in the room
- 4-2. Using the metronome and playing Audio files
- 4-2-1. Playing Audio Files
- 4-2-2. Using the Metronome
- 4-3. Changing Your Settings
- 4-4. Record Audio
- 5. Users Screen
- 5-1. Searching for Users
- 5-2. User Detailed Display
- 5-3. Adding Users to Favorites
- 5-4. Blocking Users
- 6. My Profile
- 6-1. Setting Up and Editing Your Profile
- 6-2. Profile Privacy Settings
- 7. Settings Menu
- 7-1. Account Settings
- 7-2. Data Transmission Settings
- 7-3. Advanced Settings
- 7-4. Connectivity Checker
- 7-5. About SYNCROOM
- 7-6. Log out